4-26
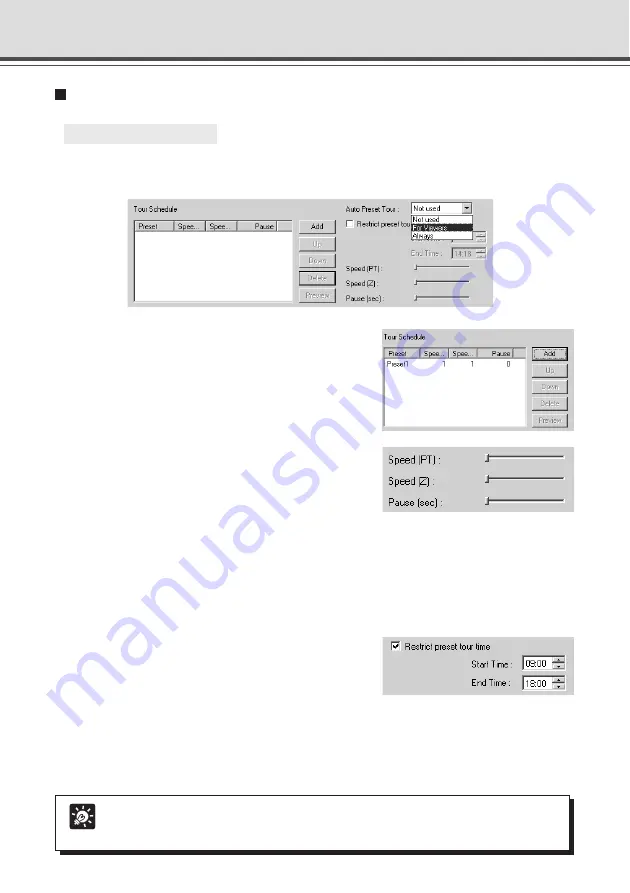
2. Select the preset number you want to add to
the Tour Schedule from the Preset setting
area and click the “Add” button.
The preset is registered in the Tour Schedule list. You
can register a maximum of 20 presets.
Setting Preset Tour
○ ○ ○ ○ ○ ○
Setting up
1. Select an option from Auto Preset Tour.
Select either “For Viewers” or “Always”.
Tip
You cannot add a home position to the Tour Schedule list.
Preset Setting Tool
3. Select a preset in the Tour Schedule list and
with the slide bars in Speed (PT), Speed (Z)
and Pause (sec), set the speed for panning,
tilting and zooming for each preset and the
number of seconds for the pause in preset
position.
Click the “Preview” button to display the set value in
the Preset setting area. Also, the camera angle
switches to the preset and you can check from the
Admin Viewer.
4. To set the duration of the Preset Tour, select
“Restrict preset tour time” and enter a start
time and end time.
You cannot set Start Time and End Time on the same
time.
5. Click the “Apply” button.
Check the status list that the settings have been correctly applied and click the “Save Settings”
button to save the settings to the device.
Summary of Contents for VB-C50I
Page 16: ...xvi ...
Page 28: ...1 12 ...
Page 70: ...3 30 ...
Page 142: ...4 72 ...
Page 172: ...5 30 ...
Page 203: ...Appendix Chapter ...
Page 232: ...7 30 ...


