background image

26 


Preparing the Camera

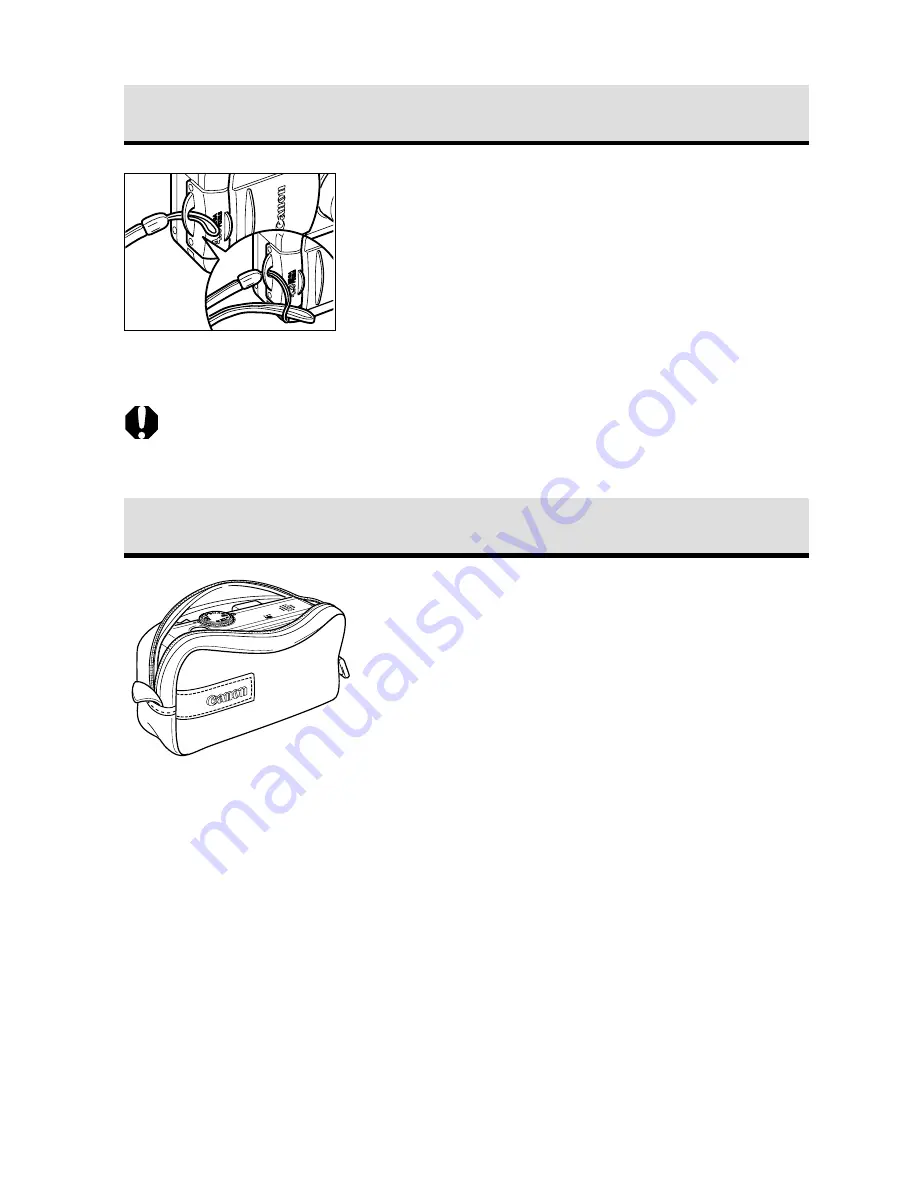
Attaching the Strap

Thread the small loop of the wrist strap
through the strap holder on the camera
and pull the large loop through the
small loop until the strap is firmly
secured.

• Avoid waving the camera about or catching it on other items when suspending it

from the strap.

Using the Soft Case (Optional)

The soft case can be used to carry the
camera, battery pack and CF card.

• Optional soft case appearance and

specifications may vary according to region.

Summary of Contents for PowerShot S30

Page 1: ...ng the Camera to a Computer Software Starter Guide Downloading Images to a Computer Camera User Guide This guide covers both the PowerShot S30 and PowerShot S40 digital cameras Please start by reading the Precaution on the reverse side of this cover Please see the User Guide that accompanies each printer DIGITAL CAMERA Camera User Guide ENGLISH ...

Page 2: ...or at least 4 hours to charge the date time battery It will charge even when the camera power is set to Off If the Set Date Time menu appears when the camera power is turned on it means that the date time battery charge is depleted Recharge it as described above Disclaimer While every effort has been made to ensure that the information contained in this guide is accurate and complete no liability ...

Page 3: ...wer On Off 27 Switching between Shooting and Replaying 29 Switching the LCD Monitor Display Mode 30 Pressing the Shutter Button 34 Using the Optical Viewfinder to Shoot 36 Adjusting the Zoom Focal Length 37 Selecting Menus and Settings 38 Customizing the Camera My Camera Settings 41 Changing My Camera Settings 41 Customizing My Camera Settings 43 Shooting Letting the Camera Select Settings 44 Auto...

Page 4: ...posure Setting FE Lock 81 Switching Between Light Metering Modes 82 Shooting Problem Subjects for the Autofocus 84 Manually Setting Image Characteristics 87 Resetting the File Number 89 Functions Available in Each Shooting Mode 90 Replaying 92 Viewing Images Singly Single Image Replay 92 Magnifying Images 93 Viewing Nine Images at a Time Index Replay 94 Jumping Between Images 95 Viewing Movies 96 ...

Page 5: ...with DPOF Print Settings 119 Printing with the Direct Print Compatible Bubble Jet Printer Optional 121 Connecting Bubble Jet Printer to the Camera 121 Printing 123 Printing with DPOF Print Settings 128 Image Transfer Settings DPOF Transfer Order 130 Selecting Images for Transferring 130 Resetting the Transfer Settings 132 List of Menu Options 133 Rec Menu 133 Play Menu 136 Set up Menu 137 My Camer...

Page 6: ... copying of images from performances exhibitions or commercial properties by means of a camera or other device may contravene copyright or other legal rights even if the image was shot for personal use Warranty Limitations This camera s warranty is only effective in the country of sale If a problem arises while the camera is in use abroad please convey it back to the country of sale before proceed...

Page 7: ...elp Desk Stop operating the equipment immediately if it emits smoke or noxious fumes Failure to do so may result in fire or electrical shock Immediately turn the camera s power off remove the camera battery and unplug the power cord from the electrical outlet Confirm that smoke or fume emissions have ceased Please consult your camera distributor or the closest Canon Customer Support Help Desk Stop...

Page 8: ... an explosion Immediately flush with water any area of the body including the eyes and mouth or clothing that comes into contact with the inner contents of a battery If the eyes or mouth contact these substances immediately flush with water and seek medical assistance Avoid dropping or subjecting the batteries to severe impacts that could damage the casings It could lead to leakage and injury Do n...

Page 9: ...n do not touch the surface of the flash after taking several pictures in rapid succession Either action could result in burns If your camera is used for prolonged periods the camera body may become warm Please take care when operating the camera for an extended period as your hands may experience a burning sensation Preventing Malfunctions Avoid Strong Magnetic Fields Never place the camera in clo...

Page 10: ...7 Open the CF card slot battery cover Hold back the battery lock in the direction of the arrow using the corner of the battery pack then insert the battery pack into the compartment until it is locked 3 Install the CF card p 21 4 Open the lens cover p 27 The camera powers up into Shooting mode If the Set Date Time menu appears on the LCD monitor set the date and time p 24 5 Turn the Shooting Mode ...

Page 11: ... is complete 8 View the recorded image p 46 The recorded image appears in the LCD monitor for approximately 2 seconds Keep your finger on the shutter button or press on the multicontroller while the image is displayed to continue to display the image after the shutter button is released To Immediately Delete the Displayed Image 1 Press the button while the image is displayed 2 Confirm that Erase i...

Page 12: ...rs Bubble Jet Printer with the direct print function optional Bubble Jet Printer digital camera connection cable supplied with the Direct Print compatible Bubble Jet Printer Front View Components Guide Lens Lens Cover p 27 Speaker Flash p 47 Microphone Audio Video Out Terminal p 142 Terminal p 112 121 Optical Viewfinder Window p 36 Zoom Lever p 37 39 Shooting Mode Dial Terminal cover Shutter butto...

Page 13: ...wfinder p 36 Strap Eyelet p 26 DC Coupler Cable Cover p 19 CF Card Slot Battery Cover p 17 21 Tripod Socket The LCD monitor is covered with a thin plastic film for protection against scratches during shipment Remove it before using the camera ...

Page 14: ...ing Orange Ready to record camera shake warning Lower Indicator Yellow Macro mode Manual focus mode Flashing Yellow Focusing difficulty although you can press the shutter button try using focus lock or adjusting the focus manually p 86 Exposure White Balance AEB Flash Exposure Compensation Button p 73 74 77 78 Flash Index Button p 47 94 Macro Jump Button p 57 95 Power Mode Indicator p 27 Power Rep...

Page 15: ...s according to the image composition type Portrait p 49 Landscape p 49 Night Scene p 50 Fast Shutter Speed p 50 Slow Shutter Speed p 51 Color Effects p 52 Stitch Assist p 53 Movie p 56 Creative Zone The user selects exposure aperture or other settings to achieve special effects Program AE p 65 Shutter Speed Priority AE p 66 Aperture Priority AE p 68 Manual Exposure p 70 Image Z o n e C r e ative Z...

Page 16: ...s on the LCD monitor and confirm the selection Moving the cursor on the LCD monitor up and down Use C or D to select a menu item on the LCD monitor Moving the cursor on the LCD monitor left and right Use B or A to select a menu item on the LCD monitor Confirming a menu selection or selecting an AF frame Press or ...

Page 17: ...nge while the battery pack is charging It will change to a steady green when the charge is complete After charging unplug the battery charger and remove the battery pack from it To protect and prolong the life of the battery pack do not charge it for 24 hours or longer at a time This is a lithium ion battery pack so there is no need to completely use or discharge it before recharging It can be rec...

Page 18: ...inue to discharge naturally You are advised to charge the battery on the day of use or one day before to ensure a full charge Since storing a fully charged battery pack for long periods of time about 1 year can shorten its lifecycle or affect performance you are recommended to use the battery pack in the camera until it is completely discharged and to store it at room temperature 30 C 86 F or less...

Page 19: ... corner of the battery pack then insert the battery pack into the compartment until it is locked To remove the battery pack release the battery lock 4 Close the CF card slot battery cover then slide it to the original position until it clicks Charge the battery pack before using it the first time p 15 When the upper indicator on the left side of the viewfinder is flashing green the CF card is bein...

Page 20: ...temperature 23º C 73º F alternating maximum wide angle and maximum telephoto shots at 20 second intervals with flash fired once every four shots and camera power turned off and on every eighth shot CF card used Replaying Room temperature 23º C 73º F continuous playback at one image per 5 seconds CF card used PowerShot S30 PowerShot S40 Number of Images Shot LCD Monitor On Approx 160 images Approx ...

Page 21: ...er adapter and plug it into an electrical outlet 2 Connect the DC plug of the compact power adapter cable to the DC Coupler DR 700 terminal 3 Open the CF card slot battery cover then insert the DC Coupler until it is locked 4 Press and hold the DC Coupler cable cover using the cable then close the CF card slot battery cover Always disconnect the power cord from the power supply after use Compact P...

Page 22: ...Household Power Source continued Always turn the camera s power off before connecting or disconnecting the compact power adapter Use of any adapter other than AC Adapter Kit ACK700 may cause malfunction of the camera or AC adapter kit ...

Page 23: ...tton and pull the card out When the indicator on the left side of the viewfinder flashes green the camera is writing reading erasing or transmitting an image to or from the card Do not perform the following for image data may be lost or corrupted Do not shake the camera Do not turn off the power or open the CF card slot battery cover Do not remove the CF card Never open the CF card slot battery co...

Page 24: ...ression ratio FC 64M 38 68 136 30 54 110 61 109 217 107 189 349 241 394 677 24 20 250 sec 916 sec L Large M 1 Medium M 2 Medium S Small FC 8M 4 8 16 3 6 13 7 13 26 12 23 42 29 47 83 2 1 30 sec 112 sec FC 16M 8 16 32 7 13 26 14 26 52 25 46 84 58 94 165 5 4 61 sec 223 sec FC 32M 18 33 68 14 27 54 30 54 108 53 94 174 120 196 337 11 10 124 sec 457 sec FC 128M 76 137 274 61 110 220 123 219 435 215 379 ...

Page 25: ...emperature If condensation forms on the CF card put it aside until the water droplets have evaporated completely Place the CF card in the supplied case for storage Do not use or store CF cards in the following types of locations Locations subject to dust or sand Locations subject to high humidity and high temperatures Microdrives are a recording medium with a hard disk Their merits are a large cap...

Page 26: ...ontroller Pressing the button also switches between menus 4 Select Date Time using C or D on the multicontroller then press The factory default for the date format may differ from that shown here in some regions 5 Set the date and time Select the item using B or A on the multicontroller Set the values using C or D on the multicontroller The date can be set up to the year 2030 6 Press After adjusti...

Page 27: ...n menus 4 Select Language using C or D on the multicontroller and press 5 Select a language using B or A on the multicontroller 6 Press After adjusting the settings press the button to close the menu window In replay mode you can change the language by holding while you press the button except when Card Photo Printer CP 10 optional or Bubble Jet Printer with the direct print function optional is c...

Page 28: ...large loop through the small loop until the strap is firmly secured Avoid waving the camera about or catching it on other items when suspending it from the strap Using the Soft Case Optional The soft case can be used to carry the camera battery pack and CF card Optional soft case appearance and specifications may vary according to region ...

Page 29: ... Direct Print Function Optional p 121 For computer connection mode see Software Starter Guide supplied with the camera Turning On Off the Camera in Shooting Mode 1 Open the lens cover The camera powers up in Shooting mode The power mode indicator shines orange Close the lens cover The power goes off Turning On Off the Camera in Replaying Mode 1 Slide the power replay lever to the right and hold it...

Page 30: ...ely five minutes after the last time a camera control is accessed Printer Connection Mode Powers down approximately five minutes after the last time a camera control is accessed on the camera or something is printed on the printer PC Connection Mode Displays a warning message on the computer screen approximately 5 minutes after a control is last accessed The camera will power down if no controls a...

Page 31: ...o Replaying mode In this case the lens does not retract To return to Shooting mode slide the power replay lever to the right again or press the shutter button halfway 2 Replaying Mode With the Lens Cover Closed 1 Open the lens cover p 27 The camera is switched to Shooting mode Relationship of the Three States Power Off Shooting Mode Replaying Mode of the Camera Replaying Mode Power Off Replaying M...

Page 32: ...r may not automatically turn on the next time the camera is started Changing the shooting mode will cause the LCD monitor to display relevant information for about six seconds when it is turned on regardless of whether the information view mode is on or off Setting the mode dial to or turns on the LCD monitor regardless of whether it is set to on or off The camera shake warning icon will appear at...

Page 33: ...m powers reflect the combined optical and digital zoom effects These figures appear when the digital zoom is activated Shutter Speed Aperture Setting MF Manual Focus Indicator Shooting Mode Flash Drive Mode Light Metering Method White Balance WB Exposure Compensation AEB Mode Flash Exposure Compensation Compression Settings Resolution Settings File Format AE Lock FE Lock Movie Recording Mode Macro...

Page 34: ...and overexposure warning appear Shooting Mode Resolution Settings Exposure level Flash Exposure Compensation White Balance Light Metering Method Macro Mode Manual Focus p 13 p 61 p 73 p 78 p 74 p 82 p 57 p 85 86 File Number Image Number and Total Display Image Total Shooting Date Time Aperture Setting Shutter Speed ISO Speed Setting L M1 M2 S Compression Settings Resolution Settings File Format So...

Page 35: ...information may also appear with some image files Please note that image information recorded by this camera may not display correctly on other cameras and image information recorded by other cameras may not display correctly on this camera Notice Concerning Shooting When using this camera to shoot scenes containing extremely bright subjects a vertical red bar of light may appear on the LCD monito...

Page 36: ...re Yellow Macro mode Manual focus mode Flashing Yellow Focusing difficulty single beep sounds Use the focus lock or focus manually to shoot when the indicator flashes yellow p 86 The AF frame appears as follows when the LCD monitor is on Green Metering complete Yellow Focusing difficulty Pressing Fully Pressing fully releases the shutter The upper indicator flashes green while the image is recordi...

Page 37: ... before being recorded onto the CF card allowing the next images to be taken immediately as long as sufficient space is available in the internal memory The beep and shutter sound can be set On Off in the Set up menu p 116 When the shutter sound is set to Off but the beep is set to On one beep will sound when the shutter button is fully pressed There is no shutter sound in movie mode ...

Page 38: ...actual image may differ from the image seen in the optical viewfinder due to the physical separation between the viewfinder and lens This is called the parallax phenomenon and is more noticeable the closer the subject is to the lens In some cases portions of images shot up close that appear in the viewfinder will not appear in the recorded image You are recommended to use the LCD monitor to shoot ...

Page 39: ...o Slide the zoom lever toward to zoom out wide angle Digital Zoom An image already zoomed with the optical zoom lens can be further zoomed digitally up to an approximate factor of 10 for PowerShot S30 and 11 for PowerShot S40 for shooting p 60 The digital zoom cannot be used with the LCD monitor turned off or in or mode The more the image is zoomed digitally the coarser its image quality becomes e...

Page 40: ...p My Camera Pressing the button also switches between the menu tabs 3 Select a menu item using C or D on the multicontroller 4 Select setting contents using B or A on the multicontroller Press for items followed by an ellipsis then select a setting Press again to confirm the setting 5 Press the button Pressing the button closes the menu and makes the settings take effect In Shooting mode the menu ...

Page 41: ...L 2272 x 1704 M1 1600 x 1200 M2 1024 x 768 S 640 x 480 320 x 240 160 x 120 Superfine Fine Normal JPEG RAW 50 100 200 400 800 AUTO ISO 800 available on PowerShot S30 only On Off Center AF Point Off 2 sec 10 sec On Off 0 0 0 Turns image protection on and off Rotates the image in the display Erases all images on the CF card Replays selected images in a slide show Sets the print settings Sets the tran...

Page 42: ...deo System can be restored all at once p 141 Menu Item Beep LCD Brightness Speaker Vol Auto Power Down Date Time Format Language Video System Start up Image Start up Sound Shutter Sound Operation Sound Selftimer Sound Available Settings On Off Normal Bright Off 1 2 3 4 5 On Off Sets the date and time Formats the CF card English Deutsch Français Nederlands Dansk Suomi Italiano Norsk Svenska Español...

Page 43: ...t up image Default camera theme Science fiction theme Animal bird or dog theme Changing My Camera Settings 1 Turn on the camera p 27 2 Press the button The Rec or Play menu appears 3 Select the My Camera menu using A on the multicontroller Pressing the button also switches between the menu tabs 4 Select a menu item using C or D on the multicontroller Customizing the Camera My Camera Settings ...

Page 44: ...he button Pressing the button closes the menu and makes the settings take effect In Shooting mode the menu can be closed by pressing the shutter button halfway If Beep in the Set up menu is set to On the beep sounds even if each sound item such as Start up Sound Shutter Sound Operation Sound and Selftimer Sound in the My Camera menu is set to Off p 140 ...

Page 45: ...Sampling frequency 11 025 kHz and 8 000 kHz Recording time 11 025 kHz 8 000 kHz Start up Sound 1 0 sec or less 1 3 sec or less Shutter Sound 0 3 sec or less 0 4 sec or less Operation Sound 0 3 sec or less 0 4 sec or less Selftimer Sound 2 0 sec or less 2 0 sec or less Any file format other than those described above cannot be used with this camera An example of this function is to record Say chees...

Page 46: ...e camera has finished metering and the indicator beside the viewfinder will shine green or orange If the LCD monitor is on the AF frame will appear green The shutter speed and aperture settings are automatically determined and show on the LCD monitor if it is on The yellow indicator will flash and the beep will sound one time if the subject is difficult to focus on The AF frame will also appear ye...

Page 47: ...ou can change the length of time images show on the LCD monitor after shooting or set it so they do not show at all p 46 Resolution Compression Flash Settings Macro Digital Zoom Drive Mode Review File No Reset Off On On Off On Off Off 2sec 10sec Large Medium 1 Medium 2 Small Superfine Fine Normal Red Eye Reduction Auto Auto Off ...

Page 48: ...perform the following while images are displayed Erasing Images Singly p 9 104 Displaying Images in detailed display mode p 30 Magnifying Images p 93 Attaching Sound Annotations p 98 Changing the Image Display Duration The length of time images are displayed after a photo has been taken can be changed from 2 seconds to 10 seconds or turned off 1 In the Rec menu select Review See Selecting Menus an...

Page 49: ...ngs The flash cannot be used with some shooting modes Red eye reduction Auto Auto Red eye reduction Flash on Flash on Flash off Red eye reduction Auto Auto Red eye reduction Flash on Flash on Flash off The flash fires automatically as required by the lighting level and the red eye reduction lamp fires each time the main flash fires The flash fires automatically as required by the lighting level Th...

Page 50: ...cept in mode The flash setting is saved when the camera is turned off in the and shooting modes The flash will fire twice A pre flash will fire and will be followed by the main flash The pre flash is used by the camera to obtain the subject s exposure data so that the main flash can be set to the optimal intensity for the shot About the Red Eye Reduction Function Light reflecting back from eyes ca...

Page 51: ...ompose the image so that the upper half of the subject s body fills most of the viewfinder or LCD monitor The background gets increasingly indistinct the more you adjust the focal length toward telephoto Landscape Mode Use this mode to shoot expansive landscape scenes 1 Turn the shooting mode dial to Shooting procedures are the same as for the Auto Mode p 44 The macro AEB AE lock FE Lock light met...

Page 52: ...AF frame to either the auto AiAF selection or manual center p 71 Always use a tripod to prevent camera shake in this mode Warn people to stay still for a few seconds after the flash fires because of the slow shutter speed Using the mode in daylight will produce an effect similar to that of the mode Fast Shutter Use this mode to shoot fast moving objects such as sports figures 1 Turn the shooting m...

Page 53: ...ode dial to Shooting procedures are the same as for the Auto mode p 44 The AEB AE lock FE lock light metering file format RAW and image adjustment ISO speed contrast sharpness and saturation settings cannot be adjusted in this mode You can set the AF frame to either the auto AiAF selection or manual center p 71 Always use a tripod to prevent camera shake in this mode ...

Page 54: ...enu will appear and allow you to change the setting again The AEB AE lock FE lock light metering file format RAW and image adjustment ISO speed contrast sharpness and saturation settings cannot be adjusted in this mode The white balance cannot be set when sepia or B W mode is selected You cannot change the macro mode setting while the Color Effect Setup menu is displayed The AF frame is set to the...

Page 55: ...into a large panoramic image using a computer Please use the bundled PhotoStitch program to merge the images on a computer Framing a Subject PhotoStitch detects the overlapping portions of adjoining images and merges them When composing shots try to include a distinctive item landmark etc in the overlapping portions Horizontal Vertical 2 x 2 ...

Page 56: ...se starting at the top left Horizontal swivel left to right or vice versa Vertical swivel up and down or vice versa To Shoot a Close Subject Slide the camera move the camera parallel to the subject to take successive shots Stitch Assist Mode continued Compose each frame so that it overlaps 30 to 50 of the adjoining image Try to keep the vertical misalignment to within 10 of the image height Do not...

Page 57: ... after the last shot The digital zoom flash red eye reduction auto auto red eye reduction continuous mode AEB AE lock FE Lock AF frame light metering file format RAW and image adjustment ISO speed contrast sharpness and saturation settings cannot be adjusted in this mode A TV cannot be used as the monitor for shooting in this mode The zoom flash on off resolution macro mode exposure white balance ...

Page 58: ...omatically after this time elapses or when the CF card becomes full The data reflects standard Canon testing conditions The actual figures will vary according to the shooting objects and conditions Be careful not to touch the microphone while shooting The AE AF white balance and zoom settings are set and locked to the settings of the first frame If the indicator on the left side of the viewfinder ...

Page 59: ...s pressed halfway Shooting procedures are the same as for the Auto Mode p 44 The macro mode cannot be selected in the and shooting modes Always use the LCD monitor to compose images in macro mode Shooting with the viewfinder is possible though the parallax phenomenon p 36 may cause images composed with the optical viewfinder to be off center When the lens is zoomed out to the maximum wide angle th...

Page 60: ...onds after you press the shutter button 3 Shoot the image When is selected the self timer lamp starts flashing when the shutter button is pressed all the way The self timer sounds and the flashing gets faster two seconds before the shutter activates When is selected the self timer lamp flashes fast from the beginning The shutter activates in two seconds Shooting procedures are the same as for the ...

Page 61: ...figures reflect standard Canon testing conditions The actual figures will vary according to the shooting conditions and settings This mode cannot be selected in or shooting mode In mode images do not appear on the LCD monitor as they are shot The flash can be used but the interval between images will lengthen to accommodate the flash recharge time Successive frames can be taken until the CF card i...

Page 62: ...e the zoom lever toward and hold it The lens will zoom to the maximum optical telephoto setting and stop Release the lever and slide it toward again to further zoom the image digitally Slide the lever toward to zoom back out 6 Shoot the image Shooting procedures are the same as for the Auto mode p 44 This mode cannot be selected in the and shooting modes or for the RAW file format Images become co...

Page 63: ...olution if you wish to print on small objects such as labels to send images electronically or to fit more images on a CF card The compression gets higher in the order Superfine Fine and Normal Select Superfine for a higher quality image or Normal if you wish to fit more images on a CF card The Fine setting provides adequate quality for standard shots To record the CCD output without compression se...

Page 64: ...68 S 640 x 480 RAW 2272 x 1704 320 x 240 160 x 120 Unit KB Unit KB sec Unit KB Unit KB sec 1602 1002 570 249 240 60 240 60 893 558 320 150 2469 445 278 170 84 1116 558 320 150 2862 556 278 170 84 2002 1002 570 249 Changing the Resolution and Compression continued 1 Turn the shooting mode dial to the desired shooting mode 2 In the Rec menu select Resolution or Compression See Selecting Menus and Se...

Page 65: ...as follows only the resolution in mode The resolution and compression settings are memorized even when the camera power is turned off Initial Shooting Mode Next Shooting Mode Resolution and Compression after Change Settings change to those of the next mode Settings do not change Settings change to those of the next mode Settings do not change Settings change to those of the next mode ...

Page 66: ...pressed file formats such as RGB TIFF images are processed in the camera and require further processing by retouching software to adjust the image parameters which reduces image quality With the RAW format however the original data can be used in special software to adjust the image parameters white balance contrast sharpness and saturation making it possible to maintain the image quality while ma...

Page 67: ...in red on the LCD monitor Use the following methods to make them show in white Use the flash Change the ISO speed setting Change the light metering method Differences and Similarities between the and Modes Both modes automatically select the shutter speed and aperture settings The following settings can be adjusted in mode but not in mode Exposure Compensation White Balance AEB Mode Flash Exposure...

Page 68: ...ges Nevertheless a certain amount of processing time may be required before the next image can be shot Setting the Shutter Speed When you set the shutter speed in the shutter speed priority AE mode the camera automatically selects an aperture setting to match the brightness Faster shutter speeds allow you to catch an instantaneous image of a moving subject while slower speeds create a flowing effe...

Page 69: ... Speed seconds Wide Angle F 2 8 3 5 to 1 1000 F 4 0 8 0 to 1 1500 Telephoto F 4 9 6 3 to 1 1000 F 7 1 8 0 to 1 1500 Shutter Speed Display The numbers in the table below indicate the shutter speed in seconds For slower speeds quote marks indicate the decimal place so that 0 3 indicates 0 3 second and 2 indicates 2 seconds 1 1500 1 1250 1 1000 1 800 1 640 1 500 1 400 1 320 1 250 1 200 1 160 1 125 1 ...

Page 70: ...und and create a beautiful portrait A higher aperture value closing it brings the entire range from foreground to background into focus The larger the aperture value the greater the range of the image brought into clear focus 1 Turn the shooting mode dial to The aperture setting appears on the LCD monitor if it is on 2 Select a value using B or A on the multicontroller 3 Shoot the image The correc...

Page 71: ...e note that camera shake becomes a factor at low shutter speeds If the camera shake warning appears in the center of the LCD monitor secure the camera to a tripod before shooting When using a flash in this mode the slowest shutter speed is 1 60 second Aperture Setting Display The larger the aperture value the smaller the lens aperture F2 8 F3 2 F3 5 F4 0 F4 5 F5 0 F5 6 F6 3 F7 1 F8 0 For the corre...

Page 72: ...ference between the standard exposure and the selected exposure appears on the LCD monitor If the difference is more than 2 steps 2 or 2 appears in red The standard exposure is calculated by the AE function according to the selected metering method The exposure compensation AE lock FE lock flash exposure compensation AEB and ISO speed AUTO settings cannot be adjusted in this mode If you wish to ch...

Page 73: ...pressing the shutter button instead of pressing 4 Shoot the image Shooting Modes and Selectable AF Frames The camera automatically selects the AF frame to focus according to the shooting conditions Manually select one of the three AF frames This is convenient for focusing accurately on an off center subject to obtain the composition you desire Auto Selection AiAF Manual Selection indicates the sel...

Page 74: ...ot AE Point p 82 For an explanation of the AF frame colors please refer to page 34 If the shooting mode is changed the AF frame may also change depending on the shooting mode See the table below AiAF has a wide range of measuring for accurate focusing AiAF focuses on the object even if it is not exactly at the center area Ai stands for Artificial intelligence and AF stands for Auto Focus Initial S...

Page 75: ...set exposure compensation value by pressing the shutter button without pressing To cancel the exposure compensation return the setting to using B or A on the multicontroller 4 Shoot the image If you pressed the shutter button at Step 3 the exposure compensation bar will reappear after the shot allowing you to change the setting for the next shot This setting cannot be adjusted in the and shooting ...

Page 76: ...usted in the and Sepia and B W shooting modes In mode it can only be adjusted for the first image The metering mode p 82 cannot be changed and the macro mode cannot be set while the white balance setting menu appears on the LCD monitor The selected shooting mode will determine whether or not the white balance setting is cancelled when the camera is turned off p 90 Auto Daylight Cloudy Tungsten Flu...

Page 77: ...m the camera at the white paper or cloth or gray card and press the button Aim the camera so that the white paper or cloth or gray card completely fills the frame on the LCD monitor screen or the entire viewfinder before pressing the button When you press the button the camera reads the white balance data 4 Press You can also take the picture with the white balance set to the selected value by pre...

Page 78: ... and to zoom in to the maximum telephoto setting Since the white balance data cannot be read in mode preset the white balance in another shooting mode first before selecting mode If the flash fires when setting a custom white balance with the flash set to red eye reduction auto or auto make sure you also use the flash when you go to shoot The correct white balance cannot be obtained unless the fla...

Page 79: ...sing B or A on the multicontroller Use A to expand the range and B to contract it 3 Press You can also take the picture with the set exposure compensation value by pressing the shutter button without pressing To cancel the AEB setting return the setting to using B or A on the multicontroller 4 Shoot the image If you pressed the shutter button at Step 3 the icon and the exposure compensation bar wi...

Page 80: ...sation value by pressing the shutter button without pressing To cancel the setting return the setting to using B or A on the multicontroller 4 Shoot the image If you pressed the shutter button at Step 3 the icon and the flash exposure compensation bar will reappear after the shot allowing you to change the setting for the next shot This setting cannot be adjusted in the and shooting modes In mode ...

Page 81: ...AF frame affect where the AE lock is metered see page 80 1 Press the button to turn on the LCD monitor 2 Focus on the subject on which you wish to lock the exposure setting Press the shutter button halfway 3 While pressing the shutter button halfway press the button The exposure setting locks AE Lock and the icon appears on the LCD monitor Using any button lever or switch other than pressing the s...

Page 82: ... will appear in the display panel and LCD monitor 5 Press B or A on the multicontroller until the desired shutter speed or aperture value is reached 6 Recompose the image and shoot The setting will cancel after the shot is taken Exposure Metering Position for the AE FE Lock According to Different Light Metering Options when an AF Frame is Selected Creative Shooting Modes Light Metering Option Eval...

Page 83: ...shutter button halfway press the button The flash exposure compensation setting locks FE lock and the icon appears on the LCD monitor The flash will fire a pre flash and lock the flash exposure to the required intensity to illuminate the subject Each time you press the button the flash exposure locks at the required intensity for that composition Using any button lever or switch other than pressin...

Page 84: ...ngs p 38 Evaluative Light Metering Center Weighted Averaging Spot AE Point Center AF Point Appropriate for standard shooting conditions including backlit scenes The camera divides images into several zones for light metering The camera evaluates the complex lighting conditions such as the position of the subject the brightness the background the direct light and the backlighting and adjusts the se...

Page 85: ...t AE Point is set to AF Point it appears inside the selected AF frame 5 Shoot the image Spot AE Point Frame The light metering mode cannot be changed while the white balance setting menu appears on the LCD monitor This function can only be selected in the and shooting modes The setting is cancelled when the camera power is turned off However the Spot AE Point option selected in the menu remains se...

Page 86: ...ith the desired subject or use the manual focus When shooting through glass get as close as possible to avoid reflections off the glass Shooting with Focus Lock Focus Lock Method 1 1 Press the button to turn on the LCD monitor 2 Aim the AF frame at an object at a similar distance to the subject you wish to shoot 3 Press the shutter button halfway to lock the focus The AE setting will also lock whe...

Page 87: ...ppears on the LCD monitor The focus setting will lock even if the shutter button and the button are released The manual focus setting will cancel if the button is pressed again 3 Recompose the image and press the shutter button all the way to shoot the image Focus lock cannot be used while the shooting mode is set to Method 2 is convenient because you can let go of the shutter button to recompose ...

Page 88: ... until the image appears focused on the LCD monitor Pressing the button a second time cancels the manual focus mode 3 Shoot the image The indicator beside the viewfinder shines yellow when the shutter button is pressed halfway This setting cannot be adjusted in shooting mode You cannot change the AF frame setting while focusing manually Cancel the manual focus mode then change the AF frame setting...

Page 89: ...ou can select from 50 default setting 100 200 400 800 only for PowerShot S30 and AUTO When AUTO is selected the camera automatically adjusts ISO between 50 and 150 only Higher ISO speeds increase the image noise To take clean images use as low an ISO speed as possible Contrast Select from Weak 0 Neutral and Strong This function allows you to adjust the degree of brightness Sharpness Select from We...

Page 90: ...ly Setting Image Characteristics continued 3 Shoot the image These functions can only be selected in the and shooting modes In the mode however the ISO speed cannot be set to Auto These settings are memorized even when the camera power is turned off ...

Page 91: ...ing up to 100 images Folders are assigned numbers from 100 to 998 Since images shot in continuous mode or Stitch Assist mode are always saved in the same folder some folders may contain 101 or more images The file numbers are reset to the start 100 0001 each time a new CF card is inserted New images recorded on CF cards with existing files are assigned the next available number The file number of ...

Page 92: ...yeReduction FlashOn On Off Macro Mode Single Shot NormalContinuousMode Drive Mode HighSpeedContinuousMode Self Timer 10 sec Self Timer 2 sec AF Frame Auto Manual Exposure Compensation White Balance AEB Mode Flash Exposure Compensation AE Lock FE Lock Evaluative Metering Center WeightedAveraging Spot Metering Center AF Point Manual Focus Large Medium 1 Resolution Medium 2 Small Movie Movie Superfin...

Page 93: ...en the camera is turned off The default for all of the settings changed by the menu and button operations can be restored all at once except for Date Time Language and Video System p 141 1 In Macro mode the AF frame is set to the center 2 The AF frame can only be set to the center In Macro mode the AF frame is also set to the center 3 The AF frame can only be set to the center 4 The sepia and B W ...

Page 94: ... to move to the next Holding B or A moves more rapidly between images but the images will not appear as clearly Press the button to show the data for the displayed image p 30 Press the button to quickly delete the displayed image p 104 You can change the display language on the LCD monitor if you press and hold then press the button p 25 This function cannot be used while a Direct Print compatible...

Page 95: ...e zoom lever toward The most magnified image is reduced to 2 5 times the original size for PowerShot S30 and 3 times the original size for PowerShot S40 by sliding the zoom lever toward Sliding the zoom lever toward again reduces the image to its original size Magnified approximately 3 times PowerShot S40 Approximate position Movie frames and index replayed images cannot be magnified If the camera...

Page 96: ... once Index Replay 3 Change the image selection using B A C or D on the multicontroller 4 Press the button Index replay cancels and the display reverts to single image replay Press the button to show the data for the displayed image p 30 Movie Frame Selected Image The C operation in this row displays the previous set of nine images The D operation in this row displays the next set of nine images ...

Page 97: ...in single replay p 92 or index replay p 94 The jump bar appears 2 The displayed image s change Single Replay Jump 9 images behind or ahead using B or A on the multicontroller Index Replay Jump to the previous or next set of nine images using B or A on the multicontroller 3 Press the button The jump bar disappears and the jump mode cancels Jump Bar Jump Bar ...

Page 98: ...laying it will display the last frame If is pressed in this state the movie will start playing from the first frame Pausing and Resuming Play Press to pause the movie Press it again to resume Fast Forwarding Rewinding Use B or A on the multicontroller to stop the movie and display the previous or next image or movie You may experience frame dropping and audio breakup when replaying a movie on a co...

Page 99: ...otate using B or A on the multicontroller and press The image cycles to the next orientation 90º 270º original each time is pressed 3 Press the button The Play menu appears again Press the button again to close the menu Movie images cannot be rotated When images are downloaded to a computer the orientation of images rotated by the camera will depend upon the software used to download the images Im...

Page 100: ...an add as many sound annotations as you like until their total time reaches 60 seconds Playing back the Sound Annotations Select in step 2 above Images with sound annotations are displayed with the mark To start playback press To stop playback press again You can adjust the volume using C or D on the multicontroller Erasing the Sound Annotations Select in step 2 above You cannot attach sound annot...

Page 101: ... the show is done Pausing and Resuming a Slide Show Press to pause the show Press it again to resume Fast Forward Rewinding a Slide Show Use B or A on the multicontroller to move to the previous or next image Stopping a Slide Show Press the button during a slide show to stop it and display the slide show menu 4 Press the button The slide show menu appears again Press the button again to close the ...

Page 102: ...or A on the multicontroller and press 4 Mark images to include in the show Single Replay Move between images using B or A on the multicontroller and mark or remove marks from images using C or D on the multicontroller The selection number and a bright green bar appear at the top of marked images Index Replay Press the button to switch to index replay 3 images Select an image using B or A on the mu...

Page 103: ...r A on the multicontroller and press 3 Select Play Time or Repeat using C or D on the multicontroller 4 Select a setting using B or A on the multicontroller Play Time Select a play time Repeat Select On or Off Sets the duration that each image in a slide show is displayed The options are any one of 3 10 seconds 15 seconds 30 seconds and Manual Sets whether the slide show stops when all the slides ...

Page 104: ...yback Slide Show continued 5 Press the button The set up menu closes The display interval may vary somewhat for some images Slide shows can be easily edited on a computer with the supplied software See the Software Starter Guide ...

Page 105: ...ler and press The icon appears on protected images To remove the protection press again in protection mode You can make the selection of images easier by toggling between single replay and Index replay with the button 3 Press the button The protect window closes Please note that formatting initializing a CF card erases all data including protected images p 106 and other file types Please check the...

Page 106: ...le 1 Set the camera to the replay mode p 29 2 Select the image you wish to erase using B or A on the multicontroller and press the button 3 Select Erase using B or A on the multicontroller and press To cancel instead of erasing select Cancel and press Protected images cannot be erased with the erase function p 103 Erasing ...

Page 107: ...e caution before erasing a file 1 In the Play menu select Erase all and press See Selecting Menus and Settings p 38 2 Select OK using B or A on the multicontroller and press To cancel instead of erasing select Cancel and press Protected images cannot be erased with the erase function p 103 ...

Page 108: ...ect Format and press See Selecting Menus and Settings p 38 2 Select OK using B or A on the multicontroller and press To cancel formatting instead select Cancel and press If the camera does not work properly the inserted CF card may be malfunctioning Formatting the CF card may solve the problem When a non Canon brand CF card is malfunctioning reformatting it may solve the problem CF cards formatted...

Page 109: ...arks set by your camera Print settings cannot be set for movie images or RAW images The output of some digital printers or photo lab services may not reflect the specified print settings After you have set the DPOF settings you can connect a Direct Print compatible printer optional or the Direct Print compatible Bubble Jet Printer optional and print directly from the camera p 112 121 Selecting Ima...

Page 110: ...set one copy of each image to print by pressing then selecting Mark All using C or D on the multicontroller and pressing again When the print type is set to Standard or Both the setting for the number of print copies can be changed for each image When Index is selected the print settings can be deleted For the instructions on changing settings please reread Step 3 from the beginning You can cancel...

Page 111: ...ate or File No using C or D on the multicontroller 4 Select a setting using B or A on the multicontroller Print Type Select Standard Index or Both Date Select On or Off Prints one image per page Prints the selected images together at a reduced size in an index format Prints the images in both the standard and index formats Adds the date to the print Adds the file number to the print Standard Print...

Page 112: ...oth both Date and File No can be set to On however only the file number is printed for the index print The date prints as the date and time in the format specified in the Set Date Time menu p 24 Setting the Print Style continued File No Select On or Off 5 Press the button The set up menu will close and the Print Order menu will reappear ...

Page 113: ...settings can all be removed at once The print type is reset to Standard and the date and file number options are set to Off 1 Display the Print Order menu p 107 2 Select Reset using B or A on the multicontroller and press 3 Select OK using B or A on the multicontroller and press ...

Page 114: ...rinter Use the cable DIF 100 that has a Symbol on the connector to connect to this camera You are recommended to use a household power supply to power the camera when it is connected to the printer If you are using a battery pack ensure that it is fully charged 1 Turn off the camera p 27 29 2 Attach the power cable to the printer and plug the other end into power supply 3 Connect the camera and pr...

Page 115: ...ing operations cannot be conducted while the printer is connected Replaying movies Setting the language using and the button combination When the printer is disconnected the symbol will disappear from the LCD monitor and the camera will revert to standard replay mode 4 Slide the power replay lever to the right to turn on the camera appears on the camera LCD monitor and the power mode indicator is ...

Page 116: ... to print and when it is completely finished the display will revert to standard replay mode You cannot print movies or images recorded in the RAW format Cancel Printing To cancel printing between images printed press A confirmation dialog appears Select OK using B or A on the multicontroller and press A print in progress cannot be stopped Wait until the current image is printed and then cancel be...

Page 117: ...y from 1 to 99 prints Setting the Print Style You can select from among the following print styles 1 In the print setting menu choose Style using C or D on the multicontroller and press again Prints one image per page Prints eight copies of the same image on one page Prints right to the edges of the page Prints with a border Prints the image s creation date Image Standard Multiple Borders Borderle...

Page 118: ...e image s top bottom and sides may be cropped slightly If you have not specified a trimming setting a frame will appear around the area of the image that will be printed allowing you to check the portion that will be cropped The date and borders settings cannot be selected when the multiple option is selected The image will be printed with the Date set to Off and the Borders set to Borderless With...

Page 119: ...ortion 2 Trim the Image Changing the Size of the Trimming Frame Move the zoom lever toward or The trimming frame can be changed to a minimum selection of approximately half the displayed image or a maximum selection that is virtually the same size as the image You can cancel the trimming setting by moving the zoom lever toward again when the trimming frame is already set to the maximum size If the...

Page 120: ...trimming settings for another image When you close the Print mode when you turn the camera power off change the camera mode or detach the DIF 100 direct interface cable When you try to expand the trimming frame beyond its maximum size The selected Image Settings and Border setting determine the shape of the trimming frame Please use the LCD monitor to set the trimming settings The trimming frame m...

Page 121: ...and Settings p 38 The Print Order menu appears 2 Select Print using C D B or A on the multicontroller and press 3 Set the print style settings as required See Setting the Print Settings p 115 A print style cannot be set if the print type is set to Index in the DPOF print setting 4 Select OK using C D B or A on the multicontroller and press The image will start to print and when it is completely fi...

Page 122: ... current image is printed and then cancel before the next one starts The display will revert to standard replay mode Restarting Printing In the Print Order menu select Resume using B or A on the multicontroller and press The remaining images can be printed Printing cannot be restarted under the following circumstances If the print settings have been changed before restarting If the image for which...

Page 123: ...recommended to use a household power supply to power the camera when it is connected to the printer If you are using a battery pack ensure that it is fully charged The printing may stop if the camera battery is discharged even if it is not complete therefore early replacement of the low battery with a fully charged one is recommended 1 Connect the camera and printer using the cable When you insert...

Page 124: ... cable Please see the Bubble Jet Printer Quick Start Guide manual for instructions to install paper and ink cartridges The following operations cannot be performed while the printer is connected Replaying movies Setting the language using the and the button combination When the printer is disconnected the symbol will disappear from the LCD monitor and the camera will revert to standard replay mode...

Page 125: ...rded in the RAW format Cancel Printing To cancel printing between images press A confirmation dialog appears Select OK using B or A on the multicontroller and press The printing stops even if it is incomplete and the paper is fed through A print in progress cannot be stopped Wait until the current image is printed and then cancel before the next one starts The display reverts to standard replay mo...

Page 126: ...er You can specify from 1 to 99 prints Setting the Print Style You can select from among the following print styles 1 In the print setting menu choose Style using C or D on the multicontroller and press Select the paper size from the following Card 1 Card 2 Card 3 LTR or A4 For the usable paper type please refer to the Bubble Jet Printer User Guide Prints right to the edges of the page Prints with...

Page 127: ... at an enlarged size As a result the image s top bottom and sides may be cropped slightly If you have not specified a trimming setting a frame will appear around the area of the image that will be printed allowing you to check the portion that will be cropped If you use the DPOF print settings for printing cannot be set The date is printed according to the DPOF print setting With the Bordered opti...

Page 128: ... already been selected for the image the frame will appear around the previously selected portion 2 Trim the Image Changing the Size of the Trimming Frame Move the zoom lever toward or The trimming frame can be changed to a minimum selection of approximately half the displayed image or a maximum selection that is virtually the same size as the image You can cancel the trimming setting by moving th...

Page 129: ...When you close the Print mode when you turn the camera power off change the camera mode or detach the cable When you try to expand the trimming frame beyond its maximum size The selected Paper Settings and Border setting determine the shape of the trimming frame Please use the LCD monitor to set the trimming settings The trimming frame may not display correctly on a TV monitor Trimming Frame 3 Pre...

Page 130: ...nction optional 1 In the Play menu select Print Order and press See Selecting Menus and Settings p 38 The Print Order menu appears 2 Select Print using C D B or A on the multicontroller and press 3 Set the print style settings as required See Setting the Print Settings p 124 4 Press The image starts printing and when it is completely finished the display will revert to the standard replay mode ...

Page 131: ...If the image for which the print settings were set has been deleted before restarting If there was very little free space on the CF card when the printing was cancelled If these circumstances apply you can select OK in the Print Order menu and reprint starting from the first image If printing was cancelled because the camera battery became discharged you are recommended to power the camera with a ...

Page 132: ... mark will display on images that have had transfer marks set by another DPOF compliant camera These settings will be overwritten by any marks set by your camera Selecting Images for Transferring There are two ways to select images Singly All images on a CF card 1 In the Play menu select Transfer Order and press See Selecting Menus and Settings p 38 The Transfer Order menu appears 2 Select Order u...

Page 133: ...h to index replay three images Then press and select Mark All using C or D on the multicontroller and press again If you select Clear All instead of Mark All you can remove marks from all the images You can mark or remove a mark from each image after marking or removing marks from all the images 4 Press the button The selection mode will turn off and the Transfer Order menu will reappear Images ar...

Page 134: ...r der Resetting the Transfer Settings The transfer marks can all be removed at once 1 Display the Transfer Order menu p 130 2 Select Reset using B or A on the multicontroller and press 3 Select OK using B or A on the multicontroller and press ...

Page 135: ...ls Medium 2 1024 x 768 pixels Small 640 x 480 pixels Sets the resolution of the frames as they are recorded to the CF card 320 x 240 pixels 160 x 120 pixels Sets the relative compression ratio used to record images to CF cards Superfine Fine Normal Sets the file format used to record images to CF cards JPEG RAW Sets the single shooting continuous shooting and its option or self timer shooting and ...

Page 136: ...ombines with the optical zoom to zoom images Off On Sets the Spot AE Point option Center the AE point is fixed to the center or AF Point the AE point corresponds to the AF point Center AF Point Sets the duration images display on the LCD monitor after the shutter button is released Off 2 sec 10 sec Sets how file numbers are assigned to images when new CF cards are inserted On Off Reference Page It...

Page 137: ...t of Menu Options 135 p 87 p 87 p 87 Adjusts the image contrast 0 Adjusts the image sharpness 0 Adjusts the image saturation 0 Reference Page Item Menu Screen Settings Content Contrast Sharpness Saturation ...

Page 138: ...grees clockwise in the display Erases all images from a CF card excluding protected images Plays images in an automated slide show Sets the images that will be printed on a DPOF compatible printer or at a photo lab service the number of copies and other parameters Sets the images that will be transferred with your e mail software Reference Page Item Menu Screen Settings Content Play Menu ...

Page 139: ...e LCD monitor Normal Bright Adjusts the sound volume when the shutter button is pressed all the way The beep does not sound while a movie is being shot Off 1 2 3 4 5 Adjusts the sound volume when a movie is played and the startup sound when power comes on After adjusting the sound volume through the menu turn the camera off and back on again in order for the new volume to take effect when playing ...

Page 140: ...d messages on the LCD monitor The menu may appear differently in some regions English Italiano Deutsch Norsk Français Svenska Nederlands Español Dansk Chinese Suomi Japanese You can change the language during image replay by holding the button and pressing the button Sets the video output signal standard NTSC PAL p 28 p 24 p 106 p 25 p 142 Auto Power Down Date Time Format Language Video System Ref...

Page 141: ...tton There is no shutter sound while a movie is being shot See also How the Beep setting in the Set up menu and each sound setting in the My Camera menu are related on page 140 1 Start up Image Start up Sound Shutter Sound Reference Page Item Menu Screen Settings Content p 40 p 40 p 40 My Camera Menu You can select the start up image and start up shutter operation and self timer sounds You can cus...

Page 142: ...ted on this page 1 Reference Page Item Menu Screen Settings Content Operation Sound Selftimer Sound p 40 p 40 My Camera Menu continued How the Beep setting in the Set up menu and each sound setting in the My Camera menu are related To actually turn off the sound of the start up sound shutter sound operation sound and self timer sound individually Beep in the Set up menu must be set to Off If Beep ...

Page 143: ...e camera You can turn on the camera into either Shooting or Replaying mode 2 Press the button for longer than 5 seconds The message Reset settings to default appears on the LCD monitor 3 Select OK using B or A on the multicontroller then press The screen on the right hand appears while resetting The normal screen resumes when resetting is complete To cancel resetting select Cancel instead of OK ...

Page 144: ...he images are not appearing on the TV when shooting press the button No image will appear on the LCD monitor when the camera is connected to a TV monitor The video output signal can be switched NTSC or PAL to accommodate different regional standards p 138 The default setting will vary between regions NTSC Japan U S A Canada Taiwan etc PAL Europe Asia excluding Taiwan Oceania etc If an incorrect vi...

Page 145: ... Canon Customer Support Help Desk Viewfinder Use a lens blower brush to remove dust and dirt If necessary gently wipe the viewfinder and LCD monitor with a soft cloth or an eyeglass lens wiper to remove stubborn dirt LCD monitor Use a lens blower brush to remove dust and dirt If necessary gently wipe the viewfinder and LCD monitor with a soft cloth or an eyeglass lens wiper to remove stubborn dirt...

Page 146: ...or use a household power source Wipe the terminals with a clean dry cloth Switch the camera to Shooting mode See Switching between Shooting and Replaying p 29 Wait until the orange indicator stops flashing and shines steadily signaling that the flash is charged then press the shutter button Insert a new CF card If required download the images to a computer and erase them from the CF card to make s...

Page 147: ...rning appears Be careful not to block the AF auxiliary light emitter with your finger or other items Ensure that there is at least 80 cm 2 7 ft between the camera lens and subject Use the macro mode to shoot close ups between 10 and 80 cm 3 9 in and 2 7 ft at maximum wide angle and 30 and 80 cm 12 in and 2 7 ft at maximum telephoto Set the flash to on Set the exposure compensation to a positive se...

Page 148: ...8 Set the exposure compensation to a negative setting Use the AE lock or spot metering function See Locking the Exposure Setting AE Lock p 79 and Switching between Metering Modes p 82 Change the shooting angle Set the flash to Auto or Off Set the flash to Auto or On Turn the camera on to either shoot or replay Set the video system to the appropriate setting NTSC or PAL for your TV See Set up Menu ...

Page 149: ... with the same name as the directory that the camera is attempting to create or the highest possible file number has already been reached In the Rec menu please set File No Reset to On After you save all the images you wish to retain onto a computer format the CF card p 102 Please note that formatting will erase all the existing images and other data Change the battery pack Battery charge is insuf...

Page 150: ...ecorded in a special format proprietary format used by the camera of another manufacturer etc Unidentified Sound Data Cannot attach sound annotation to the image because the image has some sound file recorded in an inappropriate format Protected You attempted to erase a protected image Too many marks Too many images have been marked for printing or for inclusion in a slide show Cannot process any ...

Page 151: ... jammed during printing Paper has been changed Paper was changed after the print menu was displayed Recharge the printer battery The printer s battery pack is depleted Communication Error The printer is experiencing a data transmission error Cannot trim You attempted to trim an image from another camera one recorded in a different format or one that has been edited on a computer Readjust trimming ...

Page 152: ...installed in the printer Printer cover open Close the printer cover securely Media type error Cancel printing Set the paper you chose in the Print Style Paper lever error Adjust the paper selection lever to the proper position Low ink level The ink tank needs to be replaced soon Prepare a new ink tank If you select Continue in the error screen you can restart printing Waste tank full You can resta...

Page 153: ...cm 2 7ft from tip of the lens barrel Macro AF 10 cm W 30 cm T 80 cm 3 9 in W 11 8 in T 2 6 ft Manual focus 10 cm W 30 cm T 3 9 in W 11 8 in T Shutter Mechanical shutter electronic shutter Shutter speeds 15 1 1500 sec 1 3 sec or more shutter is available in Shutter Priority mode or Manual mode Slow shutter speeds of 1 3 sec or more operates with noise reduction Light metering method Evaluative mete...

Page 154: ... the supplied software RemoteCapture Storage media CompactFlash CF card Type I and Type II File Format Design rule for Camera File system DPOF compliant Image Still images JPEG Exif 2 2 or RAW recording format Movies AVI Image data Motion JPEG Audio data WAVE monaural JPEG compression mode Super fine Fine or Normal Number of Still images Large S30 2048 x 1536 pixels recording S40 2272 x 1704 pixel...

Page 155: ...s digital camera supports Exif 2 2 also called Exif Print Exif Print is a standard for enhancing the communication between digital cameras and printer By connecting to an Exif Print compliant printer the camera s image data at the time of shooting is used and optimized yielding extremely high quality prints Battery Pack NB 2L Type Rechargeable lithium ion cell Nominal voltage 7 4 V Nominal amperag...

Page 156: ...00 240 V 50 60 Hz 0 32 A Rated output 7 4 V DC 2 0 A Operating temperatures 0 40 C 32 104 F Dimensions 112 29 45 mm 4 4 1 1 1 8 in Weight Approx 186 g 6 6 oz CompactFlash Card Card slot type Type I Dimensions 36 4 x 42 8 x 3 3 mm 1 4 x 1 7 x 0 1 in Weight Approx 10 g 0 4 oz ...

Page 157: ... D Date Time 24 138 DC Coupler 19 Digital Print Order Format DPOF Settings Print Settings 107 119 128 Transfer Order 130 Digital Terminal 10 112 121 Digital Zoom 37 60 134 Display Modes 30 33 Detailed 30 32 Simple 30 32 DPOF Print Settings 107 119 128 Transfer Order 130 E Erasing All Images 105 Displayed Images 9 Single Images 104 Exposure AEB 77 AE Lock 79 Aperture Priority AE 68 Compensation 73 ...

Page 158: ... 111 Power On Off 27 29 Power Save 28 138 R RAW File Format 64 133 Recording File Format 64 Red Eye Reduction Function 48 Replay Index Replay 94 Jumping 95 LCD Monitor 92 Magnifying Images 93 Movies 96 Rotating 97 Single Image Replay 92 Slide Show 99 Switching from Shooting Mode 29 TV 142 Volume 137 Resolution 61 Resetting the settings to default 141 Rotate 97 S Saturation 87 Self Timer 58 Sound 4...

Page 159: ...ng Subjects 53 Shooting 54 Strap 26 T Telephoto 37 Transfer Order Reset 132 Selecting Images 130 Troubleshooting 144 146 V Video System 138 142 Viewfinder LCD Monitor 12 30 Optical 10 36 Volume Replay 137 Shooting 137 W WAV Files 32 43 98 White Balance 74 Wide Angle 37 Z Zoom 37 60 93 ...

Page 160: ...he separation between the equipment and receiver Connect the equipment into an outlet on a circuit different from that to which the receiver is connected Consult the dealer or an experienced radio TV technician for help The cables with the ferrite core provided with the digital camera must be used with this equipment in order to comply with Class B limits in subpart B of Part 15 on FCC rules Do no...

Page 161: ...DIGITAL CAMERA Camera User Guide CDI E055 010 XXXXXXX 2002 CANON INC PRINTED IN JAPAN ...

Page 162: ...ra to a Computer p 14 p 14 Start the Software and Download Images p 32 p 71 Windows Macintosh This guide explains how to install the software programs and briefly introduces their functions and operating procedures For more detailed explanations see the Help menu for each program Please read the software license agreement in this guide before using the software By using the software you agree to b...

Page 163: ...ademark of SanDisk Corporation iBook and iMac are trademarks of Apple Computer Inc Macintosh PowerBook Power Macintosh and QuickTime are trademarks of Apple Computer Inc registered in the United States and other countries Microsoft Windows and Windows NT are either registered trademarks or trademarks of Microsoft Corporation in the United States and or other countries Other names and products not ...

Page 164: ...f the SOFTWARE is a violation of this Agreement You must reproduce and include the copyright notice on the back up copy 3 SUPPORT AND UPDATES Neither Canon nor its subsidiaries dealers or distributors will be responsible for providing maintenance or support for use of the SOFTWARE No updates fixes or support will be made available for the SOFTWARE 4 LIMITED WARRANTY AND LIMITATION OF LIABILITY It ...

Page 165: ...e null and void with respect to the jurisdiction of that court or tribunal and all the remaining provisions of this Agreement shall remain in full force and effect 9 CONTROLLING LAW The terms of this Agreement as it relates to purchases of the Software in the United States of America shall be governed and construed in all respects in accordance with the laws and regulations of the State of New Yor...

Page 166: ...with the Software 6 Canon Digital Camera solution Disk 6 Arcsoft Camera Suite CD 11 System Requirements 12 Windows 12 Macintosh 13 Connecting the Camera to a Computer 14 Selecting a Downloading Method 14 Connecting to a USB Port 15 Connecting to a CF Card Reader or PC Card Reader 16 ...

Page 167: ...Software User Guide Windows ImageBrowser Software User Guide Macintosh The manuals in PDF format provide a relatively detailed description of the operating procedures for the ZoomBrowser EX program for Windows and the ImageBrowser program for Macintosh Read this Manual for the Following When you wish to organize and search for images When you wish to edit or add special effects to images When you ...

Page 168: ...o your computer and connect the printer to the computer for printing Read this Manual for the Following When you wish to install uninstall the printer driver required to use the CP 10 When you wish to install uninstall the USB driver When you wish images saved onto the computer to be printed with the CP 10 When you wish to print original photo cards When you wish to print on labels 8 label sheets ...

Page 169: ...tal Camera Solution Disk in the CD ROM drive The installer panel will display 2 In the installer panel click Software Explanation and ZoomBrowser EX Software Guide The guide will display If the installer panel does not display automatically open the Readme and English folders on the CD ROM and double click the ZOOMBROWSER EX GUIDE PDF file Macintosh 1 Place the Canon Digital Camera Solution Disk i...

Page 170: ...P 10 pdf file Macintosh 1 Place the Canon Digital Camera Solution Disk in the CD ROM drive 2 Double click the Canon Digital Camera Installer icon in the CD ROM window The installer panel will display 3 In the installer panel click Using the Software and CP 10 Printer Driver The Card Photo Printer CP 10 Printer Driver User Guide Windows Macintosh will display You can also display it by opening the ...

Page 171: ...98 2000 loads camera images into TWAIN compliant programs such as ArcSoft PhotoImpression and ArcSoft VideoImpression USB WIA Driver Windows This driver for Windows Me starts the Scanners and Cameras Wizard to automatically download camera images to the computer It also allows you to copy camera images using standard file copying procedures in Windows Explorer but it cannot upload computer files t...

Page 172: ...mageBrowser Macintosh These programs can display images in order according to the creation date As the images display in a simulated time tunnel you can zoom the tunnel forward and backward in time as if you were moving through time Converting RAW Format Image Files RAW Image Converter This program can convert images shot in the camera s RAW file format into standard image formats such as 8 or 16 ...

Page 173: ...large image files to sizes small enough for easy transmission The automatic start of email programs is only supported by Windows and the email programs must be enabled as MAPI clients Programs for Saving New Start Up Images and Start Up Sounds to the Camera ZoomBrowser EX Windows ImageBrowser Macintosh These programs can add various camera settings such as start up images start up sounds and shutt...

Page 174: ...u can also use them to make artistic single image layouts Programs for Printing Indexes PhotoRecord Windows ImageBrowser Macintosh These programs can output an index of the computer or camera s image thumbnails tiny versions to a printer Programs for Printing with Card Photo Printer CP 10 PhotoRecord Windows ImageBrowser Macintosh These programs can output your original photo cards or labels 8 lab...

Page 175: ...together in one simple procedure You can shoot and stitch 360º scenes together and save them in the QuickTime VR format to make them appear to surround you as you view them Computer Controlled Camera Shooting RemoteCapture This program allows your camera s shutter to be controlled by the computer when the two are connected The recorded images are loaded directly into the computer ...

Page 176: ... to convert camera images to sepia colors apply other special effects to images edit them and create greeting cards and calendars Programs for Editing Stills and Movies ArcSoft VideoImpression This program provides simple procedures for compiling a movie from multiple movies or stills and for editing out unwanted frames from movies ...

Page 177: ...ore Canon Digital Camera USB WIA Driver 25 MB or more Canon CP 10 Printer Driver 1 MB or more space required for installation ArcSoft PhotoImpression 125 MB or more ArcSoft VideoImpression 30 MB or more Display 800 x 600 pixels 256 colors 8 bit or better 1 024 x 768 pixels High Color 16 bit or better is recommended 800 x 600 pixels 32 000 colors or better is required to use ArcSoft PhotoImpression...

Page 178: ...MB or more Canon Digital Camera Plug In Module 15 MB or more Canon CP 10 Printer Driver 3 8 MB or more space required for installation ArcSoft PhotoImpression 120 MB or more ArcSoft VideoImpression 30 MB or more Display 800 x 600 pixels 256 colors or better 1 024 x 768 pixels 32 000 colors or better is recommended 800 x 600 pixels 32 000 colors or better is required to use ArcSoft PhotoImpression ...

Page 179: ... this point The USB Driver must be installed before the camera is connected to the computer via the USB interface The USB Driver can be installed very easily so please wait until the driver is installed before connecting the camera You should use a household power source to power the camera when it is connected to the computer The separately sold AC Adapter Kit ACK700 is required Downloading Metho...

Page 180: ...a in the connected state Some computers will not awaken properly if you disconnect the camera while they are in standby mode Please refer to your computer manual for instructions regarding its standby mode 1 Install the software first time connection only Windows users see p 20 Macintosh users see p 68 2 Attach the supplied USB cable to the computer s USB port and the camera s Digital Terminal You...

Page 181: ...d adapter PCMCIA adapter before placing it into the card slot on the computer or reader 1 Remove the CF card from the camera and if required insert it into a PC card adapter Insert the card into the adapter 2 Place the card in the CF card reader or the loaded adapter into the card slot on the computer or PC card reader Since the requirement for the power to be on or off varies widely between compu...

Page 182: ...A which is inserted as the third digit in the name I E STA_0001 JPG STB_0002 JPG STC_0003 JPG The xxxx in file names represent four digit numbers All folders except the xxxCANON folders contain image settings files Do not open or delete them IMG_xxxx JPG JPEG format images CRW_xxxx CRW RAW format images CRW_xxxx THM STx_xxxx JPG Stitch Assist mode images MVI_xxxx AVI Movies MVI_xxxx THM DCIM xxxCA...

Page 183: ...18 ...

Page 184: ...he ZoomBrowser EX Camera Window 36 Downloading and Saving Images from the Camera 37 Printing Images 38 ZoomBrowser EX Features 41 Using the ZoomBrowser EX Buttons 41 Converting RAW Format Images 43 Replaying Movies 47 Merging Panoramic Images with PhotoStitch 48 Shooting with RemoteCapture 49 Loading Images into TWAIN Compliant Programs 54 Loading Images into PhotoImpression 54 Downloading Images ...

Page 185: ... Driver Installation Precautions p 23 Users of Windows 2000 must first log in as an Administrator to install programs 1 Close any programs that are running 2 Set the Canon Digital Camera Solution Disk in the computer s CD ROM drive The installer panel will display automatically If the installer panel does not appear automatically use the following procedures to display it 1 Double click the My Com...

Page 186: ...l the driver software to allow the camera to be connected to a computer via the USB interface and download images Installing from the ArcSoft Camera Suite CD 1 Close any programs that are running 2 Place the ArcSoft Camera Suite CD in the computer s CD ROM drive 3 Double click the My Computer icon on the desktop to open it followed by the ArcSoft CD ROM icon and the Setup exe icon The Select the S...

Page 187: ...es ZoomBrowser EX and ZoomBrowser EX Uninstall The uninstall utility will start and remove ZoomBrowser EX If you have uninstalled ZoomBrowser EX because of a corrupt database file or other problem please also delete the Database folder which can be found within the C Program Files Canon ZoomBrowser EX folder PhotoRecord PhotoStitch RemoteCapture and other programs can be removed with the same proc...

Page 188: ...ecautions You can install the USB WIA Driver if you are using Windows Me In addition you should read USB WIA Driver Limitations below before installing the driver USB WIA Driver Limitations When you have set the WIA Driver to start a particular application program when you connect the camera the program may cause an error message similar to the following to appear TWAIN data source not found Reins...

Page 189: ...ows Explorer to display the camera s thumbnail images on the computer and download images with standard file copying procedures Window Me Window 2000 Users of Windows 2000 must first log in as an Administrator to install programs 1 Attach the supplied USB cable to the computer s USB port and the camera s Digital Terminal For USB interface connection instructions see Connecting to a USB Port p 15 T...

Page 190: ... instructions see Connecting to a USB Port p 15 2 After a moment the following dialog will display 3 Click OK and the following dialog will display 4 Click the Browse button select the Program Files Canon DC_USB_TWAIN and CAMERA3 folders on the drive on which you installed the software 5 Click OK The USB TWAIN Driver will automatically install ...

Page 191: ...ousehold power source to power the camera when it is connected to a computer If the Problem Lies in the Above The Add New Hardware Wizard in Windows 2000 the New Hardware Found Wizard may display If that happens click Cancel to close it Then disconnect the camera from the computer before reinstalling the USB WIA Driver according to the procedures in Installing the USB TWAIN Driver USB WIA Driver p...

Page 192: ...es on the next page to uninstall the driver 5 Delete the camera model name from the Scanners and Cameras Properties list in Windows 98 or Windows 2000 or the camera icon from the Scanners and Cameras folder in Windows Me Windows 98 or Windows 2000 Select the name of your camera model and click the Remove button Windows Me Select the icon of your camera model right click the mouse button and select...

Page 193: ...u installed the other software on the CD ROMs Windows 98 Windows Me 1 Open the System Properties dialog and check the Device Manager tab 1 In the Control Panel double click the System icon 2 Click the Device Manager tab 2 If your camera model name appears under the Other devices and or Imaging Device categories use the following procedures to delete it 1 Select the name of your camera model and cl...

Page 194: ...dialog This will make the hidden files and folders visible This example shows Windows 98 screen shots 4 Find and delete the Drvdata bin and Drvidx bin files 5 In the Inf folder double click the Other folder to open it The Inf folder contains numerous files that are critical to the computer s operation Be extremely careful not to delete the wrong files If you delete the wrong file you may be unable...

Page 195: ... devices or Imaging Device category use the following procedures to delete it 1 Select the name of your camera model right click the mouse button and select Delete 2 In the confirmation dialog click OK 3 Click OK to close the System Properties dialog Remove all copies of your camera model name that appear in the Other devices or Imaging Device categories or that appear more than once in one catego...

Page 196: ...Oem file The two constitute one set i e Oem0 and Oem0 pnf Please note that there may be many file sets starting with Oem so take care to get the correct set 5 Confirm that it is the correct Oem file set for Canon digital cameras Double click the Oem file The Windows Notepad program will start and show the file contents Click each Oem file until you find one that contains Canon Digital Camera USB S...

Page 197: ...do anything the camera will disconnect after approximately 1minute The message will not appear and the camera will not disconnect if the camera is powered from a household power source Slide the Power Replay lever to reconnect Please see the Camera User Guide for more information Starting ZoomBrowser EX USB Port Connection Windows 98 Windows 2000 1 Attach the supplied USB cable to the computer s U...

Page 198: ...wser EX Software User Guide p 4 What to Do the Next Time ZoomBrowser EX is Started A dialog with the previously selected automated settings will display the next time you start ZoomBrowser EX To use these settings unchanged click the Start button To do nothing click Cancel To change the settings click Modify Settings For more detailed instructions for changing settings please see the PDF manual Zo...

Page 199: ...now set ZoomBrowser EX to start automatically the next time the camera is connected If you wish to shut off the auto start place a check mark in the Disable device events or Do nothing options USB Port Connection Windows Me 1 Attach the supplied USB cable to the computer s USB port and the camera s Digital Terminal For USB interface connection instructions see Connecting to a USB Port p 15 The Sca...

Page 200: ... Double click the Canon ZoomBrowser EX icon on the desktop If you are using Windows Me a confirmation message will appear the first time ZoomBrowser EX starts asking whether you wish to register the My Pictures folder in ZoomBrowser EX Click Yes if you plan to use the My Pictures folder 3 Click the Import Images button and select From DCIM Thumbnail versions of the camera images will display in th...

Page 201: ...the Setup Options button and select Camera Settings from the menu that displays In the TWAIN Driver click the Camera Settings button to open the Camera Settings dialog 2 Check or change the settings Input a camera owner name here up to 31 characters Set the date and time here Click this button to synchronize the camera to the computer s date and time settings Check the battery charge here Click th...

Page 202: ...rom the Camera window and click the Download button Click on thumbnails to select them To select multiple images hold down the Shift key or Ctrl key while clicking The movie icon displays on movie thumbnails Downloaded images are saved to the computer disk and appear in the Browser Display Area The folder you created above normally appears within the C Program Files Canon ZoomBrowser EX Image Libr...

Page 203: ...lose it Printing Images 1 Select the image s you wish to print Movie images cannot be printed Convert RAW images before printing them p 43 2 Click the Print button and select Layout from the displayed menu The PhotoRecord printing utility will start and automatically display the selected image s in a page layout Tree View Area RAW displays on RAW images Browser Display Area The movie icon displays...

Page 204: ... User Guide p 4 a PDF file for a detailed explanation of the print modes 4 In the next dialog set the paper size and other settings and click Next 5 In the last dialog set the fine settings and click Finish 6 If you wish to change the layout set the printing settings in the PhotoRecord window 7 Click the PhotoRecord Print button The Print dialog will display 8 Click OK to start printing When you c...

Page 205: ...ext You can drag images to change the layout Slide this left to shrink the image size and right to increase it Stop importing images Switch between control panel sizes with this Display Help Display the Print Dialog Undo or restore the previous action Change the page background or borders Import images Select a layout pattern for each page Click the arrow to display a pop up menu ...

Page 206: ...Scroll modes to suit your purposes when images are displayed in the Browser Display Area Zoom Mode When you create a folder within a folder use this mode to display all the images inside the sub folder too Scroll Mode Use this mode to just display the images within one folder When there are more images than can fit in the Browser Display Area scroll bars appear on the right of the Browser Display ...

Page 207: ...wish to register and click the OK button The folder will be registered as an Image Folder Refreshing a Folder Only image files that are added copied or edited using ZoomBrowser EX will display correctly in a folder that is part of a ZoomBrowser EX image folder If you move or copy image folders with the Windows Explorer program or edit images with another application the information contained in Zo...

Page 208: ...data recorded in the RGB TIFF and other standard uncompressed file formats is irrevocably processed in the camera and again by an application program when you change the file attributes which reduces the image quality As measured by standard Canon test conditions Please see the Camera User Guide to learn how to shoot RAW images ZoomBrowser EX RAW Image Converter or the TWAIN Driver for Windows 98 ...

Page 209: ...option when you wish to use a retouching program such as Adobe Photoshop to perform advanced image editing The Linear option is only enabled when a TIFF 16 bits channel is selected Click this and a white point on the Preview Area image to set the white balance Preview Area Reset the image quality settings to the original values Display the image in the Preview Area at full size Adjustments made he...

Page 210: ...channel or BMP format To select TIFF 16 bits channel you must first select 16 bits per color channel in the Image Bit Count After Conversion section of the Conversion Settings dialog 5 Select a RAW image file from the list and click Start The selected RAW image will be converted to the specified file format and saved to the desktop If you selected Convert with RAW image quality conversion in the C...

Page 211: ...mber consecutively to input the root name yourself The file name will comprise the specified root name followed by a 5 digit number assigned consecutively and the file extension TIF or BMP How to Change the Image Format ZoomBrowser EX 1 Click the ZoomBrowser EX File menu and select Preferences The Preferences dialog will display 2 Change the format selected in the Image Format tab and click OK RAW...

Page 212: ...k Place the disk in the CD ROM drive and click QuickTime 5 0 Installation in the installer panel p 20 1 Double click an image with a movie icon QuickTime Player will start 2 Click the play button in QuickTime Player The movie will replay Play Button Do not double click a movie file AVI extension in the Windows Explorer to play it That will start Windows Media Player which may not support this file...

Page 213: ...mages shot in Stitch Assist mode with a wide converter teleconverter or close up lens cannot be merged accurately Images Shot in Stitch Assist Mode PhotoStitch automatically arranges images shot with the camera s Stitch Assist mode in their correct order and orientation making it easy to merge them Stitch Assist mode images appear in the Camera window as shown below Stitch Assist mode images have ...

Page 214: ...en the shutter release and activation is slightly longer when RemoteCapture is used to shoot than when the camera is used in the normal fashion Images shot with RemoteCapture are automatically saved to the folder selected in ZoomBrowser EX Save RemoteCapture Window View Button Select an image in the Thumbnail View and click here to display it in the Image Display Area Delete Button Select an image...

Page 215: ...AF AE Reset button if the distance to the subject or the lighting changes Set the basic camera settings here Release Button Click here to release the camera s shutter and record the image Recorded images are automatically saved to the computer AF AE Reset Button Click here to refocus the camera and meter the exposure again Viewfinder On Off Button Click here to turn the viewfinder display on or of...

Page 216: ...og If ZoomBrowser EX is already running click the Edit menu and select RemoteCapture to start RemoteCapture 6 Click Yes Shooting RemoteCapture window will display 7 Set the Size Quality Flash Macro White Balance and Exposure Compensation settings If you turn the camera on either side to shoot you can rotate the recorded image 90º either way when it is saved by selecting 90 degrees left or 90 degre...

Page 217: ...dialog will display 2 Set the delay in seconds and click Start RemoteCapture will start timer shooting recording an image after the specified delay You can specify a delay from 2 to 30 seconds Precautions for Shooting with RemoteCapture If your computer is set to go into standby mode there is no guarantee that RemoteCapture will continue to function after the computer enters standby mode Always tu...

Page 218: ...tor You can view the subject you are shooting in the camera s LCD monitor 1 In the Shooting RemoteCapture window click the Camera menu and select Camera Display Settings The Camera Display Settings dialog will display 2 Select Camera LCD monitor and click OK 3 In the Shooting window click the Viewfinder On button If you select Video Out Terminal instead you can view the subject on a TV monitor Ple...

Page 219: ...m the ArcSoft Camera Suite CD p 21 and Installing the USB TWAIN Driver USB WIA Driver p 23 Loading Images into PhotoImpression This topic explains how to load images using PhotoImpression Starting the TWAIN Driver from within PhotoImpression USB Connection 1 Attach the supplied USB cable to the computer s USB port and the camera s Digital Terminal For USB interface connection instructions see Conn...

Page 220: ... PC card adapter into the reader 2 Click the Windows Start menu and select Programs ArcSoft Camera Suite and PhotoImpression PhotoImpression will start 3 Click the Camera Scanner button at the lower left of the PhotoImpression window 4 Select your camera model from the Select Source list 5 Click the button The TWAIN Driver will start ...

Page 221: ...umbnails from a connected camera Main Buttons Click these buttons to perform the main tasks such as loading images and closing the TWAIN Driver Help Button Display Style Button Loading Images with the TWAIN Driver The TWAIN Driver only displays still images To download movies use ZoomBrowser EX p 32 Loading from the Camera 1 Click the Camera button The camera s images will display in the Thumbnail...

Page 222: ...he acquired image s will display in PhotoImpression s main window To save the acquired image s click the Save button at the window s left followed by the Save As at the bottom of the window Input a file name and change the file location and format settings if necessary How to Convert RAW Images with the TWAIN Driver 1 Select a RAW image in the TWAIN Driver and click the Acquire button The RAW imag...

Page 223: ...B port and the camera s Digital Terminal For USB interface connection instructions see Connecting to a USB Port p 15 The Scanners and Cameras Wizard will open automatically 2 Click the Next button 3 Select the image s you wish to download and click the Next button To select multiple images press and hold the Ctrl or Shift key on the keyboard while clicking on images To select all the images click ...

Page 224: ...rocedures Copy by Specifying a Folder Select an image in the Explorer window right click the mouse select Save and specify a folder The image and its thumbnail will be downloaded to the specified location Copy by Dragging and Dropping Select an image in the Explorer window drag it to the target folder and drop it This will download the image and its thumbnail RAW image files converted and download...

Page 225: ... Select the image s you wish to download and click the Open button The selected image s will load into the program To save the loaded image s click the File menu and select Save As Input a file name and change the file location and format settings if necessary Loading Images with Windows TWAIN Source You can also load images excluding RAW images into a program not ArcSoft PhotoImpression with Wind...

Page 226: ... or PDF manual ZoomBrowser EX Software User Guide p 4 Displaying the My Camera Window To save the My Camera Settings to the camera you use the My Camera window The following explains the procedures for displaying the My Camera window 1 The Camera Window will open after you have connected the camera to the computer and started ZoomBrowser EX For starting instructions for ZoomBrowser EX see Starting...

Page 227: ...s selected View Play Button Displays the thumbnail tiny version of the selected image data The button s name changes to the Play button when a sound is selected You can add new data to the My Camera window See Adding New Data to the My Camera Window p 64 Saving the Data to the Camera You can save the My Camera Settings displayed in the My Camera window to the camera Content that does not appear in...

Page 228: ... will be saved to the camera 6 Click the Close button to close the window This concludes the process for saving the My Camera Settings to the camera To use this data on the camera change the start up image and sound settings on the camera itself Please see the Camera User Guide for instructions for these procedures Save to Camera Button Saves the My Camera Settings to the camera Delete Button Dele...

Page 229: ...pixels Creating a Sound Record a sound using a Sound Recorder such as the one commonly bundled with Windows Record the sound as a 11 025 kHz or 8 000 kHz 8 bit mono sound and save it in the WAV format Furthermore the sound duration should conform to the following Please note that files not meeting the above criteria cannot be saved to the camera To learn how to create a sound file see the ZoomBrow...

Page 230: ...ct the file you created in the Open file dialog and click the Open button The selected file will appear in the Computer list This concludes the process for adding new data You can save the newly created data to the camera using the procedures described in the Saving the Data to the Camera section p 62 To delete a data file select it and click the Delete button The newly added data will appear here...

Page 231: ...66 ...

Page 232: ...m the Camera 75 Printing Images 77 ImageBrowser Features 79 Converting RAW Format Images 79 Replaying Movies 83 Merging Panoramic Images with PhotoStitch 84 Shooting with RemoteCapture 85 Loading Images into Plug In Compliant Programs 90 Loading Images into Adobe Photoshop 90 Downloading Images with the USB Mounter 94 Enabling the USB Mounter 94 Downloading Images 95 Saving the My Camera Contents ...

Page 233: ...n and the Canon Digital Camera Installer icon The installer panel will display 4 Click Digital Camera Software Installation 5 Select the programs you wish to install and click the Install button A check mark should appear beside the programs that will be installed The installation will start Follow the onscreen messages to proceed with the installation 6 After the installation is complete restart ...

Page 234: ...ages to proceed with the installation 4 Click the Quit button when a message tells you that the installation is complete Continue by installing ArcSoft VideoImpression Installing ArcSoft VideoImpression 1 Double click the English folder icon within the CD ROM followed by the VideoImpression Installer icon Installation will start Follow the onscreen messages to proceed with the installation 2 When ...

Page 235: ... s folder into the Trash to uninstall programs such as ImageBrowser PhotoStitch RemoteCapture RAW Image Converter USB Mounter ArcSoft PhotoImpression and ArcSoft VideoImpression If the program folders contain subfolders into which images have been saved be careful not to accidentally delete those subfolders Uninstalling the Plug In Module For instructions to uninstall the Plug In Module please ope...

Page 236: ...he camera will disconnect after approximately 1minute The message will not appear and the camera will not disconnect if the camera is powered from a household power source Slide the Power Replay lever to reconnect Please see the Camera User Guide for more information Starting ImageBrowser USB Port Connection 1 Attach the supplied USB cable to the computer s USB port and the camera s Digital Termin...

Page 237: ...ide p 4 What to Do the Next Time ImageBrowser is Started A dialog with the previously selected automated settings will display the next time you start ImageBrowser To use these settings unchanged click the Start button To do nothing click Cancel To change the settings click Settings Change For more detailed instructions for changing settings please see the PDF manual ImageBrowser Software User Gui...

Page 238: ...ear the check mark here to stop ImageBrowser from starting automatically CF Card Reader PC Card Reader Connection 1 Insert the CF card or loaded PC card adapter into the reader 2 Start ImageBrowser Double click the Canon ImageBrowser icon on the desktop If the icon does not appear on the desktop double click the folder in which you installed the program followed by the Canon Utilities and ImageBro...

Page 239: ... Options button and select Camera Settings from the displayed menu In the Plug In Module click the Camera Settings button to open the Camera Settings dialog 2 Check or change the settings Input a camera owner name here up to 31 characters Set the date and time here Click this button to synchronize the camera to the computer s date and time settings Check the battery charge here Click this to forma...

Page 240: ...orer View Section 2 Create a new folder for saving images from the camera Click the File menu and select New Folder A folder with the name Untitled will be created Click it to change the folder name as you wish 3 In the Explorer Vie Section click the newly created folder Explorer View Section ...

Page 241: ... displays on RAW images Browser area The movie icon displays on movie thumbnails To disconnect the camera click the close box at the upper left of the Camera window The Camera window will close Explorer View Section Downloaded images are saved to the computer and appear in the Browser area You can also download images to the computer by dragging them from the Camera window and dropping them on the...

Page 242: ...d layout and click the Next button Select the Custom layout printing option for the purposes of this example The Custom Layout printing option in the Layout Options window allows you to freely change the size and position of the images for printing The other options allow you to print an index or print onto Canon perforated paper For more details on the Layout Options window please see the PDF man...

Page 243: ...start printing Add Text Open the Edit menu and select Add Text Add Captions to Images Click the image and then the Edit menu and select Edit Caption Displays the Layout Options window Display the Print dialog Change the default number of images printed per page Rotate the selected image Reset the layout Change the Image Size Drag the border to resize the image Edit the Page Title Open the Edit men...

Page 244: ...fore conversion to retain the degree of image quality appropriate to your purposes The result is high quality images In contrast image data recorded in the RGB TIFF and other standard uncompressed file formats is irrevocably processed in the camera and again by an application program when you change the file attributes which reduces the image quality As measured by standard Canon test conditions P...

Page 245: ...n when you wish to use a retouching program such as Adobe Photoshop to perform advanced image editing The Linear option is only enabled when a TIFF 16 bits channel is selected Click this and a white point on the Preview Area image to set the white balance Preview Area Reset the image quality settings to the original values Display the image in the Preview Area at full size Adjustments made here ar...

Page 246: ...channel you must first select 16 bits per color channel in the Image Bit Count After Conversion section of the Conversion Settings dialog 5 Select a RAW image file from the list and click Start The selected RAW image will be converted to the specified file format and saved to the desktop If you selected Convert with RAW image quality conversion in the Conversion Options for Image Quality section o...

Page 247: ...r consecutively to input the root name yourself The file name will comprise the specified root name followed by a 5 digit number assigned consecutively and the file extension TIF How to Change the Image Format ImageBrowser 1 Click the ImageBrowser Edit menu and select Preferences The Preferences dialog will display 2 Change the format selected in the File Format window and click OK RAW Image Conve...

Page 248: ...or a later version is not already installed install the QuickTime 5 0 program from the Canon Digital Camera Solution Disk Place the disk in the CD ROM drive and click QuickTime 5 0 Installation in the installer panel p 68 1 Double click an image with a movie icon QuickTime Player will start 2 Click the play button in QuickTime Player The movie will replay Play Button ...

Page 249: ...s shot in Stitch Assist mode with a wide converter teleconverter or close up lens cannot be merged accurately Follow the instructions to merge the images Images Shot in Stitch Assist Mode PhotoStitch automatically arranges images shot with the camera s Stitch Assist mode in their correct order and orientation making it easy to merge them Stitch Assist mode images appear in the Camera window as sho...

Page 250: ...ation is slightly longer when RemoteCapture is used to shoot than when the camera is used in the normal fashion Images shot with RemoteCapture are automatically saved to the folder selected in ImageBrowser You cannot use RemoteCapture when the USB Mounter is running p 94 Save RemoteCapture Window View Button Select an image in the Thumbnail View and click here to display it in the Image Display Ar...

Page 251: ...t update unless you click the AF AE Reset button if the distance to the subject or the lighting changes Set the basic camera settings here Release Button Click here to release the camera s shutter and record the image Recorded images are automatically saved to the computer AF AE Reset Button Click here to refocus the camera and meter the exposure again Viewfinder On Off Button Turn the viewfinder ...

Page 252: ...e Compensation settings If you turn the camera on either side to shoot you can rotate the recorded image 90º either way when it is saved by selecting 90 degrees left or 90 degrees right in the Rotation Settings section To change where the image is saved see Changing the Save Location and Other Preferences p 88 7 If you click the Viewfinder On button you can check the image composition in the Viewf...

Page 253: ...dow click the File menu and select Timer Shooting The Timer Shooting dialog will display 2 Set the delay in seconds and click OK RemoteCapture will start timer shooting recording an image after the specified delay You can specify a delay from 2 to 30 seconds Precautions when Shooting with RemoteCapture If your computer is set to go into standby mode there is no guarantee that RemoteCapture will co...

Page 254: ...CD monitor 1 In the Shooting RemoteCapture window click the File menu and select Camera Display Settings The Camera Settings dialog will display 2 Select Camera s LCD monitor and click OK 3 In the Shooting window click the Viewfinder On button If you select Video Out Terminal instead you can view the subject on a TV monitor Please see the Camera User Guide to learn how to connect to a TV Printing ...

Page 255: ...odule into the Adobe Photoshop Plug Ins Folder 1 Double click the folder in which you installed the program followed by the Canon Utilities and Digital Camera Plug In folders to open them 2 Copy the Canon Digital Camera Plug In file to the Adobe Photoshop Import Export folder Starting Adobe Photoshop USB Connection 1 Attach the supplied USB cable to the computer s USB port and the camera s Digital...

Page 256: ...thout installing ImageBrowser and then connect via the USB interface Use the following procedures to change the auto start setting for ImageBrowser 1 Click OK on the ImageBrowser Not Found dialog 2 In the Settings for USB Connection dialog click the The application program below will start option to clear the check mark 3 Close the Settings for USB Connection dialog This will prevent the ImageBrow...

Page 257: ...and change the file location and format settings if necessary Downloading from a Card Reader 1 Click the Adobe Photoshop File menu and select Import and Canon Digital Camera Plug In If you previously clicked the Camera button to display the camera images and the Connect to Camera message displayed when you started the Plug in Module click the Cancel button this time to close the window 2 Click the...

Page 258: ... dialog In it you can select whether or not the false color filter is used Remove the check mark from this option if you do not need to reduce the false colors in the image Main Buttons Perform the main tasks such as loading images and closing the Plug in Module Preferences Button Adjust or check image transmission settings p 89 Camera Settings Button Adjust or check camera settings p 74 Communica...

Page 259: ...n images cannot be deleted from the camera and the computer images cannot be uploaded to the camera Enabling the USB Mounter To download images with the USB Mounter first enable it with the following procedures 1 Select Control Panels from the Apple menu and Canon USB Camera Driver The Canon USB Camera Driver control panel will display 2 Select Card Reader Mode and close the control panel A dialog...

Page 260: ...older on the computer to download them Never turn off the power or detach the USB cable while copying The equipment may not operate correctly How to Download Images from ImageBrowser and the Plug In Module while the USB Mounter is Enabled When the USB Mounter is enabled use the card reader downloading procedures in ImageBrowser or the Plug In Module to download from the camera See CF Card Reader P...

Page 261: ...Window To save the My Camera Settings to the camera you use the My Camera window The following explains the procedures for displaying the My Camera window 1 Attach the supplied USB cable to the computer s USB port and the camera s Digital Terminal For USB interface connection instructions see Connecting to a USB Port p 15 ImageBrowser will start and display the ImageBrowser Automation dialog 2 Con...

Page 262: ...ou can add new data to the My Camera window See Adding New Data to the My Camera Window p 99 Saving the Data to the Camera You can save the My Camera Settings displayed in the My Camera window to the camera Content that does not appear in the Computer list of the My Camera Data window cannot be saved to the camera Do not detach the USB cable turn the camera power off or disconnect the camera from ...

Page 263: ...the camera you can select settings with a common theme 4 Repeat steps 1 3 to replace all the contents you wish to add to the camera 5 Click the Save to Camera button Settings in the Camera list will be saved to the camera 6 Click the Close button to close the window This concludes the process for saving the My Camera Settings to the camera To use this data on the camera change the start up image a...

Page 264: ...ls Creating a Sound Record a sound using a sound recorder such as SimpleSound which is commonly bundled with Macintosh computers After you have recorded it with SimpleSound use ArcSoft VideoImpression to convert the file to the WAV format The sound duration should conform to the following Please note that files not meeting the above criteria cannot be saved to the camera To learn how to create a s...

Page 265: ...he file you created in the Open file dialog and click the Open button The selected file will appear in the Computer list This concludes the process for adding new data You can save the newly created data to the camera using the procedures described in the Saving the Data to the Camera section p 97 To delete a data file select it and click the Delete button The newly added data will appear here ...

Page 266: ...gnized or the Event dialog does not display Windows only when the camera is connected via the USB interface 102 ZoomBrowser EX displays a database file related error message E_Fail error etc Windows only 103 Troubleshooting Windows Macintosh ...

Page 267: ... Genuine Apple Computer brand computer with a built in USB interface Camera is not correctly connected to the computer Read Connecting the Camera to a Computer p 10 and check the connection Ensure that you are using the correct cable and that its connectors are in good shape Insufficient battery charge If you are powering the camera with a battery pack ensure that the charge is sufficient You shou...

Page 268: ...ZoomBrowser EX database file may be corrupted Please restore the database using the procedures described in the Troubleshooting section of the PDF manual ZoomBrowser EX Software User Guide You can display the ZoomBrowser Software User Guide from the installer panel of the Canon Digital Camera Solution Disk ...

Page 269: ... 62 93 21 Faks 22 62 06 15 E mail helpdesk canon no Finland Canon OY Puhelin 010 54420 Fax 010 544 4571 Help Desk 0600 0 22606 14 80 mk min pvm Help Desk 0600 0 22666 enint 40mk puhelu pvm Sähköposti helpdesk canon fi Canon Schweiz AG Tel 01 835 6161 Fax 01 835 6526 Hotline 0900 57 55 20 Canon Svenska AB Tel 08 744 85 00 Fax 08 744 64 65 Austria Canon GmbH Oberlaaerstraße 233 A 1100 Vienna Tel 01 ...

Page 270: ...tomer Support North America 46601 Fremont Blvd Fremont CA 94538 Tel 510 440 9901 Mon Fri 8 30 AM 5 30 PM PST E mail support arcsoft com Other Regions Please see the arcSoft web site http www arcsoft com maininternational html ...

Page 271: ...106 ...

Page 272: ......

Page 273: ...CDI E028 010 080INixx 2001 CANON INC PRINTED IN JAPAN ...

Page 274: ......

Page 275: ...or Canon Canada Cuslomer Information Centre at 1 800 0K CANON 1 800 652 2666 II is your responsibility to properly package and send ttle defective PowerShot Digital C era logether with a copy of your daled proof of purchase a dated bill of sale IS sufficient a complete explanallon of the problem and a return address I Ihe aulhonzed PowerShot Dlgllal Camera service prOVider al your expense Do nol r...

Reviews: