Output Settings or specify a value (by 1%) for %. The maximum value available for %
depends on the Output Resolution. % can be specified for up to 19200 dpi (the maximum
available output resolution).
Paper Size (L, etc.) & Monitor Size (1024 x 768 pixels, etc.)
(Width),
(Height) and scale cannot be specified. The preview image will be cropped
according to the selected output size and resolution. The portion within the cropping frame will be
scanned at the size of the selected paper/monitor size. You can drag the cropping frame to
enlarge, reduce or move it while maintaining the aspect ratio.
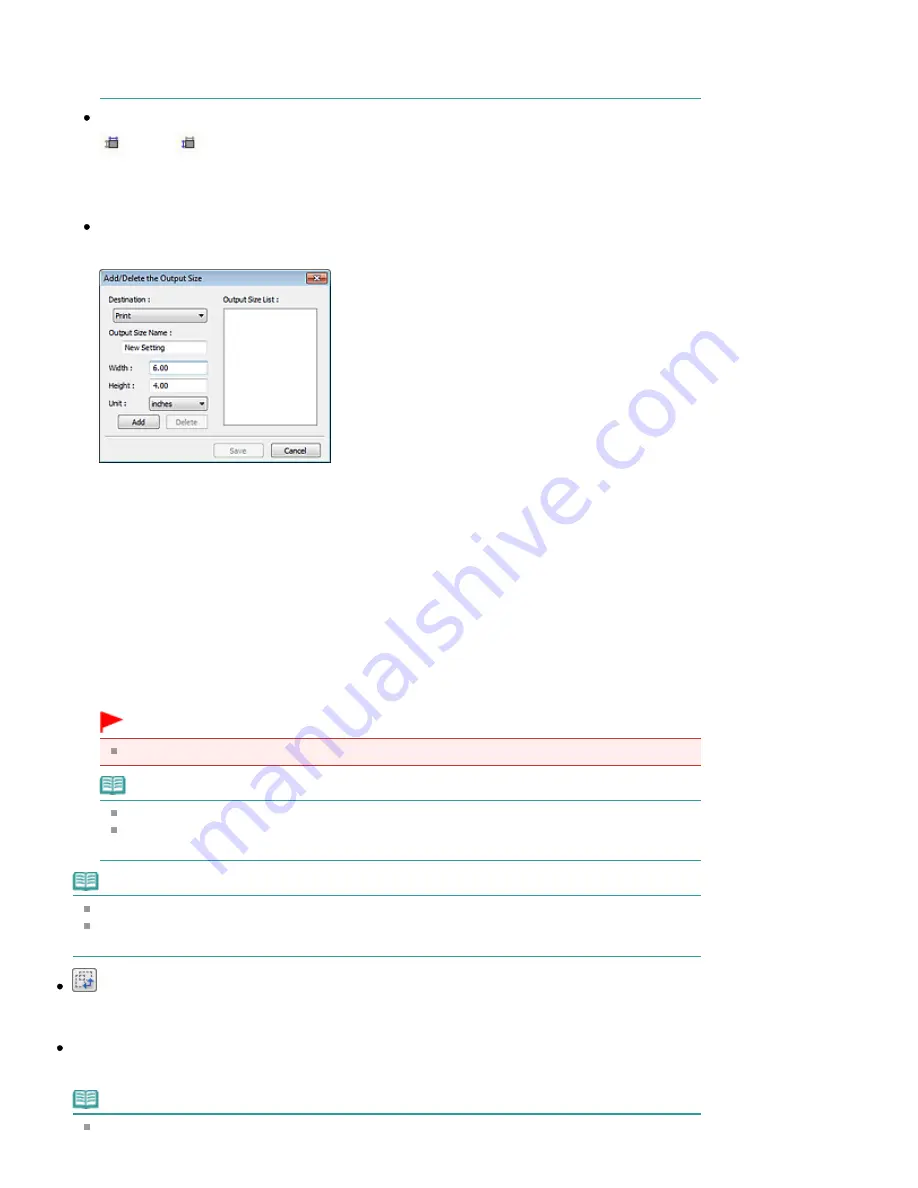
Add/Delete...
Opens the Add/Delete the Output Size dialog box, in which you can specify custom output sizes.
In the Add/Delete the Output Size dialog box, you can specify multiple output sizes and save them
at one time. Saved items will be registered to the Output Size list and can be selected, along with
the predefined items.
Add
To add a size, select Print or Image display for Destination, then enter Output Size Name, Width,
and Height then click Add. For Unit, you can select inches or mm when Destination is Print but you
can only select pixels when Destination is Image display. The name of the added size appears in
Output Size List.
Click Save to save the items listed in Output Size List.
Delete
To delete an item, select it in Output Size List and click Delete. Click Save to save the items listed
in Output Size List.
Important
You cannot delete predefined output sizes such as A4 and 1024 x 768 pixels.
Note
Save up to 10 items for each destination.
An error message appears when you enter a value outside the setting range. Enter a value
within the range displayed in the message.
Note
See "
Adjusting Cropping Frames
" for details on cropping frames.
For details on whether or how the cropping frame is initially displayed on a preview image, see
Cropping Frame on Previewed Images in "
Preview Tab
" (Preferences dialog box).
(Switch Aspect Ratio)
This button is available when Output Size is set to anything but Flexible.
Click this button to rotate the cropping frame. Click again to return it to the original orientation.
Data Size
The file size of the preview image when saved in BMP format is displayed.
Note
When the file size exceeds a certain size, the value appears in red. In that case, a warning
Page 791 of 1135 pages
Output Settings
Summary of Contents for MG8100 series
Page 30: ...Page top Page 30 of 1135 pages Inserting the USB Flash Drive ...
Page 69: ...Page top Page 69 of 1135 pages Printing Web Pages Easy WebPrint EX ...
Page 82: ...Page top Page 82 of 1135 pages Machine Settings ...
Page 85: ...Page top Page 85 of 1135 pages Loading Paper ...
Page 88: ...Page top Page 88 of 1135 pages Loading Paper in the Cassette ...
Page 118: ...Page top Page 118 of 1135 pages Printing the Nozzle Check Pattern ...
Page 194: ...See Help for details on the Edit screen Page top Page 194 of 1135 pages Editing ...
Page 198: ...Page top Page 198 of 1135 pages Printing Stickers ...
Page 205: ...See Help for details on the Print Settings screen Page top Page 205 of 1135 pages Printing ...
Page 207: ...How Can I Move or Copy the Saved File Page top Page 207 of 1135 pages Printing Layout ...
Page 210: ...Page top Page 210 of 1135 pages Selecting the Paper and Layout ...
Page 214: ...Page top Page 214 of 1135 pages Editing ...
Page 282: ...Page top Page 282 of 1135 pages Cropping Photos Photo Print ...
Page 292: ...Page top Page 292 of 1135 pages Opening Saved Files ...
Page 296: ...Page top Page 296 of 1135 pages Changing Layout ...
Page 304: ...Page top Page 304 of 1135 pages Replacing Photos ...
Page 308: ...Page top Page 308 of 1135 pages Cropping Photos ...
Page 316: ...Page top Page 316 of 1135 pages Adding Text to Photos ...
Page 338: ...Page top Page 338 of 1135 pages Printing ...
Page 347: ...Page top Page 347 of 1135 pages Adjusting Color Balance Using Sample Patterns ...
Page 359: ...See Help for details on the Crop window Page top Page 359 of 1135 pages Cropping Photos ...
Page 367: ...Page top Page 367 of 1135 pages Setting a Page Size and Orientation ...
Page 536: ...6 Gently close the Document Cover Page top Page 536 of 1135 pages Placing Film ...
Page 626: ...Page top Page 626 of 1135 pages Navigation Mode Screen ...
Page 628: ... Guide Opens this guide Page top Page 628 of 1135 pages Scan Import Documents or Images Tab ...
Page 675: ...Page top Page 675 of 1135 pages Send via E mail Dialog Box ...
Page 682: ...Page top Page 682 of 1135 pages Correct Enhance Images Window ...
Page 698: ...Page top Page 698 of 1135 pages Save Dialog Box ...
Page 805: ...Page top Page 805 of 1135 pages Scanner Tab ...
Page 905: ...Page top Page 905 of 1135 pages Bluetooth settings Screen ...
Page 934: ...Page top Page 934 of 1135 pages Changing the Print Options ...
Page 1045: ...Page top Page 1045 of 1135 pages Before Printing on Art Paper ...
Page 1073: ...Page top Page 1073 of 1135 pages Using Easy PhotoPrint EX ...
Page 1101: ...Page top Page 1101 of 1135 pages How to Set a Network Key Network Password Passphrase ...
Page 1113: ...Page top Page 1113 of 1135 pages Checking Information about the Network ...


