


6-33
Optional Accessor
ies
6
Network Board
12
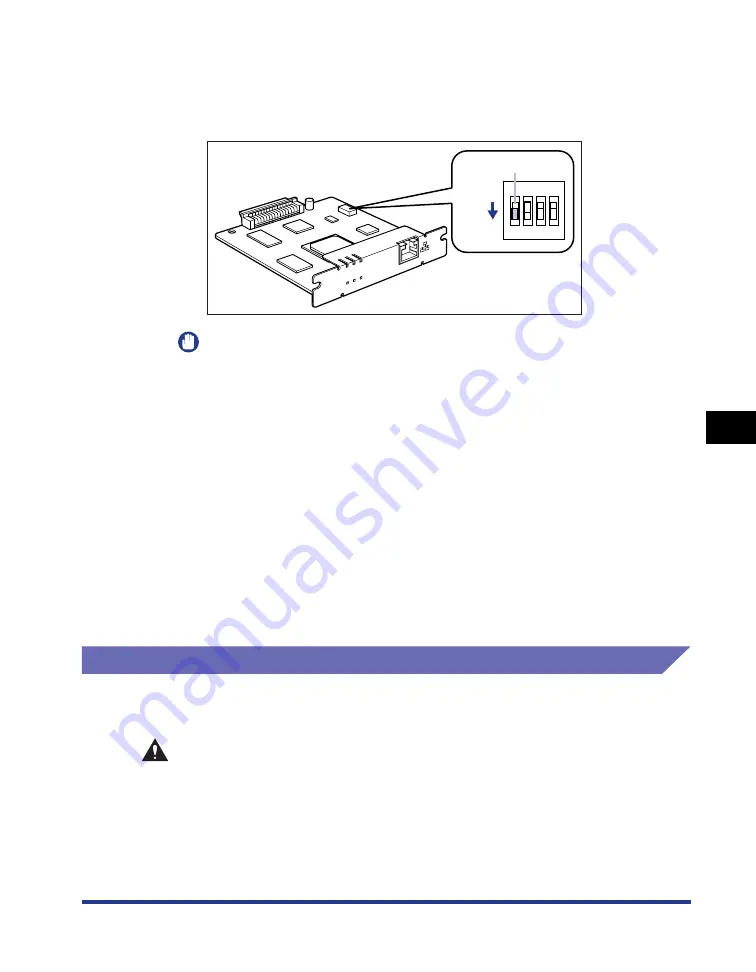
Remove the network board, then reset the DIP switch 1 to
OFF.
Set the DIP switches with the tip of a ball-point pen etc.
IMPORTANT
When setting the DIP switches, be careful not to damage the main board with the
tip of a ball-point pen etc. Do not use a sharp object such as a mechanical pencil.
13
Install the network board.
14
Connect the interface cables except for the USB cable, and
connect the power cord.
15
Plug the power plug into the AC power outlet.
16
Connect the USB cable as needed.
Removing the Network Board
Remove the network board using the following procedure. Have ready the protective
plate and screws for the expansion slot removed when the network board was installed.
CAUTION
•
Be sure to turn the printer and computer OFF and disconnect all the interface
cables and power cord from the printer before removing the network board. If a
USB cable is connected, turn the computer off, and then remove the USB cable.
If you attempt to remove the network board when the printer is ON or any cable
is connected to the printer, this may result in an electrical shock.
•
Be careful when handling the network board. Touching the edges or a sharp
portion of the network board may result in personal injury.
ERR LNK 100
NB-C1
OFF
OFF
1
2
3
4
DIP switch 1
Summary of Contents for Laser Shot LBP5000
Page 2: ...LBP5000 Laser Printer User s Guide ...
Page 25: ...xxii ...
Page 298: ...5 21 Routine Maintenance 5 Calibrating the Printer 4 Click OK ...
Page 391: ...7 44 Troubleshooting 7 Confirming the Printer Features ...
Page 397: ...8 6 Appendix 8 Dimensions of Each Part Paper Feeder Unit PF 92 410 407 125 118 mm ...
Page 417: ...8 26 Appendix 8 Location of the Serial Number ...
Page 418: ...R IE 695AA CANON INC 2005 ...


