Chapter 18
18-25
1) If the machine is on, go through the HDD shut-down instructions, and turn off the main power.
2) Connect the USB device to the USB port.
3) Put the machine in download mode (normal or safe).
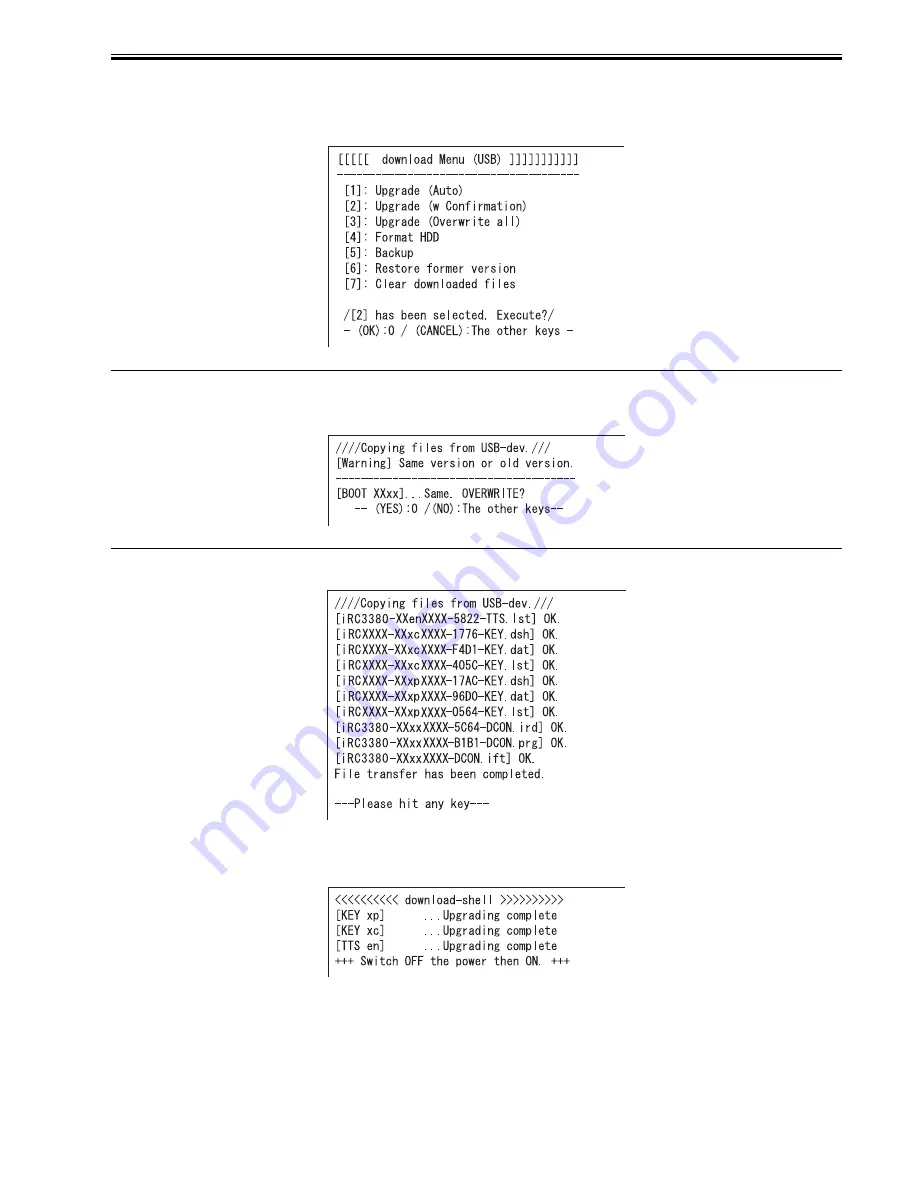
4) Go through the instructions indicated on the control panel, and press the appropriate key.
[2] -> [0]:
execute download / other than [0]: go back to Menu screen
F-18-53
MEMO:
If the system software in the USB device is found to be of the same or older version, a message will appear asking you if you want to overwrite. Go though the
instructions on the control panel, and press the appropriate key.
[0]: overwrite / other than [0]: do not overwrite
F-18-54
5) While downloading is under way, the control panel screen shows its progress. At the end of downloading, a message will appear asking you to press a key. Press
the appropriate key. If the machine is in normal mode, it starts the shut-down instructions.
F-18-55
6) When a message appears asking you to turn off the power, turn off the main power switch, remove the USB device, and turn on the main power switch.
7) Upon start-up, the machine starts to write the system software to the system area of the HDD or the flash ROM. At the end of writing to the HDD, a message
will appear asking you to turn off and then back on the power. Turn off and then back on the main power switch.
F-18-56
18.6.5 Downloading the System Software (all overwriting)
0014-4507
/ / / / iR C3380i / iR C3380 / iR C2880i / iR C2880
[3]: Upgrade (Overwrite all)
The system software in the USB device will overwrite the software on the HDD regardless of the version of the latter. Unlike menu item [1], however, the
machine will not restart on its own at the end of downloading. When the power is turned off and then back on manually, the machine starts writing the system
software.
Summary of Contents for iR C2880 series
Page 1: ...Aug 29 2006 Service Manual iR C3380 2880 Series ...
Page 2: ......
Page 6: ......
Page 23: ...Chapter 1 Introduction ...
Page 24: ......
Page 26: ......
Page 52: ......
Page 53: ...Chapter 2 Installation ...
Page 54: ......
Page 127: ...Chapter 3 Basic Operation ...
Page 128: ......
Page 130: ......
Page 136: ......
Page 137: ...Chapter 4 Main Controller ...
Page 138: ......
Page 160: ......
Page 161: ...Chapter 5 Original Exposure System ...
Page 162: ......
Page 188: ...Chapter 5 5 24 F 5 68 4 Remove the original sensor 2 hook 1 F 5 69 ...
Page 189: ...Chapter 6 Laser Exposure ...
Page 190: ......
Page 192: ......
Page 206: ......
Page 207: ...Chapter 7 Image Formation ...
Page 208: ......
Page 256: ......
Page 257: ...Chapter 8 Pickup Feeding System ...
Page 258: ......
Page 262: ......
Page 303: ...Chapter 9 Fixing System ...
Page 304: ......
Page 306: ......
Page 321: ...Chapter 10 Externals and Controls ...
Page 322: ......
Page 326: ......
Page 336: ...Chapter 10 10 10 F 10 10 2 Remove the check mark from SNMP Status Enabled ...
Page 337: ...Chapter 10 10 11 F 10 11 ...
Page 359: ...Chapter 11 MEAP ...
Page 360: ......
Page 362: ......
Page 401: ...Chapter 12 RDS ...
Page 402: ......
Page 404: ......
Page 411: ...Chapter 13 Maintenance and Inspection ...
Page 412: ......
Page 414: ......
Page 416: ...Chapter 13 13 2 F 13 1 8 9 1 2 3 3 5 6 7 10 11 12 13 14 4 ...
Page 421: ...Chapter 14 Standards and Adjustments ...
Page 422: ......
Page 424: ......
Page 431: ...Chapter 15 Correcting Faulty Images ...
Page 432: ......
Page 434: ......
Page 459: ...Chapter 16 Self Diagnosis ...
Page 460: ......
Page 462: ......
Page 481: ...Chapter 17 Service Mode ...
Page 482: ......
Page 484: ......
Page 571: ...Chapter 18 Upgrading ...
Page 572: ......
Page 574: ......
Page 603: ...Chapter 19 Service Tools ...
Page 604: ......
Page 606: ......
Page 609: ...Aug 29 2006 ...
Page 610: ......


