Chapter 4
4-16
4.3.6 Cutter
0023-3213
iPF765 / iPF760 / iPF750 / iPF755
a) Cutter
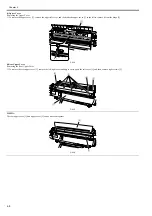
Removing the Cutter
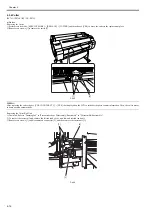
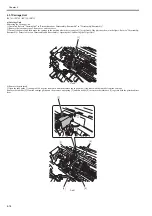
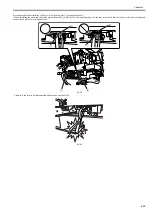
1) Perform service mode: [SERVICE MODE] > [REPLACE] > [CUTTER] and then choose [YES] to move the cutter to the replacement place.
2) Remove two screws [1] to remove the cutter [2].
F-4-33
MEMO:
After replacing the cutter, choose [CLR COUNTER CT-1] > [YES] that displayed on the LCD to initialize the parts counter information. Then, the cutter moves
to home position automatically.
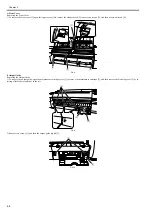
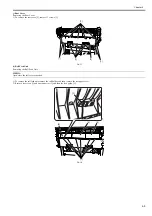
Removing the Cutter Rail Unit
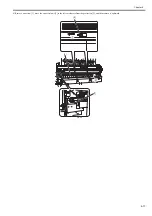
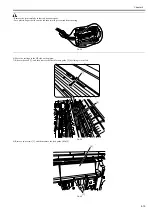
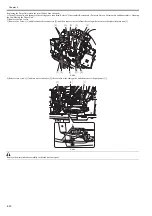
1) Drain ink. Refer to "Draining Ink" in "Precautions about Disassembly/Reassembly" in "Disassembly/Reassembly".
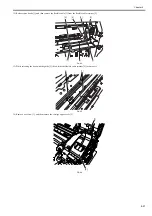
2) To remove the cutter rail unit, remove the left ink tank cover, mist fan, and left ink tank unit.
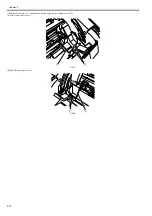
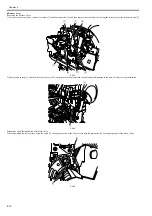
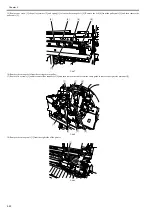
3) Remove two screws [1] and disconnect one connector [2], and then remove the cutter unit [3].
F-4-34
[1]
[2]
[2]
[3]
[1]
Summary of Contents for iPF750 series
Page 1: ...Jul 25 2012 Service Manual iPF760 750 series ...
Page 2: ......
Page 6: ......
Page 11: ...Chapter 1 PRODUCT DESCRIPTION ...
Page 12: ......
Page 14: ...Contents 1 7 3 5 Self diagnostic Feature 1 71 1 7 3 6 Disposing of the Lithium Battery 1 72 ...
Page 87: ...Chapter 2 TECHNICAL REFERENCE ...
Page 88: ......
Page 99: ...Chapter 2 2 9 ...
Page 145: ...Chapter 3 INSTALLATION ...
Page 146: ......
Page 148: ......
Page 152: ......
Page 153: ...Chapter 4 DISASSEMBLY REASSEMBLY ...
Page 154: ......
Page 156: ......
Page 214: ...Chapter 4 4 58 2 Shaft Cleaner 1 F 4 119 1 ...
Page 215: ...Chapter 4 4 59 3 Upper Cover Hinge Catch 1 Roll Cover Slide Guide 2 F 4 120 2 1 ...
Page 218: ......
Page 219: ...Chapter 5 MAINTENANCE ...
Page 220: ......
Page 222: ......
Page 227: ...Chapter 5 5 5 ...
Page 228: ......
Page 229: ...Chapter 6 TROUBLESHOOTING ...
Page 230: ......
Page 232: ......
Page 250: ......
Page 251: ...Chapter 7 SERVICE MODE ...
Page 252: ......
Page 254: ......
Page 305: ......
Page 306: ......
Page 307: ...Chapter 8 ERROR CODE ...
Page 308: ......
Page 310: ......
Page 327: ...Jul 25 2012 ...
Page 328: ......

