9
In the
A
Page Size
list, click the size of the original as specified in the application. In this case, click
ISO
A4
.
10
Select the
C
Enlarged/Reduced Printing
check box.
11
Click
ISO A4
in the
G
Paper Size
list.
12
Click
F
Scaling
and enter
120
.
Note
•
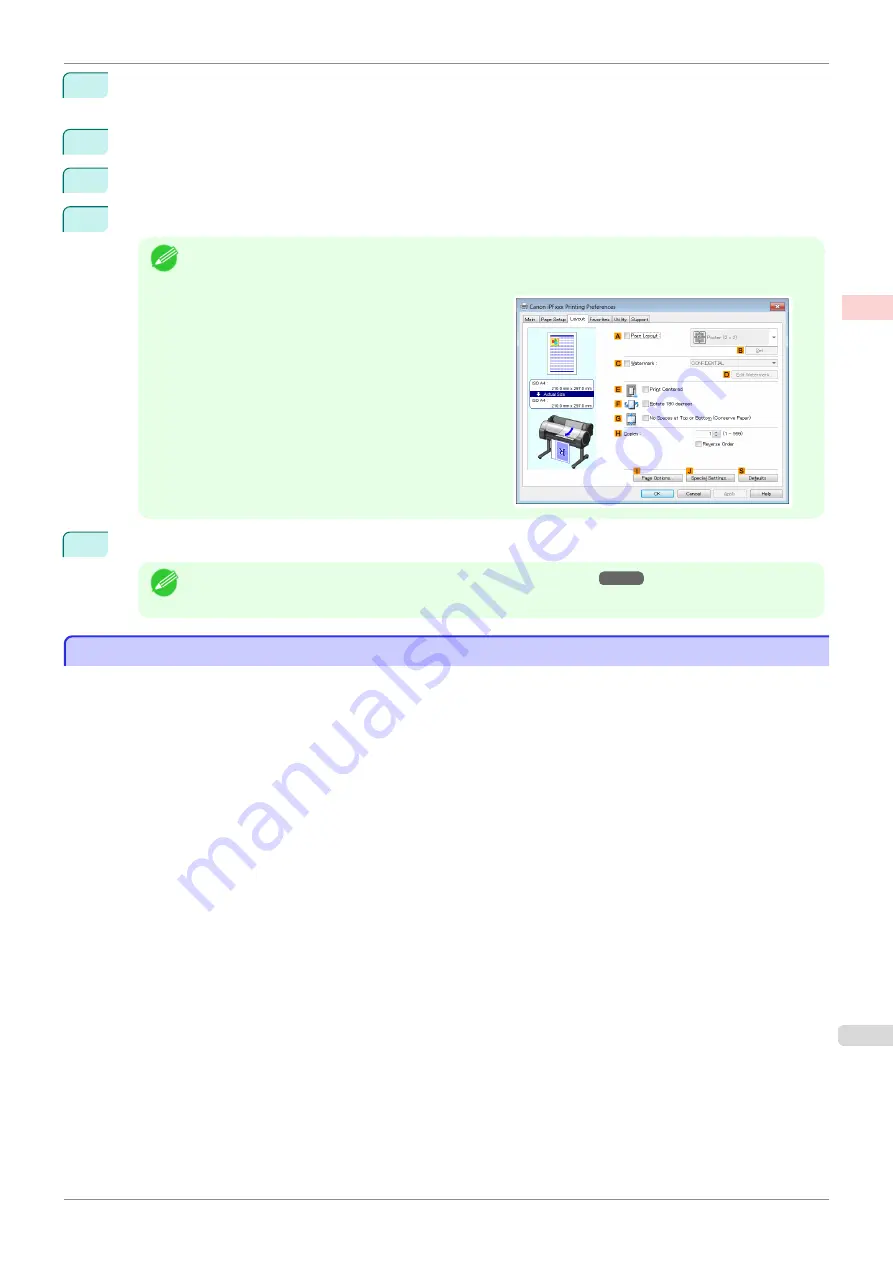
You can specify enlargement that exceeds the paper size, but in this case, the portions off the bottom and
right edges of the paper will not be printed.
•
If the original size after enlargement or reduction is
smaller than the paper size, the original is printed in
the upper-left corner. In this case, you can center
originals by selecting
E
Print Centered
on the
Lay-
out
sheet.
13
Confirm the print settings and print as desired.
Note
•
For tips on confirming print settings,
see "Confirming Print Settings ."
Resizing Originals by Entering a Scaling Value (Mac OS)
Resizing Originals by Entering a Scaling Value (Mac OS)
This topic describes how to enlarge originals before printing by entering a scaling value, based on the following
example.
•
Document: Any Type
•
Page size: A4 (210.0 × 297.0 mm [8.3 × 11.7 in])
•
Paper: Roll paper
•
Paper type: Plain Paper
•
Roll paper width: A2/A3 roll (420.0 mm [16.5 in])
iPF785
Resizing Originals by Entering a Scaling Value (Mac OS)
Enhanced Printing Options
Printing enlargements or reductions
67
Summary of Contents for imageprograf IPF785
Page 14: ...14 ...
Page 28: ...iPF785 User s Guide 28 ...
Page 248: ...iPF785 User s Guide 248 ...
Page 432: ...iPF785 User s Guide 432 ...
Page 464: ...iPF785 User s Guide 464 ...
Page 518: ...iPF785 User s Guide 518 ...
Page 534: ...iPF785 User s Guide 534 ...
Page 638: ...iPF785 User s Guide 638 ...


