Open the network folder.
Windows Vista/Server 2008
[Start]
select [Network].
Windows 7/Server 2008 R2
[Start]
[Computer]
select [Network].
Windows 8/Server 2012
Right-click the lower-left corner of the screen
[File Explorer]
select [Network].
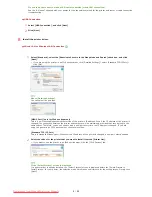
Right-click the newly added printer icon, and click [Install].
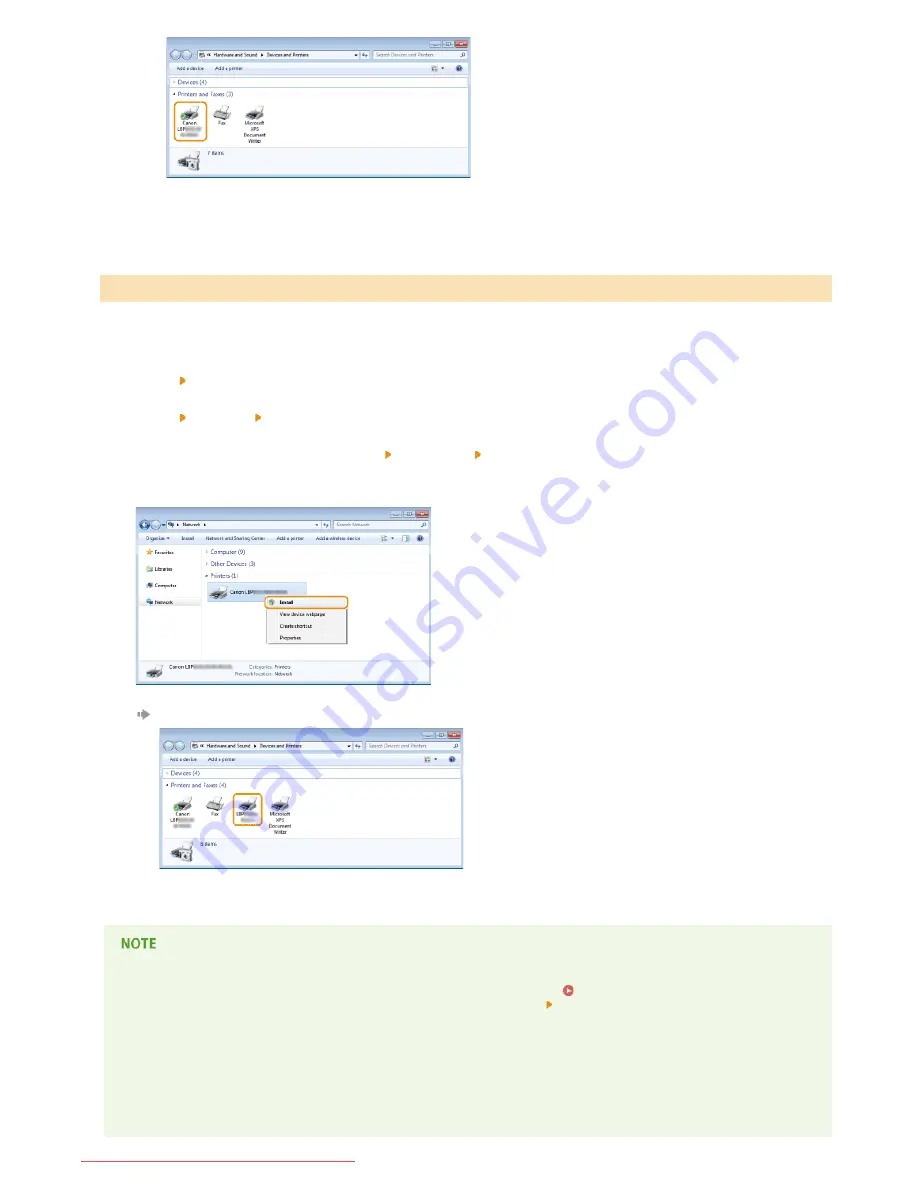
Installation for using WSD is complete when an icon for the printer is added to the printer folder.
Deleting Unneeded Printer Icons
When you have finished installing the network printer, the icon added in step 13 of
Installing a Printer Driver
is no longer
needed. To delete the icon, right-click it and select [Remove device] or [Delete] click [Yes].
Adding a Network Printer
1
2
㻞㻝㻌㻛㻌㻡㻢
Downloaded from ManualsPrinter.com Manuals
Summary of Contents for imageClass LBP6230dw
Page 1: ...㻝㻌㻛㻌㻞㻠㻜 Downloaded from ManualsPrinter com Manuals ...
Page 49: ...LINKS Basic Print Operations 㻠㻥㻌㻛㻌㻞㻠㻜 Downloaded from ManualsPrinter com Manuals ...
Page 87: ...LINKS Configuring Printer Ports 㻤㻣㻌㻛㻌㻞㻠㻜 Downloaded from ManualsPrinter com Manuals ...
Page 91: ...Click Close 3 Click OK 4 㻥㻝㻌㻛㻌㻞㻠㻜 Downloaded from ManualsPrinter com Manuals ...
Page 109: ...㻝㻜㻥㻌㻛㻌㻞㻠㻜 Downloaded from ManualsPrinter com Manuals ...
Page 189: ...Close the top cover 5 㻝㻤㻥㻌㻛㻌㻞㻠㻜 Downloaded from ManualsPrinter com Manuals ...
Page 222: ...Click Back Exit 6 㻞㻞㻞㻌㻛㻌㻞㻠㻜 Downloaded from ManualsPrinter com Manuals ...
Page 241: ...㻝㻌㻛㻌㻡㻢 Downloaded from ManualsPrinter com Manuals ...
Page 253: ...7 Click Next Exit 㻝㻟㻌㻛㻌㻡㻢 Downloaded from ManualsPrinter com Manuals ...
Page 262: ...㻞㻞㻌㻛㻌㻡㻢 Downloaded from ManualsPrinter com Manuals ...
Page 273: ...Click OK 4 㻟㻟㻌㻛㻌㻡㻢 Downloaded from ManualsPrinter com Manuals ...
Page 278: ...LINKS Connecting via USB 㻟㻤㻌㻛㻌㻡㻢 Downloaded from ManualsPrinter com Manuals ...


