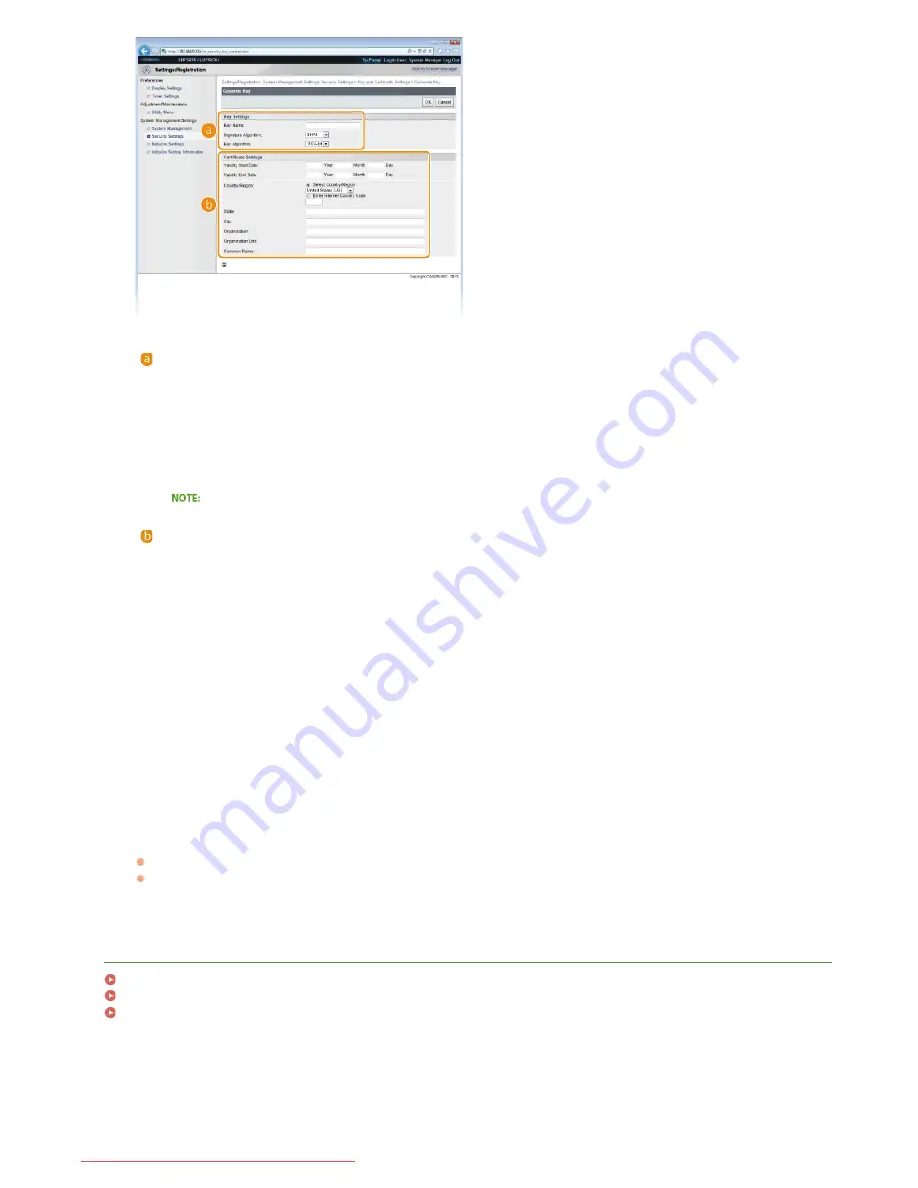
[Key Settings]
[Key Name]
Enter up to 24 alphanumeric characters for naming the key pair. Set a name that will be easy for you to find later in a list.
[Signature Algorithm]
Select the signature algorithm from the drop-down list.
[Key Algorithm]
The algorithm used to generate keys is RSA. Select the key length from the drop-down list. The larger the number for the
key length, the slower the communication. However, the security is tighter.
[512-bit] cannot be selected for the key length, if [SHA384] or [SHA512] is selected for [Signature Algorithm].
[Certificate Settings]
[Validity Start Date]
Enter the first date of validity of the certificate in year/month/day format in the range 1 January 2000 to 31 December
2037.
[Validity End Date]
Enter the last date of validity of the certificate in year/month/day format in the range 1 January 2000 to 31 December
2037. A date earlier than the [Validity Start Date] cannot be set.
[Country/Region]
Click the [Select Country/Region] radio button and select the country/region from the drop-down list. You can also click the
[Enter Internet Country Code] radio button and enter a country code, such as "US" for the United States.
[State]/[City]
As necessary, enter up to 24 alphanumeric characters for the address.
[Organization]/[Organization Unit]
As necessary, enter up to 24 alphanumeric characters for the name of the organization.
[Common Name]
As necessary, enter up to 48 alphanumeric characters for the common name of the certificate. "Common Name" is often
abbreviated as "CN."
Click [OK].
A key pair may take approximately 10 to 15 minutes to generate.
After a key pair is generated, it is automatically registered to the machine.
LINKS
Using CA-issued Key Pairs and Digital Certificates
Verifying Key Pairs and CA Certificates
Enabling SSL Encrypted Communication for the Remote UI
6
㻝㻟㻟㻌㻛㻌㻞㻠㻜
Downloaded from ManualsPrinter.com Manuals
Summary of Contents for imageClass LBP6230dw
Page 1: ...㻝㻌㻛㻌㻞㻠㻜 Downloaded from ManualsPrinter com Manuals ...
Page 49: ...LINKS Basic Print Operations 㻠㻥㻌㻛㻌㻞㻠㻜 Downloaded from ManualsPrinter com Manuals ...
Page 87: ...LINKS Configuring Printer Ports 㻤㻣㻌㻛㻌㻞㻠㻜 Downloaded from ManualsPrinter com Manuals ...
Page 91: ...Click Close 3 Click OK 4 㻥㻝㻌㻛㻌㻞㻠㻜 Downloaded from ManualsPrinter com Manuals ...
Page 109: ...㻝㻜㻥㻌㻛㻌㻞㻠㻜 Downloaded from ManualsPrinter com Manuals ...
Page 189: ...Close the top cover 5 㻝㻤㻥㻌㻛㻌㻞㻠㻜 Downloaded from ManualsPrinter com Manuals ...
Page 222: ...Click Back Exit 6 㻞㻞㻞㻌㻛㻌㻞㻠㻜 Downloaded from ManualsPrinter com Manuals ...
Page 241: ...㻝㻌㻛㻌㻡㻢 Downloaded from ManualsPrinter com Manuals ...
Page 253: ...7 Click Next Exit 㻝㻟㻌㻛㻌㻡㻢 Downloaded from ManualsPrinter com Manuals ...
Page 262: ...㻞㻞㻌㻛㻌㻡㻢 Downloaded from ManualsPrinter com Manuals ...
Page 273: ...Click OK 4 㻟㻟㻌㻛㻌㻡㻢 Downloaded from ManualsPrinter com Manuals ...
Page 278: ...LINKS Connecting via USB 㻟㻤㻌㻛㻌㻡㻢 Downloaded from ManualsPrinter com Manuals ...


