Page 23 of 41
INSTRUCTION, USE AND
MAINTENANCE MANUAL
GB
4. Press the pedal to turn the wheel clockwise until
the whole bead has been lifted from the rim. During
the rotation of the wheel, the bead lifting tool slides
away from the mounting tool moving onto the rim
edge. The plastic protector prevents the lever from
scratching the rim.
5. Lift the tyre and repeat the operation on the other
bead.
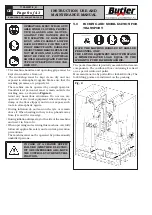
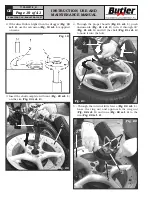
On heavy low-profile tyres, for an easier and safer
demounting, once the upper bead has been broken, it
is advisable to keep pressing until obtaining enough
space to lubricate the groove, the bead seating, and
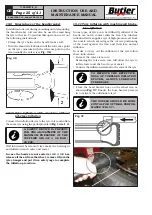
the bead itself. (see
Fig. 31
). Failure to lubricate might
cause friction between the mounting tool and the tyre,
and would cause damage to the tyre and/or the bead.
Lubricate
Fig. 31
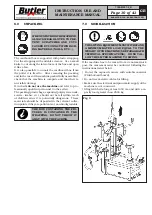
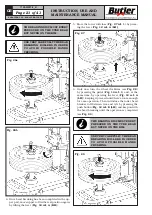
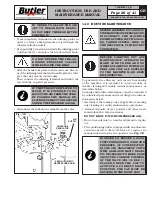
When the upper bead is being demounted, it might
happen that the lower bead re-sets in the rim. In this
case use bead breaker’s lower roll to bead-break again,
and if the tyre should be very wide, push it up to the
mounting tool (see
Fig. 32
).
Fig. 32
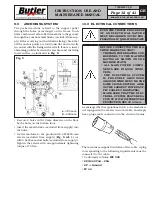
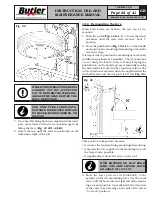
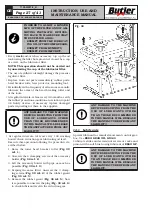
When demounting hard tyres, it may happen that
the bead comes onto the mounting tool with the lip
turned. This causes the bead to slide from the lever
when clockwise rotation begins. To avoid this problem
rotate the wheel slightly anti-clockwise until the bead
flattens. Now the clockwise demounting cycle can begin
(see
Fig. 33
).
NO
YES
Fig. 33
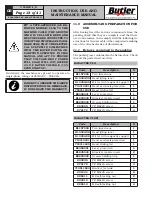
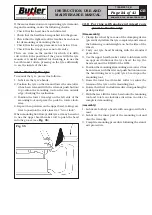
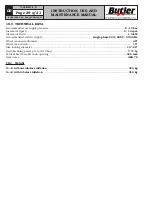
When demounting hard low-profile tyres, it might
happen that the bead pushes up the mounting tool. It
may be found useful to use the upper bead-breaking
roller to push the bead down to create enough space
to position the lever and at the same time pushing up
the tool holder arm down (
Fig. 34
).
Fig. 34
KARACTER.TLX - KARACTER.TLXFI
7108-M007-0_B

