Page 22 of 41
GB
INSTRUCTION, USE AND
MAINTENANCE MANUAL
13.6 Demounting the tyre
When both beads are broken, the tyre can be de-
mounted.
1. Push the pedal (
Fig. 14 ref. 1
) to rotate the wheel
clockwise until the valve stem reaches “hour 1”
position.
2. Press the push button (
Fig. 13 ref. 1
) on the handle
and position the mounting/demounting arm on the
rim outer edge.
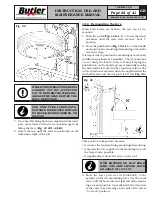
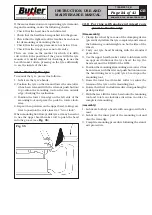
It is important to position the mounting arm correctly
(2 different positions are possible). The two positions
are set using the knob on the rod and, keeping the
push button on the handle pressed, manually moving
the arm until it is locked in the required position. The
correct position is achieved when the angle between the
tool holder arm and the rim plate is 90° (see
Fig. 30
).
Fig. 30
This position is important because:
• It reduces the tension during mounting/demounting.
• It spreads the force applied to the mounting tool over
the largest area possible.
• It significantly reduces the wear on the tool.
WITH ROUNDED OR FLAT EDGE
RIMS, THE ARM SHOULD HAVE
AN ANGLE OF 100°/110°.
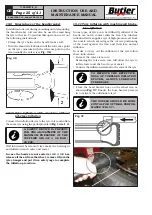
3. Move the lever protector (# B0326001) to the
pointed end of the bead lifting lever. Use the same
lever to lift the bead onto the right end of the mount-
ing tool and position it parallel with the rim plate
at the same time pressing on the side of the tyre at
“6 o’clock” position.
Fig. 29
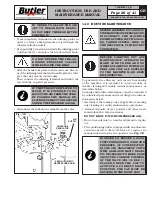
WHILE THIS OPERATION IS BEING
CARRIED OUT PAY ATTENTION
NOT TO DEFORM THE TYRE SIDE.
GREASE THE BEAD BEFORE THE
ROLL RE-ENTERS.
USE ONLY TYRE LUBRICANTS.
SUITABLE LUBRICANTS CONTAIN
NO WATER, HYDROCARBONS, OR
SILICON.
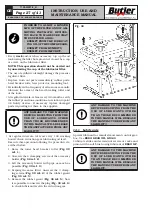
7. Once bead breaking has been completed in the lower
part, move lower roll in the rest position again, by
lifting the lever (
Fig. 12 rEf. A (LH)
).
8. Rotate the rim until the valve is positioned on the
immediate right of the roll.
KARACTER.TLX - KARACTER.TLXFI
7108-M007-0_B

