


Using the XSpect Pro Program
72
User Manual
If reference points are set, all measurement points are defined relatively to those positions. This
allows to transfer a large list of measurement points to multiple samples even if the samples are
shifted or rotated.
When a stage program is loaded, move to the first reference point and click the accept ref button.
Then go to the second reference point (if there are two) and click the accept ref button again. All
measurement points will be recalculated based on the shift of those point(s).
During Stage program creation, the definition of reference points is performed by moving the stage
onto a characteristic position of the sample and clicking the
button.
It is recommended, though not necessary, to define at first the reference positions and afterwards
all measurement points. When two reference points are used, it is recommended to use two distinct
positions on the sample which are far apart. This enables higher precision for rotation correction. A
comment can only be added by typing it before adding the respective reference point.
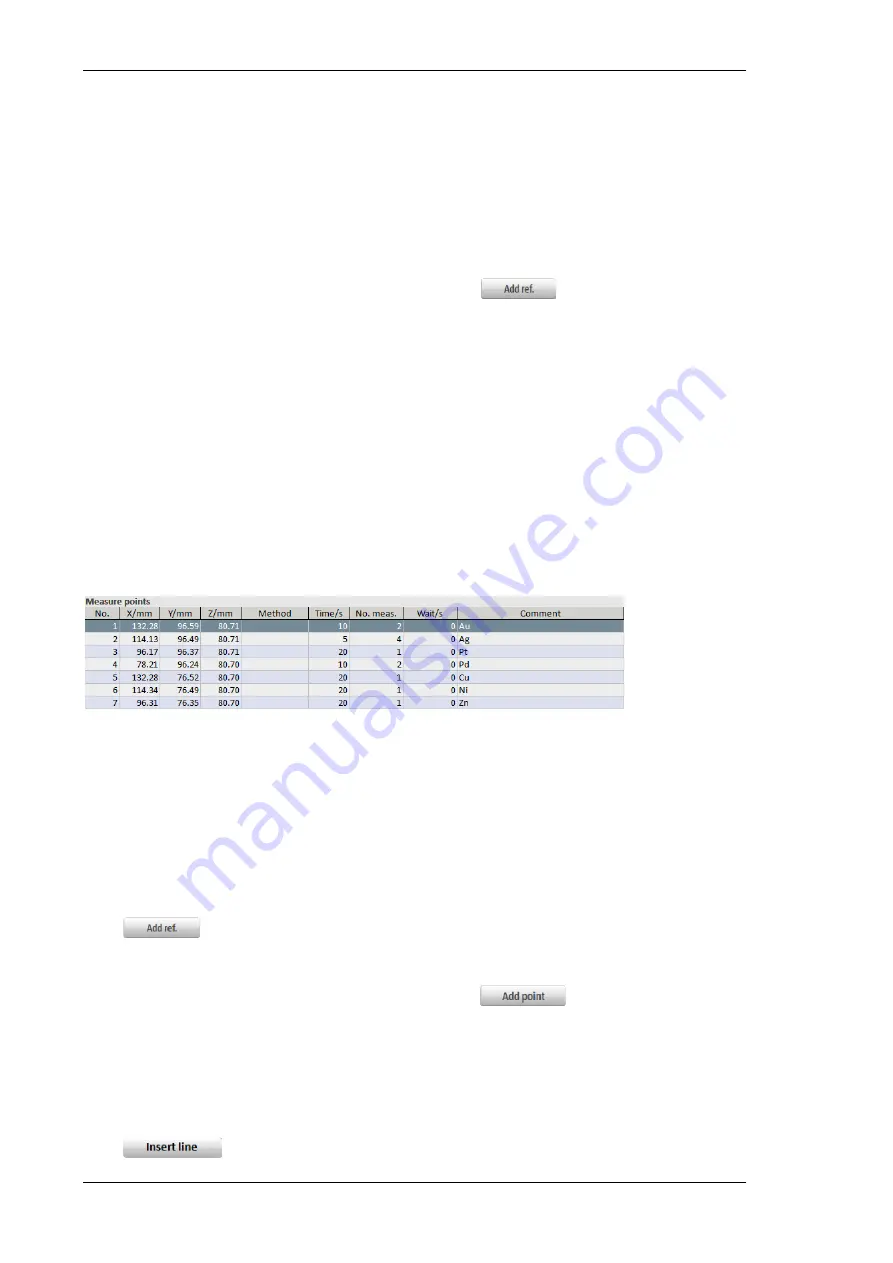
5.6.4 Measure Points Table
The lower of the two visible tables is the
Measure points
table.
The coordinates of all defined measurement positions, as well as additional information like
measurement time or number of measurements at this position are displayed. The points are listed
in the succession of their measurement.
Fig. 53 Table of measurement positions
5.6.5 Create/Edit Stage Programs
There are different ways to create or edit stage programs and set reference and measurement
points.
Stage program with reference points:
Align the crosshair in the video image with a characteristic point of the sample and press the
button. Repeat this at a second position if higher precision is needed. Note that a
second position is mandatory if sample rotation has to be corrected.
Point-by-point setup:
Move the stage to each desired position and click the
button. The xyz
coordinates of this point will be added to the measurement positions table.
Setup line:
Add measurement points as start and end of a line. Mark both points in the measurement
positions table using the <Shift> key and mouse. Select
Line
in the Line/Rectangle dialog
and type the desired number of points (including the already existing start and end point).
The distance in millimeters between two points of the line is displayed. Click the
button.


