How to use the Add-In function in Microsoft applications (P-touch Editor 5.x for Windows)
You can create and print labels quickly and easily by highlighting (selecting) the text/data and clicking the P-touch Add-In icon
in Microsoft Word, Excel or Outlook.
Setting the Add-In function using the Add-Ins Utility
Recording the text/data in the Label List
Setting the Add-In function using the Add-Ins utility
Make sure that the applications you want to change the settings for are not running before changing the settings.
1. Click [
Start
] - ([
All Programs
] or [
Programs
]) - [
Brother P-touch
] - ([
P-touch Tools
]) - [
P-touch Editor 5.x Add-Ins Utility
].
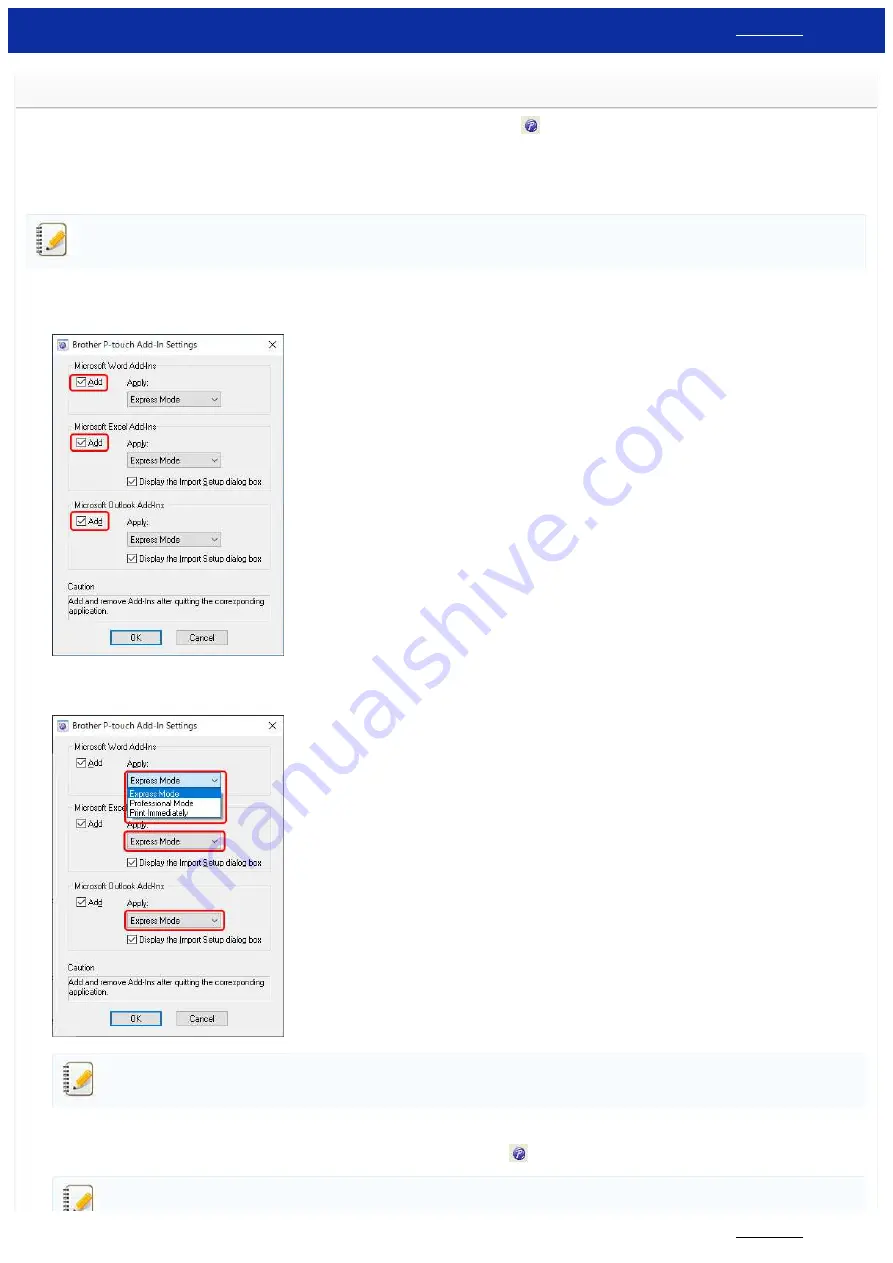
2. The Brother P-touch Add-In Settings dialog box appears.
Check the "
Add
" checkboxes for the applications that you want to use the P-touch Add-Ins with.
3. Select the P-touch Editor mode from the "
Apply
" list for each application.
To import the text/data into a label, select [
Express Mode
] or [
Professional Mode
].
To print directly from the application, select [
Print Immediately
].
When selecting [
Print Immediately
], the default or the last used layout style for currently installed label/tape size will be applied to the text/data you highlight.
4. Click [
OK
] to close the dialog box.
5. Open the Microsoft application and highlight the text or data you want to pirnt, and then click the P-touch Add-In icon
.
The Add-In icon may not appear in Microsoft Word when you open Microsoft Outlook first.
If Outlook is running, close both Word and Outlook, reopen Word and then check if the Add-In icon appears.
RJ-3150
28 / 237


