62
Chapter 2 Playing a Song
* When switching to User Styles (USER or CARD) that use a
lot of memory, the message “No More Memory!” may be
displayed, and in some cases, the data may not be played, even
though it is recorded in the Form. In such situations, you can
either switch to a Preset Song or a User Song that uses less
memory, or you can enable play of all Forms by reducing Song
or Style data.
Furthermore, be careful to note that in situations such as
mentioned above, where you are unable to play previously
recorded Forms, if you attempt a Style recording all the Forms
could get overwritten.
Playing with Forms You
Select Yourself
You can have a song played using Forms that you have
selected.
* When a Form is switched, the entire sequence of forms set for
the Song is disabled. When [RESET] is pressed, the sequence
of forms set for the Song is restored.
1.
Press [FORM] ([INTRO] through [ENDING]) to select
the first Form to be played.
If you select a form other than the currently selected
form (for which the button is lit), the button will blink,
and playback will pause.
2.
Press [START], and playback will begin with the
currently selected form.
When the first-selected form finishes playing, playback
will switch to the form that had been paused. The button
will change from blinking (paused) to lit (playing).
3.
Press [FORM] (INTRO–ENDING) to switch the Form.
The form will change at the measure following the point
where you pressed the button, and the button will
change from blinking to lit.
■
In the case of VERSE 1 and VERSE 2, the performance
will continue repeating until playback switches to the next
form.
■
If you switch to either FILL 1, FILL 2, BREAK 1, or
BREAK 2, playback will automatically switch to the
previously-selected VERSE 1 or VERSE 2 when the
performance ends.
■
In the case of ENDING, you will return to the beginning
of the song when playback ends.
* When playback reaches the number of measures specified for
the song, playback will stop and you will return to the
beginning of the song.
Playing with Chords You
Enter Yourself
You can play a song using chords you enter yourself.
* When you enter a chord, all the set chords in the song are
deactivated. With performance halted, pressing [RESET]
enables the song’s set chord progression.
While the Performance is Stopped
* Pressing [RESET] returns you to the first measure; press
[RWD] or [FWD] to move to the previous or following
measure.
1.
Press [CHORD], getting the button to light.
2.
Use the following buttons to enter a chord.
■
Use [C] through [B] and [#/
b
] to specify the root of the chord.
Pressing [#/b] repeatedly cycles through the selections of
“#,” “b,” and “none.”
* Depending on the root of the chord, the symbols that can be
selected may differ.
■
Use [Maj] through [9th] to specify the chord type.
When selecting a Chord Type other than [Maj] through
[9th], press [CURSOR], making the display flash, then
turn [VALUE] to select the chord type.
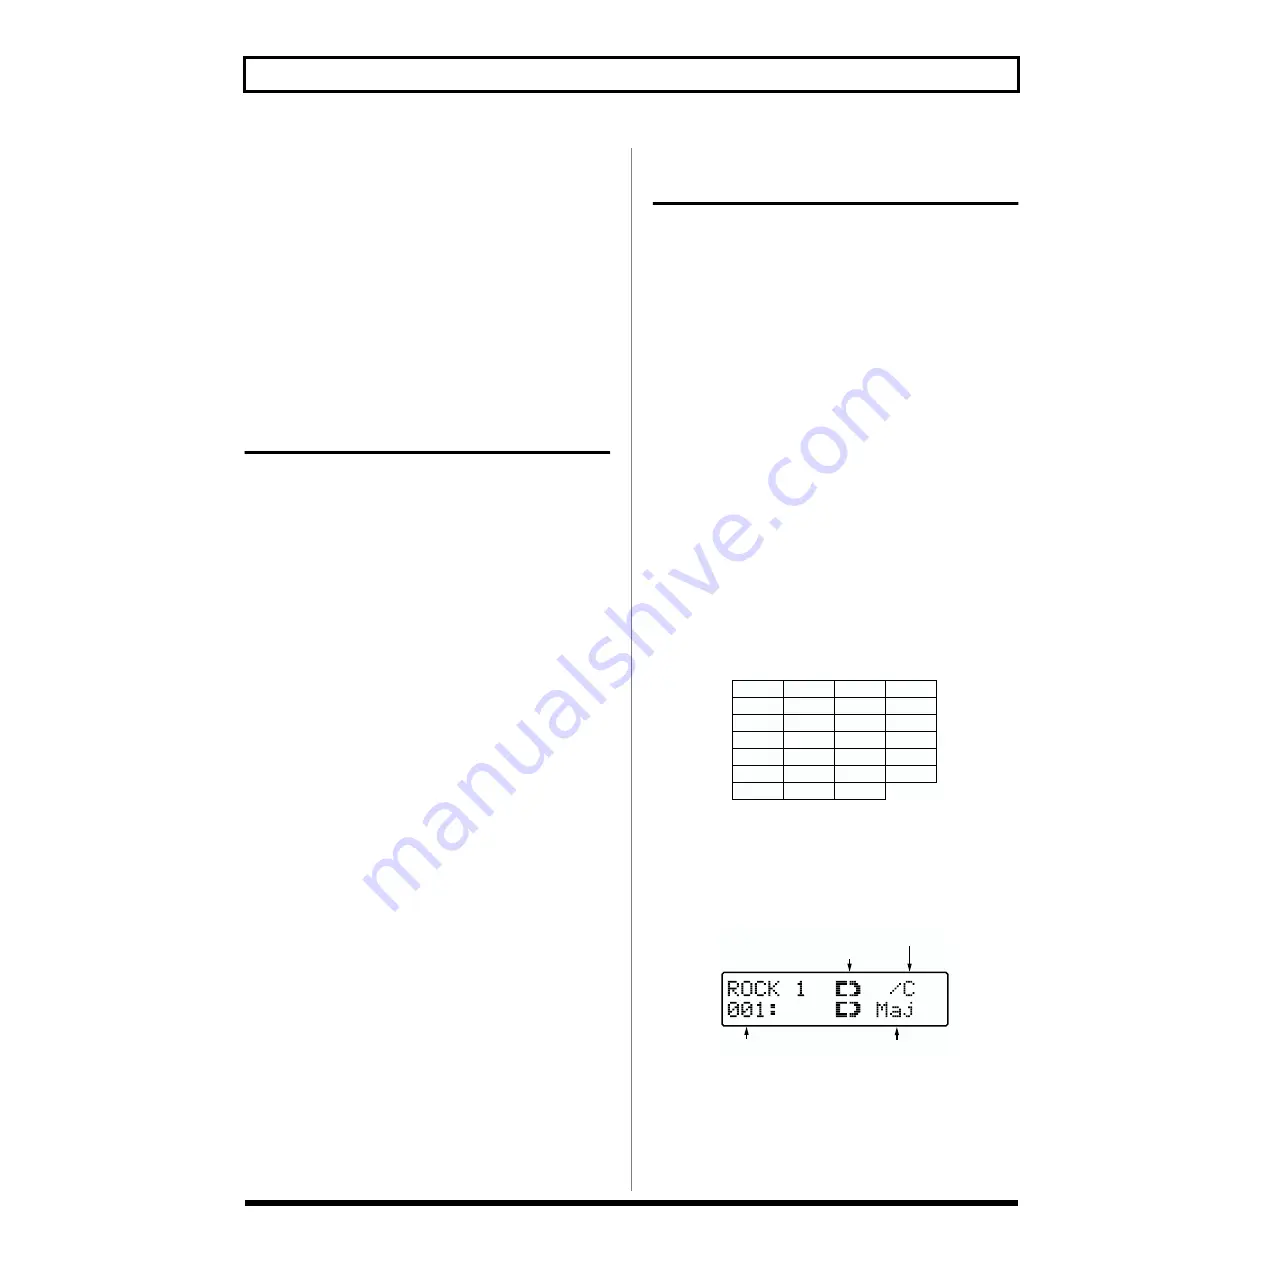
fig.RE02-30
■
To specify an On-Bass chord, hold down [SHIFT] and
use [C] through [B] and [#/
b
] to specify the bass tone.
* To eliminate an On-Bass chord, press [CURSOR] to get the
On-Bass Chord indication to begin flashing, then turn
[VALUE] so that “–” is selected.
fig.RE02-10
3.
When [START] is pressed, the performance begins
with the input chord.
4.
Input the chords as needed.
* You cannot select a chord type other than [Maj] through [9th]
while the song is being played.
- -
(N.C)
Maj
M7
M9
7
7(13)
7b5
7#9
6
69
m6
m69
add9
9
madd9
mM9
m
mM7
m7
dim
m9
sus4
7sus4
aug
aug7
7b9
m7b5
Song number
Chord type
On-Bass chord
Chord root


