125
12
Chapter 12 Using Memory Cards
You can do the following by using optional memory cards
(SmartMedia) with the JS-5.
●
You can save up to maximum100 User Songs
(including audio data) and up to maximum 20 different
User Styles.
User Songs and User Styles stored on memory cards
can be handled just like the User Songs and User
Styles stored in the User Memory.
●
You can save the entire collected data and all of the JS-
5’s settings, including the system settings, to a memory
card, and then restore (load) them to the JS-5 whenever
necessary.
Handling Memory Cards
Purchase SmartMedia at your local computer dealer or
digital-camera vendor.
* The JS-5 can use 8 MB to 64 MB smart media with a
power-source voltage of 3.3 V.
* Roland S2M-5/S4M-5 SmartMedia cannot be used.
■
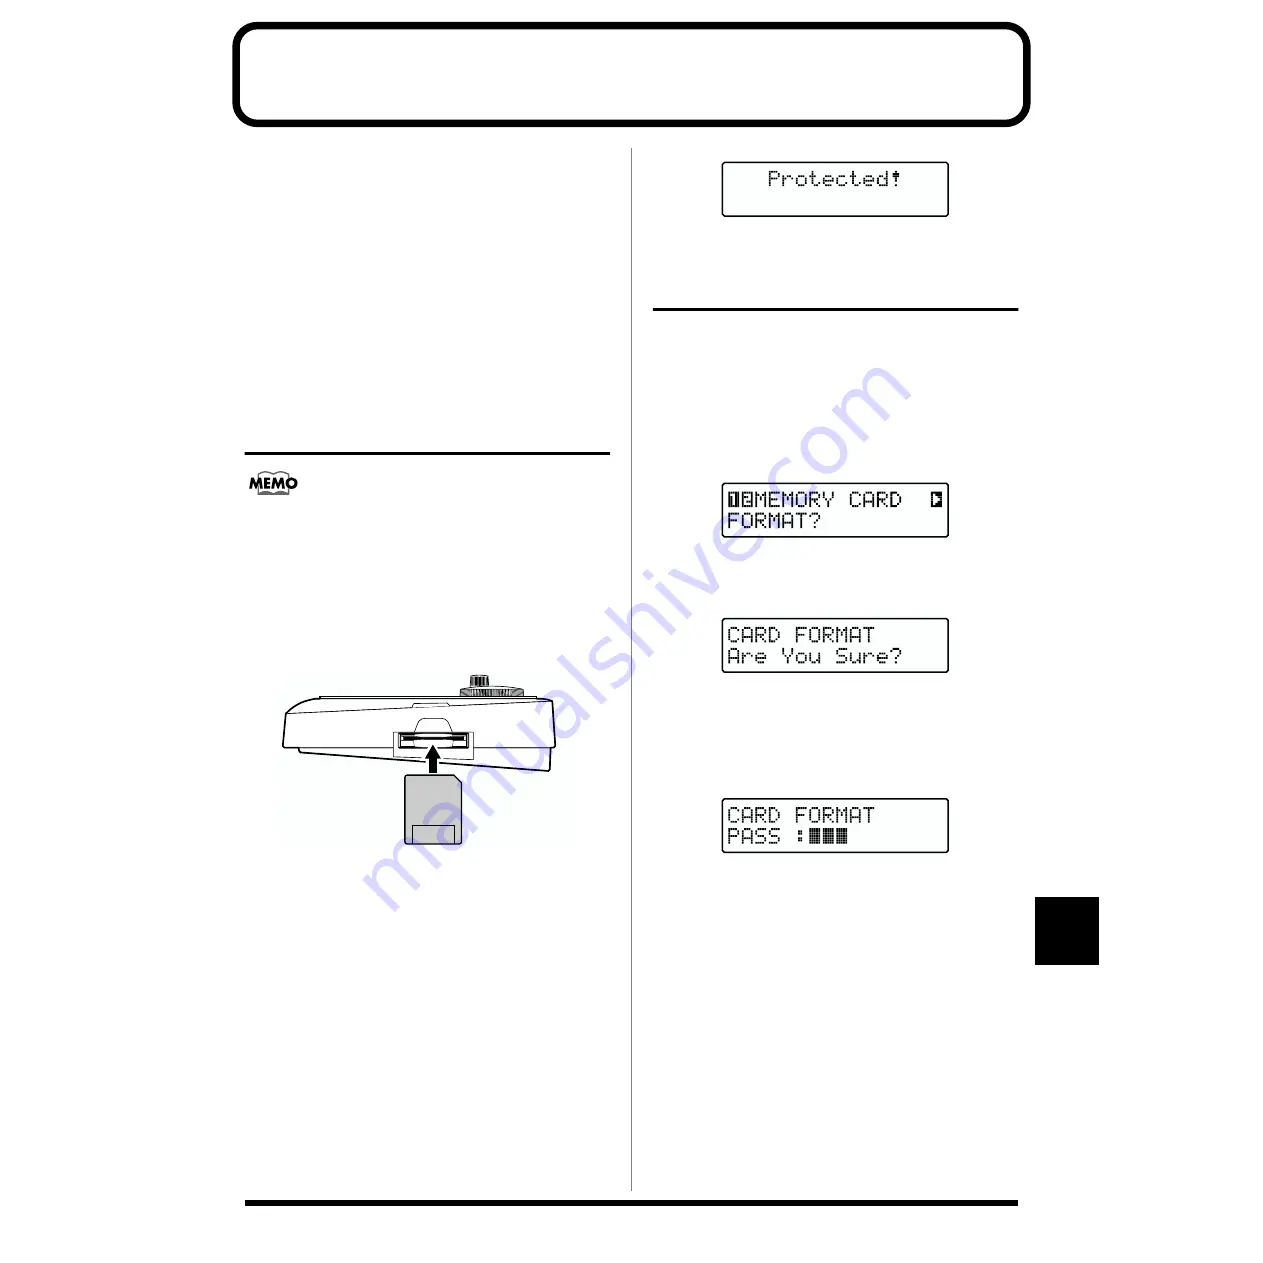
Insert memory cards in the MEMORY CARD slot only
when the performance of a Song is stopped.
fig.RE12-01
* Insert memory card so that the surface with the (gold) contacts
is not facing up.
* Insert the card firmly and completely in the slot.
* Do not the card contacts, or allow them to become dirty or
grimy.
* Never remove the memory card or turn off the power to the JS-
5 when carrying out an operation involving the card (such as
formatting or reading and writing data); this may ruin your
data, or even render the card unusable.
* Attaching a Write Protect sticker to the Write Protect area on
a card disallows formatting and writing of data to the card.
For more detailed information about the Write Protect sticker,
refer to the owner’s manual provided with the memory card. If
you attempt to format or write data to a card that has a Write
Protect sticker attached, the following screen appears.
fig.RE12-02
Initializing the Memory Card
Memory card must be formatted before they can be used for
the JS-5.
Furthermore, cards already used in a JS-5 that have been
cleared of data must also be formatted.
1.
Press [UTILITY].
2.
Press [CURSOR] to select “12 CARD FORMAT?”.
fig.RE12-06
3.
Press [ENTER].
The Format Confirmation screen appears.
fig.RE12-03
* To cancel, press [EXIT].
4.
Press [ENTER] to begin formatting the card.
The following screen appears, and the formatting
process starts.
fig.RE12-04
When the format is finished, the display will indicate
“Completed!”
The surface without
gold contacts
must be upward


