EN
WWW.BORMANNTOOLS.COM
7
A. Operating check list
1. Operating Location
Only use OUTSIDE and place the generator in a well-ventilated area. Only operate the generator on a flat, level surface and in a clean, dry operating environ
-
ment. Allow two feet clearance on all side of the generator while operating it outdoors. Please consult your local authority. In some areas, generators must be
registered with the local utility. Generators used to construction sites may be subject to additional rules and regulations.
DANGER! TOXIC FUMES
The exhaust of the generator contains carbon monoxide, an odourless, colourless, poison gas. Using engine indoors CAN KILL YOU! NEVER use inside any build
-
ing or any kind of enclosure, EVEN IF doors and windows are open. Place the generator In a well-ventilated area and carefully consider wind and air currents
when positioning generator.
High altitude
This engine may require a high altitude carburettor kit to ensure correct operation at high altitudes. Consult your local dealer for high altitude kit information
if you always operate your engine at altitudes above 5,000 feet (1,500 meters).
CAUTION!
Even with carburettor modification, generator horsepower will decrease about 3.5% for each 1,000 feet (300 meters) increase in altitude. The effect
of altitude on horsepower will be greater than this if no carburettor modification is made.
CAUTION!
Operation the engine at altitude below 5,000 feet (1,500 meters) with modified carburettor may cause the generator to overheat result in serious
engine damage.
2. Operating Condition
Check for loose or damaged arts, signs of oil or fuel leaks,and any other condition that may affect proper operation. Repair or replace all damaged or defective
parts immediately.
WARNING
:
Failing to correct problem(s) before operation could result in property damage, serious injury or even death.
Remove any excessive dirt or debris, especially around the muffler and recoil starter. DO NOT move or tip the generator during operation. Use generator only
for Intended uses. If you have questions about intended use, ask your local dealer.
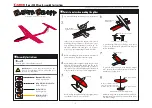
Fuel tank cap
Remove the fuel tank cap by rotating it anticlockwise.
Push-button start (If applicable)
You can start the generator by pressing a switch
with your finger.
Ventilation knob
The fuel tank cap is equipped with the ventilation knob to prevent leakage of fuel. The ventilation knob
must in ''ON" position when operating generating set. Because this makes the fuel be injected to the
carburettor and drive the engine.
To avoid fuel leakage, turn it in ''OFF'' position when carrying or not use the generating set.
Main adjustments and instructions prior to use
Summary of Contents for 034469
Page 1: ...Art Nr WWW BORMANNTOOLS COM en el v2 1 034469 BGB2000...
Page 17: ...WWW BORMANNTOOLS COM 18 EL 1 5...
Page 18: ...WWW BORMANNTOOLS COM 19 EL AC 1 2 3 RUN...
Page 19: ...WWW BORMANNTOOLS COM 20 EL ON OFF OFF OFF ON OFF OFF RUN ON OFF ON Reset...
Page 20: ...WWW BORMANNTOOLS COM 21 EL inverter ON OFF 1 60cm 5 000 1 500 3 5 1 000 300 5 000 1 500...
Page 21: ...WWW BORMANNTOOLS COM 22 EL 3 4 4 5 000 1 500 2...
Page 22: ...WWW BORMANNTOOLS COM 23 EL 5 M6 6 AC 7 4 mm2 B 1 2 ON...
Page 23: ...WWW BORMANNTOOLS COM 24 EL 4 ON OFF 5 6 15 3 3 RUN...
Page 24: ...WWW BORMANNTOOLS COM 25 EL ON START 0 3s 10 30 Start 7 ON 1 2 3 4 OFF 5 6 7...
Page 26: ...WWW BORMANNTOOLS COM 27 EL 3 ON 4 5 OFF E 4 1 2 3 4 PAH PAH 1...
Page 28: ...WWW BORMANNTOOLS COM 29 EL A B A 300 B...
Page 29: ...WWW BORMANNTOOLS COM 30 EL 1 2 3 4 5 0 6mm 0 8mm 6 7 15 20Nm 8 1 2 3 4 5 6...
Page 30: ...WWW BORMANNTOOLS COM 31 EL OFF RUN RUN ON 2 20 2 1 2 3 4 5 6 15ml 7...
Page 31: ...DISPOSE OF PACKAGING RESPONSIBLY DO NOT DISPOSE OF ELECTRICAL GOODS IN HOUSEHOLD WASTE...