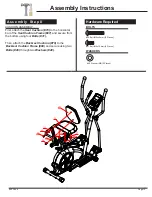
Hardware Required
BOLTS
#32. Screw (M5x12 mm)
[4 Pieces]
A s s e m b l y S t e p 6
Remove the four
Screws (#83)
and four
Washers (#82)
that are pre-assembled on the
Monitor (#
51C
) .
Set
them aside nearby as they will be used later in this process.
Attach the
Monitor Base (#77)
to the back of the
Monitor (#51C),
secure by using four
Screw (#83)
and
four
Washers (#82)
that were previously removed.
With the help of an assistant, connect the
Main Sensor
Wire (Upper) (#53A)
to the corresponding wire on the
Monitor (#51C)(diagram A)
. Connect the end of wire
of
Handle Pulse (#52A)
to the
Monitor (#51C)
by
Attach the
Monitor (#51C)
to the bracket on the
Center
Post (#02)
by using the four
Screws (#32)
that were
previously removed.
MONITOR ASSEMBLY
Remove the four
Screws (#32)
that are pre-assembled
on the back of the
0RQLWRU%DVH
.
Set them aside
nearby as they will be used later in this process.
B
Make sure the wire is accessible and
exposed (as shown) before attaching
Monitor Base (#77)
to the
Monitor
(#51C).
#83. Screw (M4x12 mm)
[4 Pieces]
inserting it into the back hole as illustrated below
(diagram B). Being careful not to pinch/damage any of
the wires.
Assembly Instructions
Page 11
BRT 3858


