179
65535.
Time Schedule:
Select or set exactly when the rule works. When set to “Always On”, the rule will
work all time; and also you can set the precise time when the rule works, like 01:00 - 19:00 from
Monday to Friday. Or you can select the already set timeslot in “
Time Schedule
” during which the
rule works. And when set to “Disable”, the rule is disabled or inactive and there will be an icon”
” in list table indicating the rule is inactive. See
Time Schedule
.
Action:
Select to
drop
or
forward
the packets fit the outgoing filtering rule.
Log:
check the check-box to record the security log. To check the log, users can turn to
Security Log
.
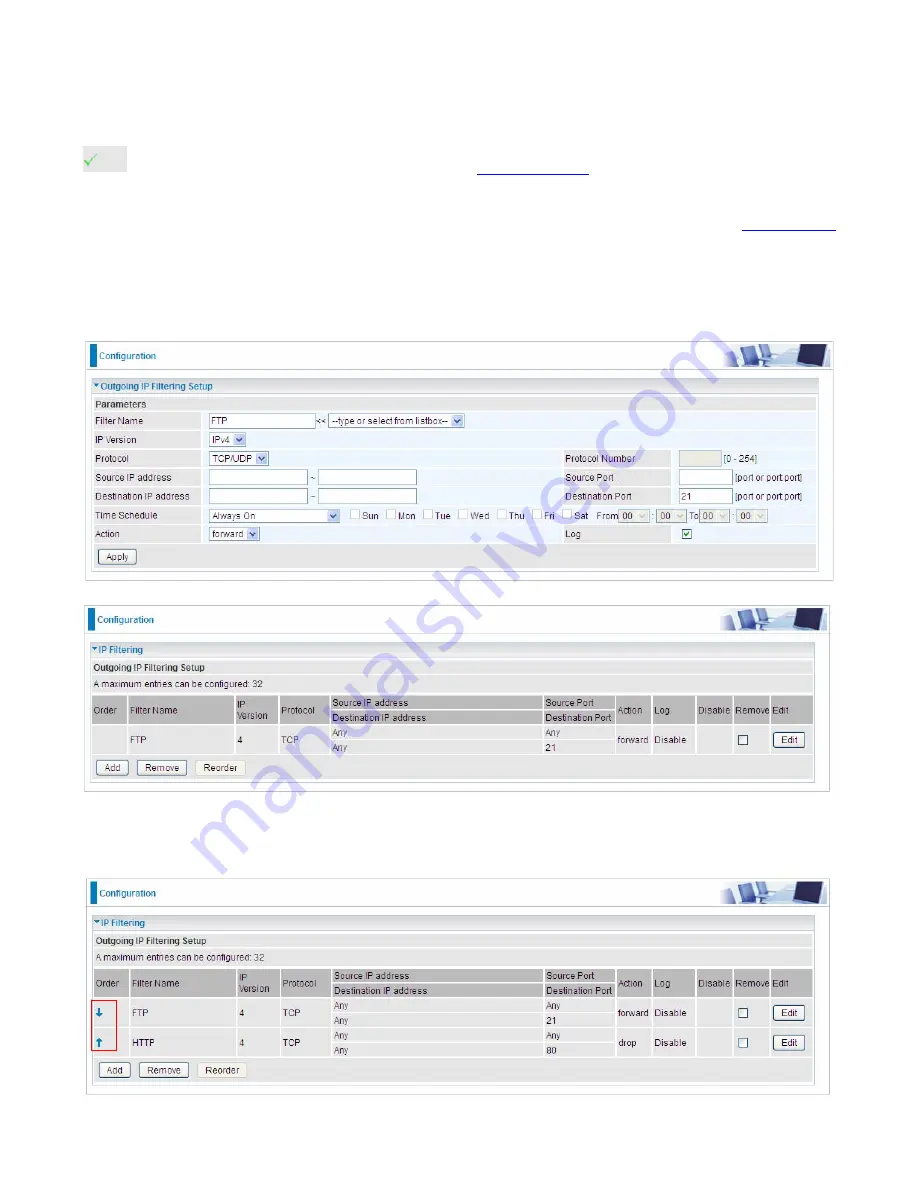
Example:
For example, if there is an outgoing rule set as follows, then the 21 application between
source IP and destination IP will be forwarded. Or exactly in the rule below, all traffic trying to access
FTP will be forwarded.
(The rule is active; disable field shows the status of the rule, active or inactive)
Add another Outgoing IP Filtering rule, users will find the “arrow” icon to change the IP outgoing filter
rule working orders.
Summary of Contents for BiPAC 8700VAX(L)-1600
Page 17: ...12 The Rear Ports 5 1 2 3 4 7 9 8 10 6 ...
Page 22: ...17 3G 4G LTE mode Failover fallback mode ...
Page 37: ...32 8 In the above page click finish to complete the EZSO settings ...
Page 40: ...35 8 In the above page click finish to complete the EZSO settings ...
Page 43: ...38 8 In the above page click finish to complete the EZSO settings ...
Page 106: ...101 Configure AP as Enrollee Add Registrar with PIN Method 1 Set AP to Unconfigured Mode ...
Page 126: ...121 Router C setup Refer to Router B setup ...
Page 169: ...164 Accessing mechanism of Storage In your computer Click Start Run enter 192 168 1 254 ...
Page 171: ...166 Access the folder public ...
Page 174: ...169 Step 2 Click Add a Printer Step 3 Click Add a network wireless or Bluetooth printer ...
Page 185: ...180 How to disable set rule Rule inactive ...
Page 233: ...228 ...
Page 236: ...231 ...
Page 246: ...241 4 Input Internet address and Destination name for this connection and press Next ...
Page 247: ...242 5 Input the account user name and password and press Create ...
Page 248: ...243 6 Connect to the server ...
Page 250: ...245 ...
Page 262: ...257 4 Input Internet address and Destination name for this connection and press Next ...
Page 263: ...258 5 Input the account user name and password and press Create ...
Page 267: ...262 ...
Page 291: ...286 2 ipoe_eth4 with DDNS www hometest1 com using username password test test ...
Page 303: ...298 Click Apply to confirm your settings ...
Page 312: ...307 Mobile Network User can press Scan to discover available 3G 4G LTE mobile network ...
Page 318: ...313 Example Ping www google com ...
Page 319: ...314 Example trace www google com ...


