


46
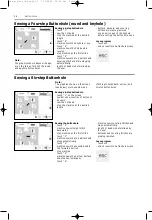
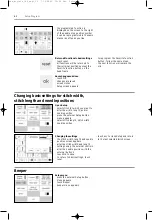
4 directions
· select 4 directional stitching
· select one of the eight stitches:
· 41 Straight Stitch
· 42 Zig-zag Stitch
· 43 Jersey Stitch
· 44 Running Stitch
· 45 Double Overlock Stitch
· 46 Blanket Stitch
· 47 Super Stretch Stitch
· 48 Honeycomb Stitch
· a presser foot symbol with 4 direc-
tions appears in the center of the
screen
· use the curved arrows to select the
desired direction
· the stitch length and width of these
stitches cannot be altered when a
direction other than forward is
selected
Sewing in 4 directions without turn-
ing the fabric is particularly useful for
mending worn areas in tubular items
(sleeves, trousers, etc.) and can also
be used in some decorative tech-
niques.
4 directional sewing
Quilt stitches/directional sewing
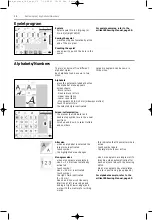
16 directional sewing – straight stitch with long stitch function
Straight stitch with long stitch
function
· press the external quilt/directional
button
· touch the 16 direction symbol
· select straight stitch
· activate the long stitch function –
every third stitch will be sewn
Note:
Without the long stitch
function, the needle hesitates to
allow for the movement of the
fabric, stitching every third stitch.
When the long stitch function is
activated, the needle will hesitate
for 9 stitches.
· the long stitch function is now
highlighted on the toolbar at the
lower edge of the screen
· select direction
· the machine sews in the direction
chosen, stitching 9 mm straight
stitches
Application
The combination of straight stitch
and the long stitch function is
particularly useful for joining large
motifs or letters (see page 45 of the
Sewing Manual). The connecting
stitches can be removed after the
sewing is complete.
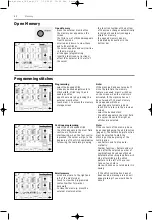
16 directions programmed into memory
Zig-zag in memory
· follow the directions above,
selecting the zigzag stitch instead
of the straight stitch
· a presser foot symbol with a
thick
arrow is displayed in the memory
toolbar
· each presser foot symbol represents
9 mm
· when stitching with a directional
zigzag stitch, adequate stabiliza-
tion is critical to prevent puckering
and tunneling of the fabric
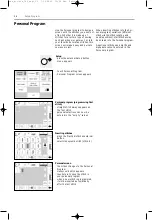
Straight stitch in memory
· press the external quilt/directional
button
· touch the 16 direction symbol
· open the memory by pressing the
external mem button
· if the memory bank displayed is not
empty, touch mem to access the
memory storage screen
· select an empty bank (indicated by
a white space)
· touch OK to confirm the selection
· select straight stitch
· select the desired direction by using
the curved arrows in the center of
the screen
· a presser foot symbol with a
thin
arrow is displayed in the memory
toolbar
· the presser foot symbol is turned
90˚ to the left
To see the true stitching direction,
look at the front (toes) of the
presser foot symbol and note the
direction of the arrow
· each presser foot symbol represents
three 3 mm straight stitches for a
total of 9 mm of stitching
· to sew a longer distance in the
same direction, touch the symbol
the appropriate number of times to
enter several “presser feet” into
the memory
bed_artista_180_engl_V3 7.10.2002 16:29 Uhr Seite 46


