


34
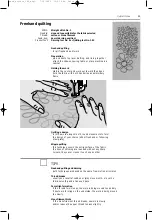
Darning
Straight stitch No. 1
size and type suitable for the fabric selected
lightweight darning thread
down (darning position)
Darning foot No. 9 (optional accessory)
Darning holes or worn areas
· replaces threads with the lengthwise and the crosswise
grains in all fabrics
Preparation
· stretch fabric into darning ring (optional accessory) to
prevent distortion
· use of the slide-on sewing table is recommended
Sewing
· move the darning ring smoothly and without using
pressure
· work from left to right
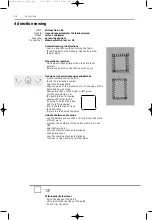
Stitch over the hole
· sew the first rows to cover the hole (not too close)
· turn work by a quarter turn – 90°
Cover the first rows
· sew over the first rows – not too close for a soft finish
· turn work by a half turn – 180°
Complete darning
· loosely and in same direction as 2nd rows
Method for tubular items
· first step in a horizontal direction
· second and third steps in lengthways direction
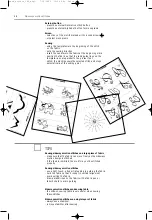
When you have mastered the technique
· work the rows in irregular lengths so that the turns are
“lost” in the fabric
Stitching hints
· move the hoop as if writing the letters “L” or “M”
· when changing direction, move in curves, avoiding points
· this prevents holes and thread breakage
· do not sew in circles; these do not mimic the fabric
threads
Manual darning
TIPS
Thread breaks
· if thread breakage is a problem, it could be that the
ring is not being moved smoothly
Poor stitch formation
· if the thread is lying on top of the fabric, the ring is
being moved too quickly
· if there are knots on the underside of the fabric, the
ring is being moved too slowly
Stitch:
Needle:
Thread:
Feed-dog:
Presser foot:
☞
naeh_artista_180_engl. 7.10.2002 16:31 Uhr Seite 36


