background image

EU_decl_BM3xU_en_02_2021.docx


Page 

1

 of 

1


BEKO

 TECHNOLOGIES GMBH 

Im Taubental 7 
41468 Neuss 
 
GERMANY 
 
Phone: +49 2131 988-0 
www.beko-technologies.com 


EU Declaration of Conformity 

 
We hereby declare that the product named below complies with the stipulations of the relevant directives and technical 
standards. This declaration applies only to the product in the condition in which it is marketed by us. Parts which have not 
been installed by the manufacturer and/or modifications which have been implemented subsequently remain unconsidered. 
 
Product designation: 

Condensate drain 

Types: 

BEKOMAT

®

 31U, 32U, 32UV, 33U, 33UV, 33U CO, 32iU, 32iUV, 

33iU, 33iUV, 33iU CO 

Supply voltage versions: 

95 … 240 VAC ±10% (50 … 60 Hz) / 100 … 125 VDC ±10% 
or 
24 … 48 VAC ±10% (50 … 60 Hz) / 18 … 72 VDC ±10% 

Max. operating pressure: 

16 bar(g) 

Product description and function: 

Condensate drain for electronically level-controlled discharge of 
condensate in the compressed-air system. 


Low Voltage Directive 2014/35/EU 

Applied harmonised standards: 

EN 61010-1:2010 

The devices with a working voltage of 24 … 48 VAC and 18 … 72 VDC are not governed by the scope of the Low Voltage 
Directive. 


EMC Directive 2014/30/EU 

Applied harmonised standards: 

EN 55011:2009 + A1:2010, group 1, class B 
EN 61326-1:2013 


RoHS II Directive 2011/65/EU 

The products meet the requirements laid down in European Directive 2011/65/EU concerning the restriction of the use of 
certain hazardous substances in electrical and electronic devices. 

 
The manufacturer shall have sole responsibility for issuing this declaration of conformity. 
 

Signed for and on behalf of: 

 
Neuss, 25 February 2021


BEKO 

TECHNOLOGIES GMBH 


i.V. Christian Riedel 


Head of International Quality Management 

BEKOMAT

®

 33iU / 33iU CO

Original installation and operation manual

66 | 68

Summary of Contents for BEKOMAT 33iU

Page 1: ...EN BEKOMAT 33iU 33iU CO 01 4244 Original installation and operation manual BM33iU BM33iU CO ...

Page 2: ...4 Transport and storage 11 2 5 5 Installation 11 2 5 6 Maintenance 12 2 5 7 Handling hazardous substances 12 2 5 8 Use of spare parts accessories or materials 13 2 6 Warning notices 13 3 Product information 14 3 1 Product overview 14 3 2 Exploded drawing 15 3 3 Function description 16 3 4 Modbus function 17 3 4 1 Default interface parameters 17 3 4 2 Byte sequence 17 3 4 3 Implemented functions 17...

Page 3: ...lation 34 7 1 Warning notices 34 7 2 Connection work 35 7 2 1 Single device connection 35 7 2 2 Connecting multiple Modbus devices series connection 37 8 Commissioning 39 8 1 Warning notices 39 8 2 Commissioning work 40 9 Operation 41 9 1 Warning notices 41 9 2 Operating states 42 10 Maintenance 44 10 1 Warning notices 44 10 2 Maintenance schedule 45 10 3 Maintenance work 45 10 3 1 Changing the Se...

Page 4: ...ioning work 58 13 Dismantling 59 13 1 Warning notices 59 13 2 Dismantling work 59 14 Disposal 61 14 1 Warning notices 61 14 2 Disposal of operational materials and components 62 15 Troubleshooting 63 16 Appendices 64 16 1 Approval certificates and declarations of conformity 64 16 2 Declaration of Conformity 65 17 Notes 67 BEKOMAT 33iU 33iU CO Original installation and operation manual 4 68 ...

Page 5: ...diagrams and other representations are protected by the copyright of the manufacturer This applies especially to duplication reproduction microfilming and storage as well as processing in electronic systems Publication date Revision Version Reason for amendment Scope of amendment 18 May 2021 01 00 Editorial revision Spelling mistakes corrected and spare part information added 30 June 2021 02 00 Ch...

Page 6: ... possible water exposure that can occur The splash water must be free of corrosive components Only use the product and accessories in areas which are free of toxic and corrosive chemicals and gases Only use the product and accessories within the piping system designed for the technical data with appropriate connections pipe diameters and assembly clearance Only use the product and accessories outs...

Page 7: ... of any inappropriate use of the product or accessories which are not listed here the manufacturer must be informed immediately 2 2 Responsibility of the operating company The responsible operating company must ensure the following to prevent accidents incidents and adverse effects on the environment Before all actions check to ensure that the manual available does in fact belong to the product Th...

Page 8: ...echnology are people who due to their training professional experience and qualification possess all the necessary capabilities to safely execute actions and instruct all actions related to pressurised fluids and systems to independently foresee potential hazardous situations and implement appropriate measures to avert any danger The capabilities include in particular experience in handling Measur...

Page 9: ...m operation Symbol Description explanation General warning symbol danger warning caution Warning pressurised system Warning electric voltage Note the installation and operating manual General note Wear safety footwear Use protective gloves cut proof and liquid resistant Wear safety goggles with side shields i General information Original installation and operation manual BEKOMAT 33iU 33iU CO 9 68 ...

Page 10: ...ories may lead to serious personal injuries or death To guarantee safe operation of the product and accessories observe the following points Use suitable protective equipment during all work on the product or accessories Adhere to the limits and operating parameters specified on the type plate and in the manual Adhere to the assembly conditions and ambient conditions Check whether the permissible ...

Page 11: ...packaging the product and accessories carefully Transport and handle the packaged product and accessories according to the markings on the packaging note lifting gear attachment points the centre of gravity and alignment e g keep vertical do not throw etc Only use proper means of transport and lifting equipment that is in proper working order Always adhere to the permissible transport and storage ...

Page 12: ...ntenance and repair work Prevent contamination from entering the opened product or accessories Store the disassembled components and accessories directly in a safe place After completing maintenance and repair work remove all of the tools and cleaning media used as well as all parts that are no longer needed from the work area Only dispose of the product and accessories when cleaned and freed of a...

Page 13: ...ices Warning notices warn against dangers when handling the product and accessories In order to prevent accidents personal injury and damage to property as well as impairments during operation it is essential to adhere to the warning notices Structural set up SIGNAL WORD Type and source of danger Symbol Possible consequences if the danger is ignored Measure to prevent the danger Signal words DANGE...

Page 14: ...planation A Control unit complete E Condensate inlet only when a venting line is used at the same time B Control panel F Condensate discharge C Condensate inlet vertical G Right cable gland D Condensate inlet horizontal H Left cable gland BEKOMAT 33iU 33iU CO Original installation and operation manual 14 68 ...

Page 15: ... 17 Plug G1 2 6 Screw fitting 18 O ring 48 9 x 2 62 mm 7 Plug 19 Condensate collecting container cover 8 Design shell optional 20 Cylinder head screw hexagon socket M6 x 16 9 Hose connection 21 Flat gasket 10 Plug 22 Locking screw G1 2 11 Cross slot screw M6 x 16 23 Sealing mat 12 Service Unit 24 O ring 8 x 4 mm 6 7 11 12 23 24 2 3 4 5 8 9 10 13 14 15 16 17 18 19 20 21 22 20 1 Original installatio...

Page 16: ...controller The pilot valve M activates and the area above the membrane N is depressurised The membrane N lifts off of the valve seat and the excess pressure in the collecting container K presses the condensate into the condensate discharge F L F M N K When the sensor in the sensor tube L is no longer covered by condensate the controller of the pilot valve M activates and pressure builds up above t...

Page 17: ... via Modbus 10 seconds after start up with the following interface parameters Value Parameter Baud rate 19200 Data bits 8 Stop bits 1 Parity even Client address 247 3 4 2 Byte sequence Data type Modbus register Division float 2 Register ABCD u32 2 Register ABCD u16 1 Register AB u8 1 Register A u8 B 3 4 3 Implemented functions The following Modbus functions are supported 1 Read Input Registers 0x0...

Page 18: ... 1701 Status Error LED LED off 0 LED 100 1 LED 50 2 u16 1760 Main Button State Status TEST button On 1 Off 0 u16 3103 Remaining Time Hi Word Remaining service time float 3104 Remaining Time Lo Word 3105 Remaining Counts Hi Word Remaining switching cycles float 3106 Remaining Counts Lo Word 3200 Error Flags All Error Flags Bit 1 Error1 Flag Bit 2 Error2 Flag Bit 3 Error3 Flag Bit 4 Error4 Flag Bit ...

Page 19: ...V2 3 0 BBS V3 4 0 CFG V1 0 0 ASCII 0x03 VendorUrl BEKO website http www beko technologies com ASCII 0x04 ProductName BEKO product name BEKOMAT ASCII 0x05 ModelName BEKO circuit board designation KA2C OL11 2044 ELV P i4 0 ASCII 0x06 UserApplicationName BEKO serial number circuit board 1912720040 ASCII 0x80 n a Production Circuit board test date 03 01 2018 14 53 16 01 01 01 ASCII 0x81 n a Production...

Page 20: ...e Modbus Client address 1 246 Example value 0x070A decimal 1802 For interface parameters see table Index 0x07 decimal 7 Client Address 0x0A decimal 10 3 To save the settings write the value 0xBA5E decimal 47710 to Holding Register 0x139C Decimal 5020 4 Switch the product off and switch it back on again 0 The changes will go into effect approx 10 seconds after the restart Parameter HighByte Paramet...

Page 21: ...u contact the manufacturer or supplier always have this data ready for system identification 4046924 1 70 C 34 158 F IP67 24 VDC 10 3 W BM33iUP 0 8 16 barg 12 230 psig Made in Germany Manufacturer BEKO TECHNOLOGIES GMBH 4046924 14345535 14345535 6 6 9 7 5 8 1 2 3 5 Type 13 4 Example illustration Item Description explanation 1 Product name 2 Operating temperature 3 IP degree of protection 4 Housing...

Page 22: ...he BEKOMAT Illustration Description explanation BEKOMAT 33iU 33iU CO DE BEKOMAT 33iU 01 4190 Original Installations und Betriebsanleitung BM33iU Original installation and operation manual 1 x connector BEKOMAT 33iU 33iU CO Original installation and operation manual 22 68 ...

Page 23: ...or hose connection for hose diameter 13 mm 1 2 in interior Media Condensate oil contaminated Condensate oil contaminated or oil free Empty weight 1 63 kg 3 63 lbs Operating voltage 24 VDC 10 see type plate Power consumption P 0 6 3 VA W Degree of protection IP67 Housing class UL50E Type 13 Overvoltage category IEC 61010 1 III Degree of pollution IEC 61010 1 3 Recommended cable diameter 5 10 mm 0 2...

Page 24: ...3iU 33iU CO Housing Aluminium plastic glass fibre reinforced Aluminium hardcoated plastic glass fibre reinforced Membrane FKM FKM 4 4 Dimensions TEST 28 1 10 34 1 34 34 1 34 157 6 18 25 0 98 92 3 62 147 5 79 73 4 2 89 198 7 79 mm inch G1 2 NPT 1 2 G1 2 NPT 1 2 G1 2 Ø 13 0 51 G1 2 NPT 1 2 BEKOMAT 33iU 33iU CO Original installation and operation manual 24 68 ...

Page 25: ...ws mounting brackets optional 8 Nm 2 Nm 5 9 ft lb 1 46 ft lb Z3 Hose connection condensate discharge 3 4 Nm 2 21 2 95 ft lb Z4 Screws Service Unit 2 5 Nm 0 5 Nm 1 84 ft lb 0 37 ft lb Z5 Screws condensate collecting container cover 8 Nm 2 Nm 5 9 ft lb 1 46 ft lb Z6 Screws top cover 0 9 Nm 0 5 Nm 0 66 ft lb 0 37 ft lb Original installation and operation manual BEKOMAT 33iU 33iU CO 25 68 ...

Page 26: ...sembly space above the top cover at the place of installation so that the LEDs are visible and the TEST button can be pressed 4 7 Terminal diagram Illustration ON OFF GND 0V RS485 B RS485 A 24 V GND 0V RS485 B RS485 A 24 V Modbus termination BEKOMAT 33iU 33iU CO Original installation and operation manual 26 68 ...

Page 27: ...side of areas exposed to direct sunlight and heat sources NOTE Handling packaging material Inappropriate disposal of packaging materials can cause environmental damage Dispose of the packaging material in accordance with the applicable legal requirements and provisions of the country and place of use 5 1 Transport After transporting and removing the packaging material inspect the product for possi...

Page 28: ...rking area during assembly installation maintenance and repair work Before pressurisation check all system pipe connections for leak tightness and tighten if necessary Slowly pressurise the system Avoid pressure blows and high differential pressures Assemble all pipes free of mechanical stress Install the feed lines and drain lines as fixed pipes WARNING Insufficient qualification Insufficient qua...

Page 29: ...5 m 16 25 ft Drain line version Do not use shut off valves in the drain line Only connect the BEKOMAT to the drain line using a hose 0 The hose compensates for assembly tolerances vibrations and thermal expansion Do not install the drain line on storage or transportation surfaces The drain line may be a maximum of 10 m 32 8 ft long and installed at a maximum of 5 m 16 25 ft rise 0 The minimum oper...

Page 30: ... interior diameter at least 13 mm 0 5 in Do not fit any reductions in the line e g using reducing nipples or fittings Bypassing filters Drain each condensate collection point with a separate BEKOMAT Do not create any filter bypass points Ensure venting If the slope in the inflow is not sufficient or there are other problems with the inflow install a venting line 0 Connect the feed line to the cond...

Page 31: ...preparatory tasks must have been completed Prerequisites Tools Material Protective equipment Spanner or adjustable end wrench Hexagon socket key 10 mm Sealants e g PTFE Feed line Drain line Hose interior diameter 13 mm 0 51 in length approx 30 cm 1 ft Always to be worn Preparatory tasks 1 Depressurise the pressurised system or the respective system section and secure it against unintentional press...

Page 32: ... 21 out 21 D 22 9 F 9 F Horizontal connection of the condensate inlet line 2 Screw the hose connection provided 9 to the condensate discharge F and tighten with a torque of 3 4 Nm 2 21 2 95 ft lb Vertical connection of the condensate inlet line 2 Screw the hose connection provided 9 to the condensate discharge F and tighten with a torque of 3 4 Nm 2 21 2 95 ft lb Screw the locking screw 22 with th...

Page 33: ...e condensate inlet line X1 apply sealant to the end of a pressure resistant pipe and screw this in at the condensate inlet C X3 X4 9 4 For the condensate discharge push the hose provided X3 onto the hose connection 9 and use a hose clamp for fixation 5 Connect the other end of the hose X3 with the condensate drain line X4 Original installation and operation manual BEKOMAT 33iU 33iU CO 33 68 ...

Page 34: ... repair work Adhere to all applicable regulations e g VDE 0100 IEC 60364 ATEX during installation Connect the protective conductor earth connection according to regulations WARNING Insufficient qualification Insufficient qualification of the personnel carrying out work on the product and accessories can lead to accidents personal injury and damage to property as well as impair operation All work o...

Page 35: ...nal transmission Connect the shielding of the connection cables at least to the ground potential or shielding connection of the Modbus server device 7 2 Connection work For connection work to be carried out the following prerequisites must be fulfilled and the preparatory tasks must have been completed Prerequisites Tools Material Protective equipment Stripping tool Crimping tool for wire end ferr...

Page 36: ...ction cable X5 G 6 6 Fit the counter nut 6 over the connection cable X5 7 Insert the connection cable X5 into the right cable gland G Connection cable X5 8 Connect the connection cable X5 according to the terminal diagram 4 7 Terminal diagram on page 26 6 G X5 9 Draw the connection cable X5 taut 10 Screw the counter nut 6 onto the right cable gland G BEKOMAT 33iU 33iU CO Original installation and ...

Page 37: ...us devices series connection Connection work series connection Illustration Description explanation 2 1 1 Loosen the 3 screws 1 2 Lift the top cover 2 H 6 7 G 3 Unscrew the counter nuts 6 from the left cable gland H and right cable gland G 4 Remove the plugs 7 from the counter nuts 6 6 mm 50 mm 1 97 in 0 23 in 5 Prepare connection cable X5 and connection cable X6 Original installation and operatio...

Page 38: ...tion cable X6 Connection cable X5 9 Connect connection cable X5 and connection cable X6 according to the terminal diagram 4 7 Terminal diagram on page 26 6 G X6 6 H X5 10 Draw cable X5 and connection cable X6 taut 11 Screw the counter nuts 6 onto the left cable gland H and right cable gland G 2 1 12 Set the top cover 2 in place and insert the screws 1 13 Tighten the screws 1 with a torque of 0 9 N...

Page 39: ...ctions for leak tightness and tighten if necessary Slowly pressurise the system Avoid pressure blows and high differential pressures DANGER Electric voltage There is a danger of death or serious injuries as well as malfunction and device failure following contact with components which are in contact with electric voltage Only operate the product with the cover complete and closed or the housing cl...

Page 40: ... The BEKOMAT carries out the power on self test 2 Slowly pressurise the system e g by slowly opening the recommended shut off valve X2 in the condensate inlet line X1 3 Carry out a functional test see 10 3 2 Functional test on page 53 BEKOMAT 33iU 33iU CO Original installation and operation manual 40 68 ...

Page 41: ...ended or restricted by the use of accessories Adhere to the maintenance intervals DANGER Electric voltage There is a danger of death or serious injuries as well as malfunction and device failure following contact with components which are in contact with electric voltage Only operate the product with the cover or housing complete and closed NOTE Operating personnel Insufficient knowledge of the pr...

Page 42: ...valve is not cycling 0 The BEKOMAT switches to normal operation Power Alarm Service TEST Power Alarm Service TEST Power Alarm Service TEST Power Alarm Service TEST n 20 n Negative power on self test number of repetitions n 20x The red ALARM LED is on The green POWER LED is on 100 brightness while the solenoid valve is cycling quickly The green POWER LED is on 50 brightness while the solenoid valve...

Page 43: ...es The red ALARM LED is on The green POWER LED is on 50 brightness Power Alarm Service TEST n Power Alarm Service TEST Alarm mode malfunctioning of condensate discharge The red ALARM LED flashes The green POWER LED is on 50 brightness 0 The solenoid valve is cycling every 4 minutes After the malfunction has been eliminated the BEKOMAT automatically switches to normal operation Power Alarm Service ...

Page 44: ...k on again unintentionally Set up a safety area around the working area during all maintenance and repair work Only operate the product with the cover complete and closed or the housing closed DANGER Use of incorrect spare parts accessories or materials The use of incorrect spare parts accessories or materials as well as auxiliary and operating materials may result in death or serious injury Malfu...

Page 45: ... must be fulfilled and the preparatory tasks must have been completed Prerequisites Tools Material Protective equipment Screwdriver flat head size 2 5 mm 0 09 Spanner or adjustable end wrench Sealants Lubricant for greasing the O rings Mild detergent Cotton or disposable cloth BEKO TECHNOLOGIES Service Unit BEKO TECHNOLOGIES set of seals Always to be worn 10 3 1 Changing the Service Unit Exchange ...

Page 46: ...he BEKOMAT is depressurised 0 The condensate remaining in the BEKOMAT is drained 9 X3 3 Remove the hose connection 9 with the hose X3 X2 X1 4 Remove the condensate inlet line X1 and the recommended shut off valve X2 from the condensate inlet and disassemble BEKOMAT 33iU 33iU CO Original installation and operation manual 46 68 ...

Page 47: ...ntrol unit and hold it for at least 5 seconds 0 The green POWER LED flashes 8 Once the green POWER LED is permanently lit release the TEST button 0 The Remaining service time counter Modbus address 3103 3104 is reset 0 The Remaining switching cycles counter Modbus address 3105 3106 is reset 9 Lay the control unit A carefully to one side Original installation and operation manual BEKOMAT 33iU 33iU ...

Page 48: ...ensate collecting container 14 and remove 12 14 11 Pull the Service Unit 12 away from the collecting container 14 as shown 12 14 12 Lift the Service Unit 12 up and out of the bracket of the condensate collecting container 14 as shown BEKOMAT 33iU 33iU CO Original installation and operation manual 48 68 ...

Page 49: ...Lift the condensate collecting container 19 and the O ring 18 off 17 Dispose of the old Service Unit 12 and the old O ring 18 properly For more information see 14 Disposal on page 61 18 Clean the condensate collecting container 14 18 19 19 Clean the cover sealing faces of the condensate collecting container cover 19 and wipe down using a clean cloth and without detergent 20 Insert the new O ring 1...

Page 50: ...2 Nm 5 9 ft lb 1 46 ft lb 14 25 23 Clean the sealing faces 25 on the condensate collecting container 14 using a clean cloth and without detergent 24 13 24 Check to ensure the new Service Unit 12 fits the control unit A 0 Model designation 0 The colour of the locking hook X7 is identical to the colour of the control unit 25 Check the new O rings 13 24 on the new Service Unit Remove the transport lo...

Page 51: ...e new Service Unit 12 into the bracket of the condensate collecting container 14 as shown and press onto the condensate collecting container 14 27 11 28 Insert the 2 cross slot screws 11 into the bores 27 and tighten with a torque of 2 5 Nm 0 5 Nm 1 84 ft lb 0 37 ft lb Original installation and operation manual BEKOMAT 33iU 33iU CO 51 68 ...

Page 52: ...ign objects 30 Insert the sensor of the control unit A into the sensor tube opening A 12 31 Insert the hooks on the control unit A 32 Press the control unit A against the Service Unit 12 and lock into place X2 X1 33 Fit the condensate inlet X1 and the recommended shut off valve X2 BEKOMAT 33iU 33iU CO Original installation and operation manual 52 68 ...

Page 53: ...via the condensate inlet lines X1 e g by opening the recommended shut off valve X2 10 3 2 Functional test Illustration Description explanation Power Alarm Service TEST Press the TEST button for 2 5 seconds 0 The red ALARM LED is off 0 The green POWER LED is illuminated 100 brightness 0 The valve opens and condensate is drained Original installation and operation manual BEKOMAT 33iU 33iU CO 53 68 ...

Page 54: ...the use of the wrong cleaning media may result in minor injuries as well as damage to health and damage to property Never clean the device with a dripping wet cloth Never use abrasive or aggressive detergent or solvents which could damage the outer coating e g markings type plate corrosion protection etc Never clean the device with hard or pointed implements Use an anti static damp cloth for clean...

Page 55: ...ivered The contact data for the BEKO TECHNOLOGIES customer services responsible are listed in chapter 1 1 Contact on page 5 11 2 Accessories Illustration Description explanation Material no Mounting bracket for wall and floor 4012883 Trace heater 230 VAC 4041657 Drain kit 2000046 Integrator Hardware Kit 4052710 Software Integrator The software can be downloaded from the BEKO TECHNOLOGIES homepage ...

Page 56: ... Spare parts Illustration Description explanation Material no Service Unit 4023633 Design shell 4010167 X X X X X X Set of seals 4024397 BEKOMAT 33iU 33iU CO Original installation and operation manual 56 68 ...

Page 57: ...failure following contact with components which are in contact with electric voltage Only carry out maintenance and repair work on the product when it has been disconnected and secured against being switched back on again unintentionally Set up a safety area around the working area during all maintenance and repair work WARNING Insufficient qualification Insufficient qualification of the personnel...

Page 58: ... by closing the recommended shut off valve X2 Power Alarm Service TEST 2 Press the TEST button briefly multiple times 0 The BEKOMAT is depressurised 0 The condensate remaining in the BEKOMAT is drained 3 Disconnect the BEKOMAT from the voltage supply and switch off all power BEKOMAT 33iU 33iU CO Original installation and operation manual 58 68 ...

Page 59: ...onally Set up a safety area around the working area during all maintenance and repair work WARNING Insufficient qualification Insufficient qualification of the personnel carrying out work on the product and accessories can lead to accidents personal injury and damage to property as well as impair operation All work on the product and the accessories may only be carried out by skilled technical per...

Page 60: ... Remove the hose X3 from the hose connection 9 and disassemble 2 Remove the condensate inlet line X1 and recommended shut off valve X2 from the condensate inlet C D and disassemble 3 Disassemble all power supplies BEKOMAT 33iU 33iU CO Original installation and operation manual 60 68 ...

Page 61: ...ectrical and electronic equipment are marked by the crossed out rubbish bin The crossed out rubbish bin symbolises that electrical and electronic equipment must be collected separately and must not be disposed of together with unsorted domestic waste For this purpose all communities have set up collecting systems where waste from electronic equipment or electrical and equipment can be handed in fr...

Page 62: ... materials filter materials cleaning wipes and protective clothing contaminated by oils or other hazardous substances 15 02 02 Adsorption materials filter materials cleaning wipes and protective clothing with the exception of those classified by 15 02 02 15 02 03 Packaging paper and cardboard 15 01 01 Packaging plastic material 15 01 02 Electric and electronic devices with the exception of those c...

Page 63: ...tage supply and reconnect after 5 seconds Inspect the circuit board for potential damage Power Alarm Service TEST No condensate is drained after pressing the TEST button Check the feed line and the drain line Replace the Service Unit Check the valve function by pressing the TEST button 0 Valve switching can be heard clearly clicking sound Check the connection terminals on the control board Power A...

Page 64: ...TÜV Rhineland for the Canadian and US American market and that basic safety and health requirements were met during manufacturing of the product The product may be sold on the Canadian and US American market EAC marking The EAC marking indicates that a product fulfils all the Eurasian directives applicable for this product and that basic safety and health requirements were met during manufacturing...

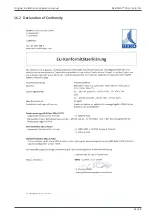
Page 65: ...16 2 Declaration of Conformity Original installation and operation manual BEKOMAT 33iU 33iU CO 65 68 ...

Page 66: ...e 16 bar g Product description and function Condensate drain for electronically level controlled discharge of condensate in the compressed air system Low Voltage Directive 2014 35 EU Applied harmonised standards EN 61010 1 2010 The devices with a working voltage of 24 48 VAC and 18 72 VDC are not governed by the scope of the Low Voltage Directive EMC Directive 2014 30 EU Applied harmonised standar...

Page 67: ...17 Notes Original installation and operation manual BEKOMAT 33iU 33iU CO 67 68 ...

Page 68: ...4 610 780 639 info es beko technologies es BEKO TECHNOLOGIES LIMITED Room 2608B Skyline Tower No 39 Wang Kwong Road Kwoloon Bay Kwoloon Hong Kong Tel 852 2321 0192 Raymond Low beko technologies com BEKO TECHNOLOGIES INDIA Pvt Ltd Plot No 43 1 CIEEP Gandhi Nagar Balanagar Hyderabad IN 500 037 Tel 91 40 23080275 91 40 23081107 Madhusudan Masur bekoindia com service bekoindia com BEKO TECHNOLOGIES S ...

Reviews: