


9. Communicator Touch Panel
5
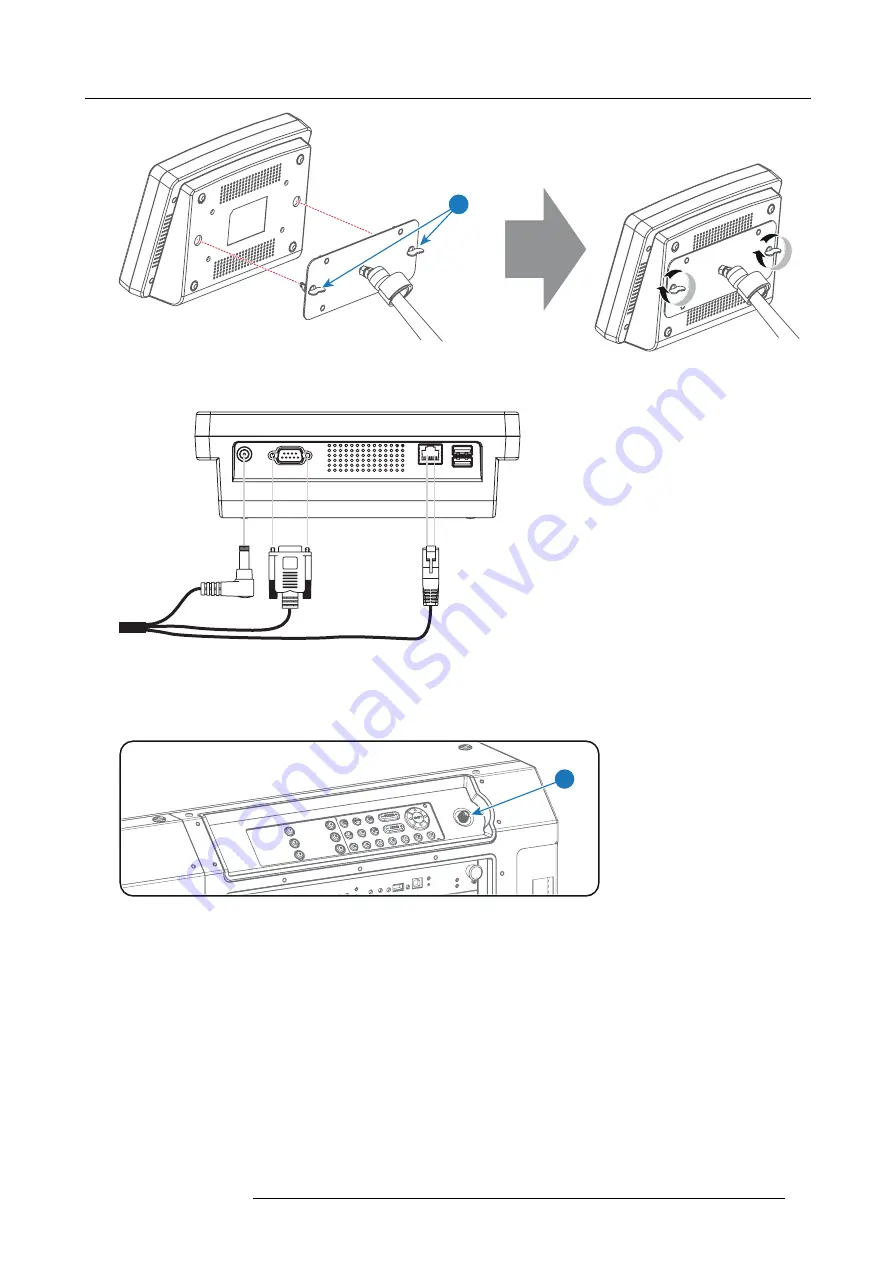
Image 9-6
4. Connect the DC plug, the RJ45 Ethernet plug and the D-SUB plug of the customized cable into their respective sockets on the
Touch Panel interface.
Image 9-7
5. Connect the circular plug of the customized cable with the circular socket (reference 6 image 9-8) at the right side of the Local
Keypad of the projector.
Caution:
To avoid connector damage, align the pins before you connect the customized cable.
Note:
Ensure to tighten the locking nut on the connector.
6
Image 9-8
6. Attach the multi cable to the swivel arm using the two Velcro strips.
7. Position the Touch Panel interface in the desired location. See "Repositioning the Touch Panel interface", page 76.
R5905961 ZEUS 09/03/2015
75
Summary of Contents for ZEUS
Page 1: ...ZEUS Installation safety manual R5905961 00 09 03 2015 ...
Page 17: ...2 Safety PR Image 2 2 R5905961 ZEUS 09 03 2015 13 ...
Page 26: ...3 Getting started 22 R5905961 ZEUS 09 03 2015 ...
Page 44: ...6 Lenses Lens selection 40 R5905961 ZEUS 09 03 2015 ...
Page 84: ...10 Starting up 80 R5905961 ZEUS 09 03 2015 ...
Page 96: ...11 Scheimpflug 92 R5905961 ZEUS 09 03 2015 ...
Page 104: ...12 Convergence 100 R5905961 ZEUS 09 03 2015 ...
Page 128: ...13 Lamp House Lamp replacement 124 R5905961 ZEUS 09 03 2015 ...
Page 160: ...16 Removal and installation of the projector covers 156 R5905961 ZEUS 09 03 2015 ...
Page 176: ...18 Pin configurations 172 R5905961 ZEUS 09 03 2015 ...
Page 184: ...19 Environmental information 180 R5905961 ZEUS 09 03 2015 ...


