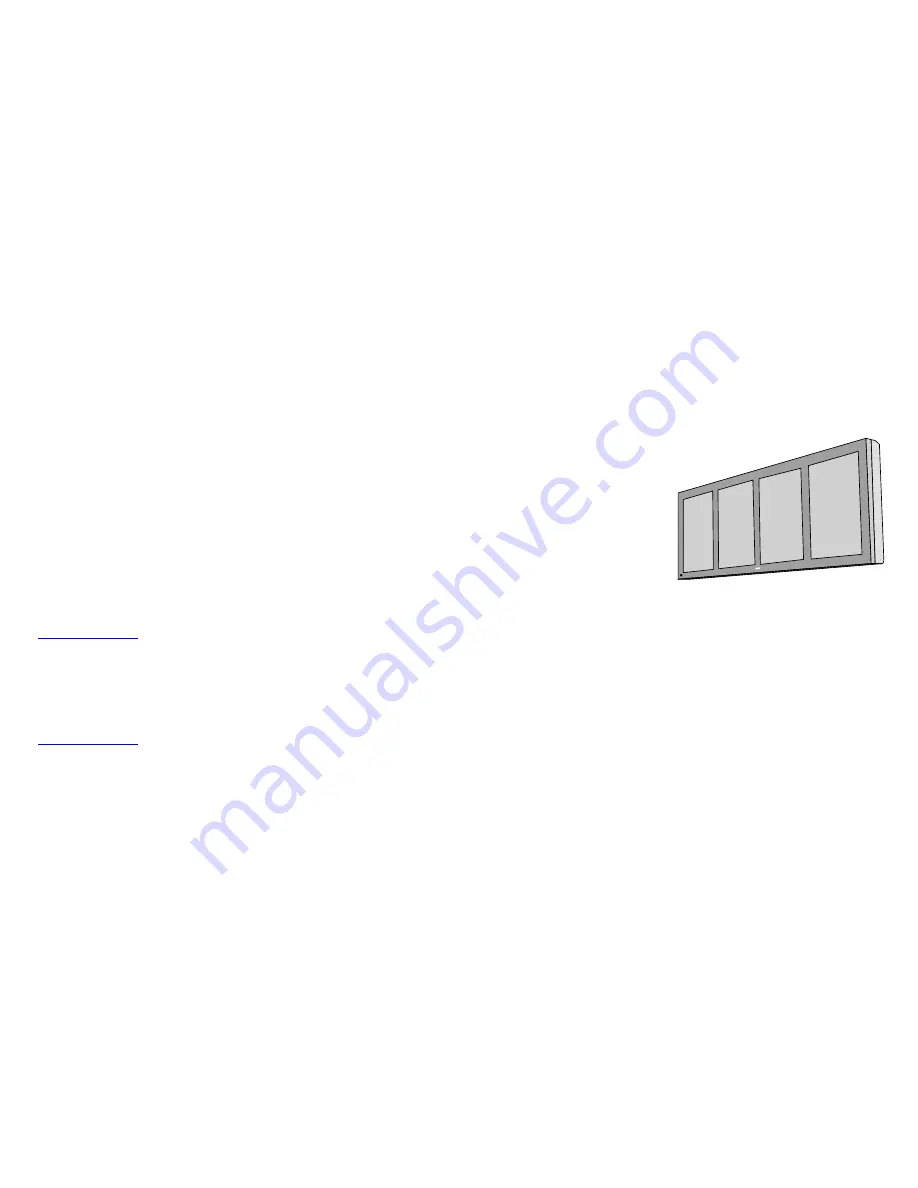
background image

System Manual

IMAGETILE

®

Softcopy Digital

Lightbox

B4102010/Rev. 00

October 2002

BarcoView

Theodoor Sevenslaan 106

8500 Kortrijk, Belgium

Phone: +32(0)56 23 32 44

Fax: +32(0)56 23 33 74

E-mail: [email protected]

http://www.barcoview.com

BarcoView Inc

3059 Premiere Parkway

Duluth, Georgia, 30097,USA

Phone: +1 678 475 8000

Fax: +1 678 475 8100

E-mail: [email protected]

http://www.barcoview.com

BarcoView LTD

16F-1, Cheng Loong Plaza 33, Min Sheng Road

Section 1, Pan Chiao, Taipei Hsien, Taiwan, R.O.C.

Phone: +886 2 2957 8357

Fax: +886 2 2957 4080

Summary of Contents for IMAGETILE

Page 1: ...56 23 33 74 E mail sales medical barco com http www barcoview com BarcoView Inc 3059 Premiere Parkway Duluth Georgia 30097 USA Phone 1 678 475 8000 Fax 1 678 475 8100 E mail sales medical barco com h...

Page 2: ...type SJ or equivalent 18 AWG min rated 300 V min provided with a hospital grade type plug 5 15P configuration for 120V application or 6 15P for 240V application Warning This apparatus must be earthed...

Page 3: ...This page intentionally left blank...

Page 4: ...izing Yourself With the 3MP2FH 20 Switch Locations 20 Using the VGA Capabilities of the BarcoMed 3MP2FH 21 Examples of PCI Slots 21 Installing the BarcoMed 3MP2FH Graphics Controller 22 Running Multip...

Page 5: ...Driver Using the BarcoMed Driver Installation Wizard 63 Setting the Resolution of Your ImageTile Display Panel with DualView Enabled 70 Setting the Resolution of Your ImageTile Display Panel with Dual...

Page 6: ...s for the first time 107 Fixed or dynamic IP addresses 107 Entering a fixed IP address 108 Acquiring an IP address dynamically 110 Changing the address properties 112 Connection problems 113 Re enter...

Page 7: ...OVERVIEW...

Page 8: ...System manual ImageTile 9 This page intentionally left blank Overview...

Page 9: ...oftware offers unprecedented image quality for accurate diagnoses quad head system with 6144 x 2048 pixels or dual head system with 3072 x 2048 pixels IMAGETILE can be used in PACS reading rooms as we...

Page 10: ...cable This user manual I Guard I GUARD is Barco s patent pending built in calibration device continuously maintaining image quality With I GUARD QA checks no longer need to disturb normal radiology ac...

Page 11: ...n the display is plugged out from power The LED is green when the display is on The LED is red when the display is in Stand by power saving mode 2 USB downstream connector 3 Soft switch Press the swit...

Page 12: ...ta input 1 per head 5 USB upstream connector The USB interface can be used as USB hub If you connect the USB upstream connector to the computer you can use the USB downstream connectors to plug in USB...

Page 13: ...IMAGING BOARD INSTALLATION...

Page 14: ...System manual ImageTile 15 This page intentionally left blank Imaging board installation...

Page 15: ...Simplified Chinese and Traditional Chinese languages Display properties control panel to dynamically change display settings Minimum System Requirements PCI slot with no obstructions Pentium II 266 M...

Page 16: ...low power consumption and low heat generation of the 3MP2FH multiple boards may be installed in adjacent PCI slots or adjacent to other PCI boards Additionally there should be no need to modify eithe...

Page 17: ...he cables used to connect it to the display panel 4 Read through this guide from beginning to end Operating system requirements You must have Windows NT 4 with at least Service Pack 4 Windows 2000 wit...

Page 18: ...System manual ImageTile 19 This page intentionally left blank Imaging board installation...

Page 19: ...elf With the 3MP2FH Prior to installing your 3MP2FH board s in your PC please take a few minutes to familiarize yourself with both the board and the PCI slots in your computer Figure 1 The 3MP2FH Swit...

Page 20: ...he graphics board See SW1 VGA switches figure 1 By default VGA should be enabled If you decide to use a separate VGA monitor as your boot monitor you must disable the on board VGA capabilities of the...

Page 21: ...talled in the computer 4 Install the 3MP2FH Graphics Controller into a free PCI slot either 32 bit or 64 bit see figure 2 for examples of slots Be sure that the board is seated firmly in the slot 5 Se...

Page 22: ...running multiple BarcoMed 3MP2FH boards This is due to the PC s PCI bus control in the system BIOS and not the BarcoMed board It may become necessary depending on how your PC s BIOS configures the PC...

Page 23: ...IMAGETILE DISPLAY PANEL INSTALLATION...

Page 24: ...System manual ImageTile 25 This page intentionally left blank ImageTile installation...

Page 25: ...and provide enough ventilation Make sure the computer is switched off before connecting the signals Because of the weight of the panel and the used method of mounting mounting and removing the panel s...

Page 26: ...the suspension holes open Mounting height We advise to mount the panel so that the center in vertical sense is at eye level The location of the fixation holes with respect to the vertical center of t...

Page 27: ...ack 5 To tilt the panel forward 10 To tilt the panel proceed as follows 1 Loosen the bolts A 2 Loosen the bolts B a little bit 3 Loosen the bolts C a little bit 4 Pull the top of the ImageTile panel f...

Page 28: ...rd 5 To tilt the panel proceed as follows 1 Loosen the bolts a little bit A 2 Loosen the bolts C 3 Loosen the bolts D 4 Pull the bottom of the ImageTile panel forward 5 Fix the bolts A C D again A A 1...

Page 29: ...board the leftmost head must be connected to the Vid1 output see illustration 3 If you wish to use the built in Sentinel reporting functions connect the panel to a local network Plug the network cabl...

Page 30: ...he panel is in stand by press the soft switch 3 once The power LED 1 is green in the on state and red in stand by 3 Now install the BarcoMed imaging board driver see next section Note The image resolu...

Page 31: ...System manual ImageTile 32 This page intentionally left blank ImageTile installation...

Page 32: ...System manual ImageTile 33 BARCOMED SOFTWARE DRIVER INSTALLATION...

Page 33: ...System manual ImageTile 34 This page intentionally left blank BarcoMed software driver installation...

Page 34: ...your BarcoMed imaging boards The Barco Metheus Hardware Configuration Tab gathers information about the BarcoMed imaging boards and your system that is useful when diagnosing problems The Barco Methe...

Page 35: ...d 3MP2FH Imaging Board Windows NT 4 0 Display Driver log in using an account with administrator privileges and follow these steps 1 Insert your ImageTile Software CD into your computer s CD drive The...

Page 36: ...e 6 If you selected a device with an existing driver the existing driver s version will be compared against the version of the driver you are installing If the existing driver s version is newer than...

Page 37: ...installation without installing the driver click Cancel and the Wizard will exit Once you click Next you cannot cancel the driver installation Figure 8 During the BarcoMed driver installation the inst...

Page 38: ...with the following message A new graphics driver has been installed The default display resolution from the driver has been temporarily used by the system Please use the Display option in the Windows...

Page 39: ...Properties dialogue box but this button will not be visible because you are running in VGA mode Select OK by pressing CTRL Enter 6 You may be asked if you want to restart your computer Select Yes Even...

Page 40: ...Driver log in using an account with administrator privileges and follow these steps 1 Double Click on the My Computer Icon 2 Open the Control Panel Folder 3 Double Click on the Display Icon 4 Click o...

Page 41: ...with administrator privileges per step 16 above Windows NT will launch the Invalid Display Settings dialog box with the following message A new graphics driver has been installed The default display r...

Page 42: ...00 on your system you must first remove the BarcoMed Imaging Boards and use a 3rd party VGA card and VGA monitor during the Windows 2000 installation process To install reinstall or update your BarcoM...

Page 43: ...NTDriverInstaller exe to start the wizard 6 Click Next on the Wizard s Welcome Screen to continue or Cancel to exit the wizard see figure 14 Figure 14 If you select Cancel a dialog box figure 15 will...

Page 44: ...ck OK to continue Figure 17 If you want to change your selection click OK to continue and then click Back on the next screen 8 Your selection on the screen shown in figure 20 will determine if DualVie...

Page 45: ...irtual screen in the display properties dialog for both heads of a Imaging Board If DualView is enabled you will see two virtual screens in the dialog box on the Settings Tab of the Display Properties...

Page 46: ...k and you will see the previous screen To begin installation click Next to continue If you want to end the installation without installing the driver click Cancel and the wizard will exit Once you cli...

Page 47: ...ng board s the Wizard will display the screen shown in figure 24 Click Yes to continue Figure 24 13 If the Wizard has successfully installed the drivers for all of the displays supported by your Barco...

Page 48: ...vise you that the installation failed see figure 27 on the next page Click Finish to exit the Wizard and try reinstalling the drivers following the steps above or using the steps outlined in Reinstall...

Page 49: ...device may not be enabled yet To enable the device check the Extend my Windows desktop onto this monitor checkbox Do not click the Apply button at this time 2 Click on the Advanced Button 3 Select th...

Page 50: ...ay the Windows desktop 5 Click Yes when asked Your desktop has been reconfigured Do you want to keep these settings Repeat steps 1 5 for each monitor display panel on all the BarcoMed Imaging Boards i...

Page 51: ...If necessary detach the second display of the BarcoMed 3MP2FH Imaging Board you are working with by right clicking on the rectangle that represents it and deselect Attached Click the Apply button Note...

Page 52: ...ualView and setting the resolutions in a Quad Head Congifuration you may need to drag the heads into the proper position in the window on the Settings tab so that the arrangement in the window on the...

Page 53: ...o bring up its property page Click on the BARCO Metheus Configuration tab 3 Select Disable DualView from the Monitor Configuration drop down menu see figure 30 below Click OK twice Note If you are usi...

Page 54: ...property page Click on the BARCO Metheus Configuration tab 3 Select Enable DualView from the Monitor Configuration drop down menu see figure 31 below Click OK twice Note If you are using a 3rd party...

Page 55: ...ection 1 Install the BarcoMed 3MP2FH Imaging Board s into your machine Please refer to the hardware installation section of this manual for more information 2 Boot the machine and log in using an acco...

Page 56: ...ard installed Follow the steps below to install the drivers for each additional board 11 Windows 2000 Plug and Play will automatically locate the drivers for the second BarcoMed 3MP2FH board When Wind...

Page 57: ...s to continue the installation 11 When the drivers are installed click Finish on the update driver wizard and click Close on the properties page for the device Reboot your system when asked even if yo...

Page 58: ...out and with DualView enabled under Windows 2000 DualView is a feature that is supported by Windows XP However BARCO has provided a means for the user to enable this functionality while running Window...

Page 59: ...the instructions in the section Initial BarcoMed Display Driver Installation to install the BarcoMed 3MP2FH driver for each 3MP2FH graphics board installed in the system 2 Double click the Add Remove...

Page 60: ...the DualView feature enabled Setting the Resolution of Your ImageTile Display Panel with DualView enabled Once you have completed the installation of the separate screens with DualView you need to se...

Page 61: ...6 Click OK in the Windows will now apply your new desktop settings dialog box Your high resolution display s should now synchronize and display the Windows desktop 7 Click Yes when asked Your desktop...

Page 62: ...w the steps below If you are reinstalling the drivers or installing a new driver release over an existing driver release skip to the step 7 on the next page 1 Install the BarcoMed 3MP2FH Imaging Board...

Page 63: ...e to start the Wizard 8 Click Next on the Wizard Welcome Screen to continue or Cancel to exit the Wizard see figure 35 Figure 35 If you select Cancel a dialog box figure 36 will open asking you to con...

Page 64: ...continue your existing driver will be replaced Click OK to continue Figure 38 If you want to change your selection click OK to continue and then click Back on the next screen 11 Your selection on the...

Page 65: ...ngs Tab of the Display Properties Control Panel one for each head of the Imaging Board If DualView is not enabled you will see a single virtual screen in the display properties dialog for both heads o...

Page 66: ...ck and you will see the previous screen To begin installation click Next to continue If you want to end the installation without installing the driver click Cancel and the Wizard will exit Figure 42 1...

Page 67: ...ng the driver installation Windows XP will warn you that the driver has not passed Windows XP Logo Testing see figure 45 Figure 45 Windows XP Windows Logo Testing Warning Screen Click Continue Anyway...

Page 68: ...your computer now Click Cancel to exit the Wizard and restart your computer at a later time If the installation failed click Finish to exit the Wizard see figure 48 and try reinstalling the drivers f...

Page 69: ...led yet To enable the device check the Extend my Windows desktop onto this monitor checkbox Do not click the Apply button at this time 3 Click on the Advanced Button 4 Select the Adapter tab and then...

Page 70: ...oard 1 To set the resolution for your ImageTile display panel s right click on an empty space of the desktop and select Properties Select the Settings tab see figure 50 on the next page Now select the...

Page 71: ...Configuration Tab 4 Click OK on the bottom of the Adapter Control Panel If the OK button on the bottom of the Adapter Control Panel is not visible press the Tab Key once and then press Enter Your Imag...

Page 72: ...l attached to the BarcoMed Imaging Board you are working with to bring up its property page Click on the BARCO Metheus Configuration tab 3 Select Disable DualView from the Monitor Configuration drop d...

Page 73: ...g Board you are working with to bring up its property page Click on the BARCO Metheus Configuration tab 3 Select Enable DualView from the Monitor Configuration drop down menu see figure 52 below Click...

Page 74: ...for more information 2 Boot the machine and log on using an account with administrative privileges 3 Windows XP will do a thorough inspection of your system and will announce that it has found new ha...

Page 75: ...ced Button 3 Select the Adapter tab and then click on the Properties button 4 Select the Driver tab and click the Update Driver button The Hardware Update Wizard will start 5 Select the Radio Button b...

Page 76: ...led in your system Repeat steps 3 11 until you have installed all of the adapters Setting the Resolution of Your ImageTile Display Panel To set the resolution of your ImageTile Display Panel s see the...

Page 77: ...System manual ImageTile 78 This page intentionally left blank BarcoMed software driver installation...

Page 78: ...1 Open the Display Properties Control Panel by right clicking on the desktop then select Properties 2 Under Windows NT 4 0 Click on the BARCO Metheus Configuration Tab see figure 53 below Under Windo...

Page 79: ...System manual ImageTile 80 Figure 54 Configuration Tab under Windows 2000 Figure 55 Configuration Tab under Windows XP BarcoMed software driver installation...

Page 80: ...mode reserves the first 10 and last 10 entries in the palette for the Windows operating system but applications can manipulate the middle 236 entries This is the standard palette mode as configured b...

Page 81: ...events palette conflicts between applications which can cause image color values to appear distorted in the background application As shown in the picture below each of the 256 entries in the palette...

Page 82: ...nge of colors in an image at the cost of spatial resolution Adjacent pixels are assigned differing color values when viewed from a distance these colors seem to blend into a single intermediate color...

Page 83: ...e registry and it doesn t agree with any of the configurations that the display control panel supports Contact Barco Medical Imaging Systems for further information Languages supported The Barco Methe...

Page 84: ...a B A R U A s d r a o B A R U A n o N s d r a o B s u e h t e M O C R A B n o i t a r u g i f n o C e r a w d r a H t r o p p u S b a T H 2 P M 2 e r a w m r i F d n a I C P n o i t a m r o f n I H F...

Page 85: ...lick on the BARCO Metheus Hardware Configuration Tab see figure 56 below Under Windows 2000 and Windows XP click on the Settings tab Double click on the rectangle that represents the BarcoMed 3MP2FH t...

Page 86: ...and Windows XP Using The BARCO Metheus Hardware Configuration Tab Device Displays the current BarcoMed Imaging Board driver and the currently selected display resolution Identify Device This button is...

Page 87: ...y clicking on this button the user can display more information about the BarcoMed imaging board installed in the selected PCI slot Generate Report Button Clicking this button will produce two reports...

Page 88: ...ication that uses dialog boxes to guide the user through the flash update procedure The user will be prompted to select a firmware update file to use for the update Therefore you will need a firmware...

Page 89: ...System manual ImageTile 90 This page intentionally left blank BarcoMed software driver installation...

Page 90: ...tors require some warm up time before they are at full performance On Barco ImageTile displays the I GUARD will stabilize the image within a few seconds after the monitor returns to the active state t...

Page 91: ...ted in the Scheme box Work Schedule Select the begin and end times for each work day If the system is not expected to be used leave both start and end work day times as the same time Begin Work Day Th...

Page 92: ...e screen savers Settings Changes settings for the selected screen saver DPMS Settings After Work Day If you have an imaging board that supports DPMS calls then you will be able to set the DPMS Setting...

Page 93: ...time On Barco ImageTile displays the I GUARD will stabilize the image within a few seconds after the monitor returns to the active state so there is no need for a warm up time period Use As Logon Scre...

Page 94: ...m to install the default schemes with either Dutch or German names Currently the default schemes are not supported in the Japanese Korean and Chinese languages We recommend that the users of these thr...

Page 95: ...asked to confirm the delete request Using the BarcoMetheus DPMS Screen Saver To set up the Barco Metheus DPMS Screen Saver using one of the three default schemes please do the following 1 Open the Dis...

Page 96: ...System manual ImageTile 97 Figure 58 Windows NT 4 0 Screen Saver Tab BarcoMed software driver installation...

Page 97: ...System manual ImageTile 98 Figure 59 Windows 2000 Screen Saver Tab BarcoMed software driver installation...

Page 98: ...System manual ImageTile 99 Figure 60 Windows XP Screen Saver Tab BarcoMed software driver installation...

Page 99: ...es Control Panel by right clicking on the desktop and then select the Screen Saver tab 2 Select the BarcoMetheus DPMS Screen Saver in the Screen Saver drop down menu if it is not already selected 3 Cl...

Page 100: ...onds after the monitor returns to the active state thus eliminating the need for a warm up period at the beginning of the work day 9 If you wish to use this DPMS screen saver as the screen saver at lo...

Page 101: ...creen Saver in the Currently Installed Programs window Click the Change Remove button 4 The Windows Installer will ask if you are sure you want to remove this program click Yes 5 When the Windows Inst...

Page 102: ...System manual ImageTile 103 SETTING UP SENTINEL...

Page 103: ...System manual ImageTile 104 This page intentionally left blank Sentinel setup...

Page 104: ...ch allows you to set the ImageTile s Internet Protocol address properties Sentinel setup overview To complete sentinel setup you must perform the following actions 1 Install the Sentinel Setup softwar...

Page 105: ...carefully Scroll down to read the complete text 7 Click on Yes if you agree with the License agreement and wish to continue with the installation 8 A window appears indicating the directory where Sen...

Page 106: ...s or acquire an IP address dynamically using the Dynamic Host Configuration Protocol DHCP This is possible when a DHCP server is available Important We advise to enter a fixed IP address Therefore ask...

Page 107: ...Check the option No DHCP server available 5 Enter valid addresses in the fields IP address Subnet Mask and Gateway The addresses must be in the format nnn nnn nnn nnn For the correct addresses also th...

Page 108: ...Configuration dialog to finish 11 When the communication with the ImageTile failed the following message appears Click on OK to close the message and enter the correct data in the dialog If the proble...

Page 109: ...ork Configuration dialog appears Sentinel setup 4 Check the option DHCP server available 5 Enter the IP address of your mail server in the field Mailhost IP For the correct address consult your networ...

Page 110: ...will need it to browse to the ImageTile later Click on OK to close the message Then click on Cancel in the Sentinel Network Configuration dialog to finish 9 When the communication with the ImageTile f...

Page 111: ...how to do this please first read the section ImageTile Web Control further in this manual 5 Reboot Sentinel by using the Reboot Sentinel function on the ImageTile web control pages see next section Ti...

Page 112: ...nel by unplugging the mains power plug from the ImageTile and then plugging it in again 4 Wait for at least 40 seconds for Sentinel to start up happens in background 5 Run the application sentinel set...

Page 113: ...ave forgotten the ImageTile s IP address you can look it up on the computer connected to the ImageTile Therefore start Windows Explorer on that computer and browse to the folder where the Sentinel Set...

Page 114: ...System manual ImageTile 115 IMAGETILE WEB CONTROL...

Page 115: ...System manual ImageTile 116 This page intentionally left blank ImageTile web control...

Page 116: ...ning and error mails Important The ImageTile Web Control will exhibit problems when it runs simultaneously with MediCal Pro Therefore close MediCal Pro before starting the ImageTile Web Control CONNEC...

Page 117: ...r host name Try entering the address or host name again in the web browser Check that both the ImageTile and the computer on which you wish to establish the connection are connected to the network Whe...

Page 118: ...ated by Sentinel We assume you have established connection with the ImageTile and your web browser displays the Sentinel main page Proceed as follows 1 In the Sentinel main page click on Sentinel Init...

Page 119: ...the maximum possible backlight drive and the actual backlight drive It is an indication of how much the backlight is aged In a display with a new backlight a certain drive voltage is applied to the ba...

Page 120: ...the interval 4 To edit the reporting settings click on Edit Fill in the Warning and Error threshold values Typical values are 2 for error and 5 for warning tolerance Fill in the e mail recipient addre...

Page 121: ...this function to check panel parameters on line We assume you have established connection with the ImageTile and your web browser displays the Sentinel main page Proceed as follows 1 In the Sentinel...

Page 122: ...s the runtime of the backlight of each tile Check I Guard Returns the status of each tile s I Guard OK or Not OK Note If the ImageTile is in power save mode e g stand by the following functions will f...

Page 123: ...e selected the Reboot Sentinel function without the intention to assign a new IP address In that case you do not have to do anything Sentinel will reboot After two minutes the ImageTile will be reconn...

Page 124: ...System manual ImageTile 125 MEDICAL SOFTWARE INSTALLATION AND USAGE...

Page 125: ...System manual ImageTile 126 This page intentionally left blank MediCal software installation and usage...

Page 126: ...an connect to MediCal Administrator 2 Set up the configuration in MediCal by using the Configuration Setup wizard 3 If necessary align the displays geometry settings 4 For all the displays in the syst...

Page 127: ...System manual ImageTile 128 This page intentionally left blank MediCal software installation and usage...

Page 128: ...System manual ImageTile 129 APPENDIX...

Page 129: ...System manual ImageTile 130 This page intentionally left blank Appendix...

Page 130: ...oft woolen or cotton towel Use a watery solution or a mild commercial glass cleaning product Cabinet Do not use chemical cleaning products benzene toluene xylene or other solvents Clean with a soft cl...

Page 131: ...ently dark or bright pixels can happen to TFT displays 20 or less permanently dead pixels do not make out a good case for exchanging the unit Please contact our Customer Service Department if the numb...

Page 132: ...2048 Display area H x V per head 423 7 x 318 mm Viewing angle 10 1 contrast Vertical 170 Horizontal 170 Input signals Possible resolutions 640 x 350 85 Hz 720 x 400 75 Hz 1536 x 2048 60 Hz Video Comp...

Page 133: ...nominal Dual head 140 W Quad head 290 W Configuration Standard wall mounting kit included for other mounting options please consult Barco Safety This apparatus conforms to UL 2601 1 c UL CAN CSA 22 2...

Page 134: ...O OUR POLICY OF CONTINUOUS PRODUCT IMPROVEMENT THE ABOVE SPECIFICATIONS ARE SUBJECTED TO CHANGE WITHOUT NOTICE BARCO SHALL NOT BE LIABLE FOR TECHNICAL OR EDITORIAL ERRORS OR OMISSIONS CONTAINED HEREIN...

Page 135: ...System manual ImageTile 136 Appendix...

Reviews: