


601
–
426-03
F70 Series
81
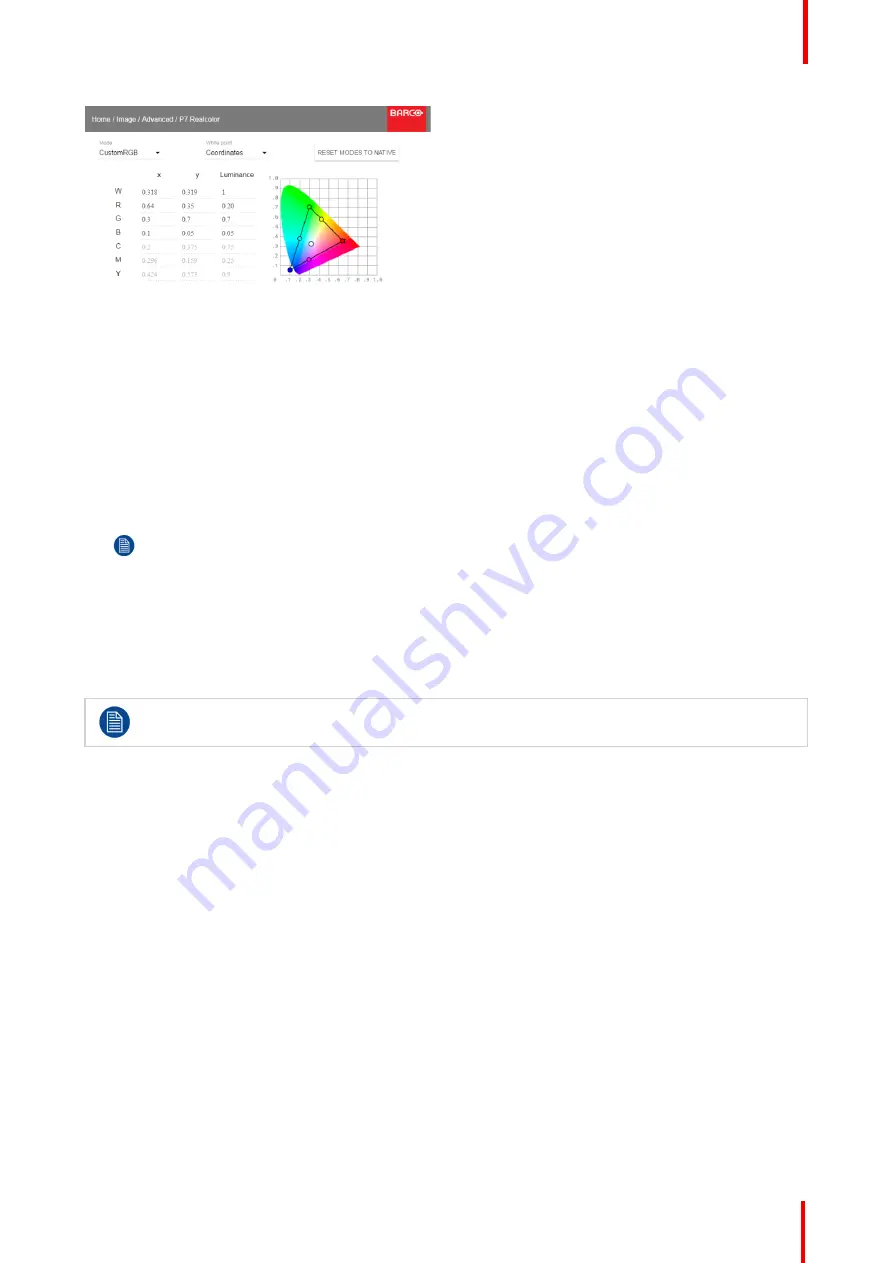
Image 7-14: P7 Realcolor menu
2.
Select the desired
Mode
. Choose one of the following
custom
options:
•
Custom RGB
: 3
–
point color configuration.
In RGB mode, the C, M and Y coordinates will be calculated automatically based on the R, G and B
coordinates.
•
Custom RGBCMY
: 6
–
point color configuration (both RGB and CMY).
In RGBCMY mode, each color can be given a specific coordinate within the measured color triangle.
•
Custom WHITE
: Configure only the White temperature.
3.
Define the coordinates for each available color.
Click on a coordinate value and select the current value. Enter the desired value with the numeric keys.
Note:
You can only pick coordinates within the measured color triangle.
4.
For
Custom White
, click on White point and choose one of the following:
•
Coordinates
: Configure the white point via specific coordinates.
The white point is specified using an x, y coordinate in the CIE 1931 Chart.
•
Temperature
: Configure the white point via a color temperature slider.
The white point is specified on a Kelvin scale between 3200K and 13000K tracking along the black body
curve.
You can reset all coordinates to the default values (to native) by selecting Reset modes to native.
Press
OK
button to reset.
7.6.2 Edit the RealColor presets.
Editing presets
The different presets in the Real Color menu can be edited to obtain an optimal rendering of the picture.
Enter the menu
Home/Image/Advanced/P7 Realcolor.
Select the desired preset mode (EBU, Rec709 or SMPTE-C) and select the coordinate within each color
component that has to be corrected. Enter the desired value by the numeric keys or the arrow key on the
remote control.
The values are stored for the preset, until the
“
Reset
”
button is enabled, or when a factory reset is performed.
There is also a possibility to store the values in the custom presets.. Press the
“
Copy preset to custom
”
button
to save.
The edited presets can be reset to the original values by enter the Reset button. There is also a possibility to
copy the values to the custom preset.
To reset the values in Custom presets, enter the
“
Reset to native
”
button when in Custom mode
Summary of Contents for F70 - 4K6
Page 1: ...ENABLING BRIGHT OUTCOMES User Manual F70 Series...
Page 8: ...601 426 03 F70 Series 8 14 3 FS70 4K6 132 14 4 FS70 W6 134...
Page 26: ...601 426 03 F70 Series 26 Safety...
Page 38: ...601 426 03 F70 Series 38 Getting to know the projector...
Page 46: ...601 426 03 F70 Series 46 Lenses...
Page 68: ...601 426 03 F70 Series 68 Getting started...
Page 74: ...601 426 03 F70 Series 74 Source menu...
Page 76: ...601 426 03 F70 Series 76 Image 7 2 Image sub menu visible on the LCD Image menu...
Page 120: ...601 426 03 F70 Series 120 Status menu...
Page 124: ...601 426 03 F70 Series 124 3D...
Page 125: ...125 Overview Update Projector Firmware 601 426 03 F70 Series User Maintenance 12...
Page 127: ...127 601 426 03 F70 Series Cleaning the projector 13...


