Baby Lock Capella, Instruction And Reference Manual
Introducing the Beresford Capella Owner's Reference Manual - your comprehensive manual to master your Capella product. This essential manual is available for free download at manualshive.com, offering step-by-step instructions, troubleshooting tips, and expert advice to enhance your Capella experience. Unlock the full potential of your Capella effortlessly with this informative user manual.
Share
Download


Reviews:
No comments
Related manuals for Capella

Panafax UF-8000
Brand: Panasonic Pages: 187

KX-TCD820FX
Brand: Panasonic Pages: 6

KX-TCD820E
Brand: Panasonic Pages: 6

DP-180
Brand: Panasonic Pages: 65

Astro
Brand: Necta Pages: 13

Autopax PAX600H
Brand: Quasar Pages: 148

Pronto C110E
Brand: GBC Pages: 12

Little Misty LM-1
Brand: Talent Pages: 6

Terra 3700B 908 4203 010
Brand: Nilfisk-Advance Pages: 68

DR-7UW
Brand: NLI Pages: 36

d-COPIA 4004MF
Brand: Olivetti Pages: 216

01555A
Brand: Clarke Pages: 28

Hydromist Lite
Brand: Truvox Pages: 16

1170 RPM
Brand: Mercury Pages: 6

TAD-798
Brand: Radio Shack Pages: 24

DJ 902
Brand: Karma Pages: 12

SPMVR2520
Brand: Spektrum Pages: 44
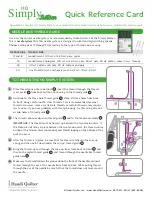
HQ Simply Sixteen
Brand: handi quilter Pages: 2


