22
Pattern type selection screen
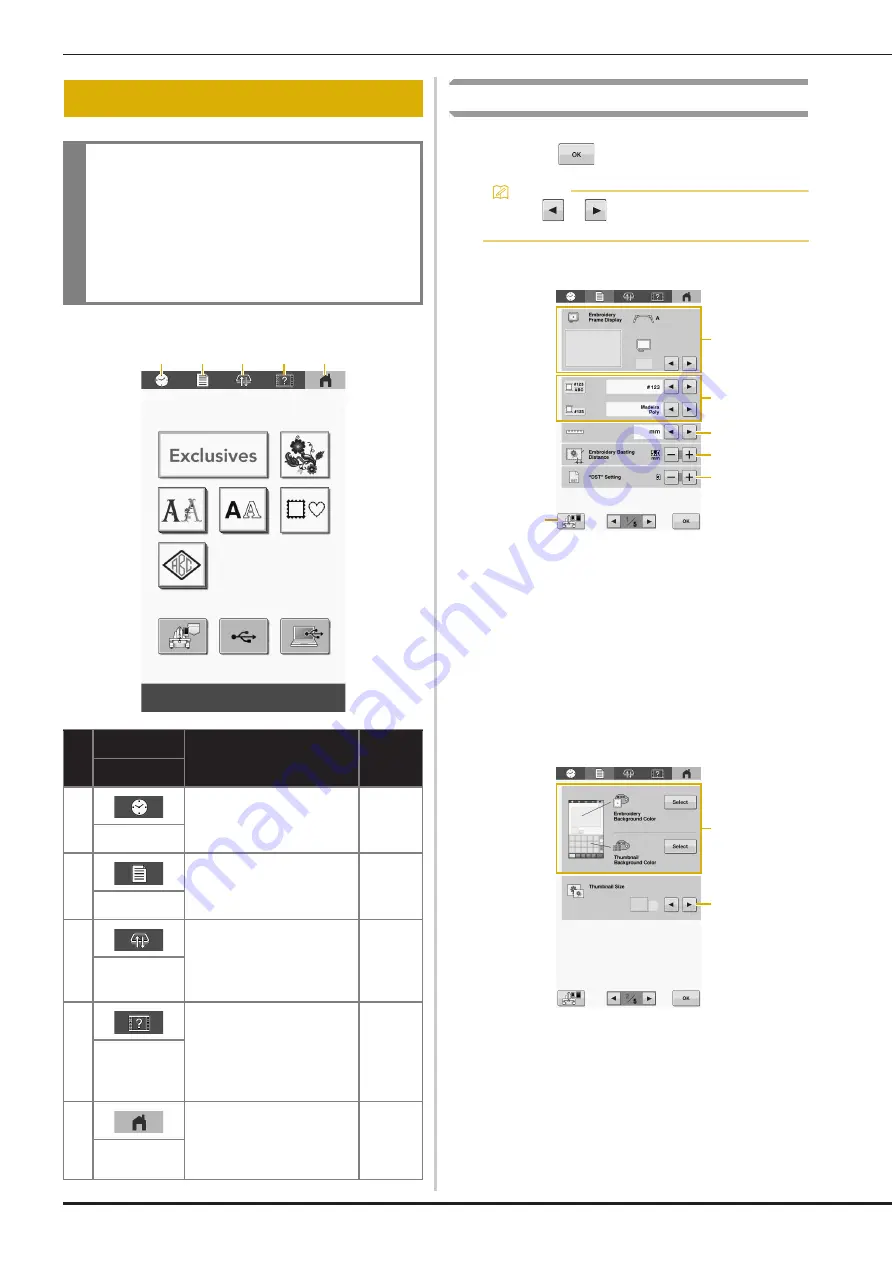
Using the settings key
You can change the various machine settings. After changing
the settings, touch
.
Page 1
1
An image of the current settings screen can be saved on
USB media.
2
The guides (center point marker and grid) for the pattern
display area can be specified. (page 86)
3
The color information can be switched to the color name
or the thread brand and color number. (page 87)
4
Select the display units for embroidering (mm/inch).
5
Specify the distance between the pattern and the
basting stitching. (page 75)
6
When using Tajima embroidery data (.dst), you can
specify whether or not the thread is cut according to the
jump codes. (page 61)
Page 2
1
Depending on the color of the embroidery, changing the
background color of the pattern display area and
thumbnails may make them more visible and easier to
select.
2
Specifies whether the size of image keys that appear
when selecting a pattern from the pattern list screen are
displayed “Small” or “Large”.
LCD SCREEN
IMPORTANT
• Only touch the screen with your finger or the
touch pen included with the machine. Do not
use a mechanical pencil, screwdriver or any
other hard or sharp object. In addition, do not
touch the screen with extreme pressure.
Otherwise the screen may be damaged.
No.
Display
Function
Page
Key Name
1
Set the clock to your local
time.
21
Clock key
2
Change the machine
settings.
22
Settings key
3
Position the carriage so the
embroidery frame can
easily be removed or
attached.
55
Frame move
key
4
Check a machine
operation.
24
Machine
operations
guide key
5
Cancel all operations
previously performed and
return to the initial pattern
type selection screen.
–
Home key
1
2
3
4
5
Memo
• Touch
or
to display the previous or next
page.
3
6
5
4
1
2
2
1


