Digiplexer 246 v2.5.x User Manual – 11/2010
Page 14
Head Office : Parc d’activites Kennedy - 20, avenue Neil Armstrong – F-33700 Bordeaux-Merignac (France)
Tel +33 (0)5 57 928 928 – Fax +33 (0)5 57 928 929 –
–
www.audemat.com
3.6.
Connecting to the network to access remote applications
3.6.
Connecting to the network to access remote applications
1.
Connect network cable B for a direct connection * between your PC and the Digiplexer 246 IP
connector.
1.
Connect network cable B for a direct connection * between your PC and the Digiplexer 246 IP
connector.
* or a straight cable (not provided) for a LAN connection, preferably on the back panel IP
connector.
* or a straight cable (not provided) for a LAN connection, preferably on the back panel IP
connector.
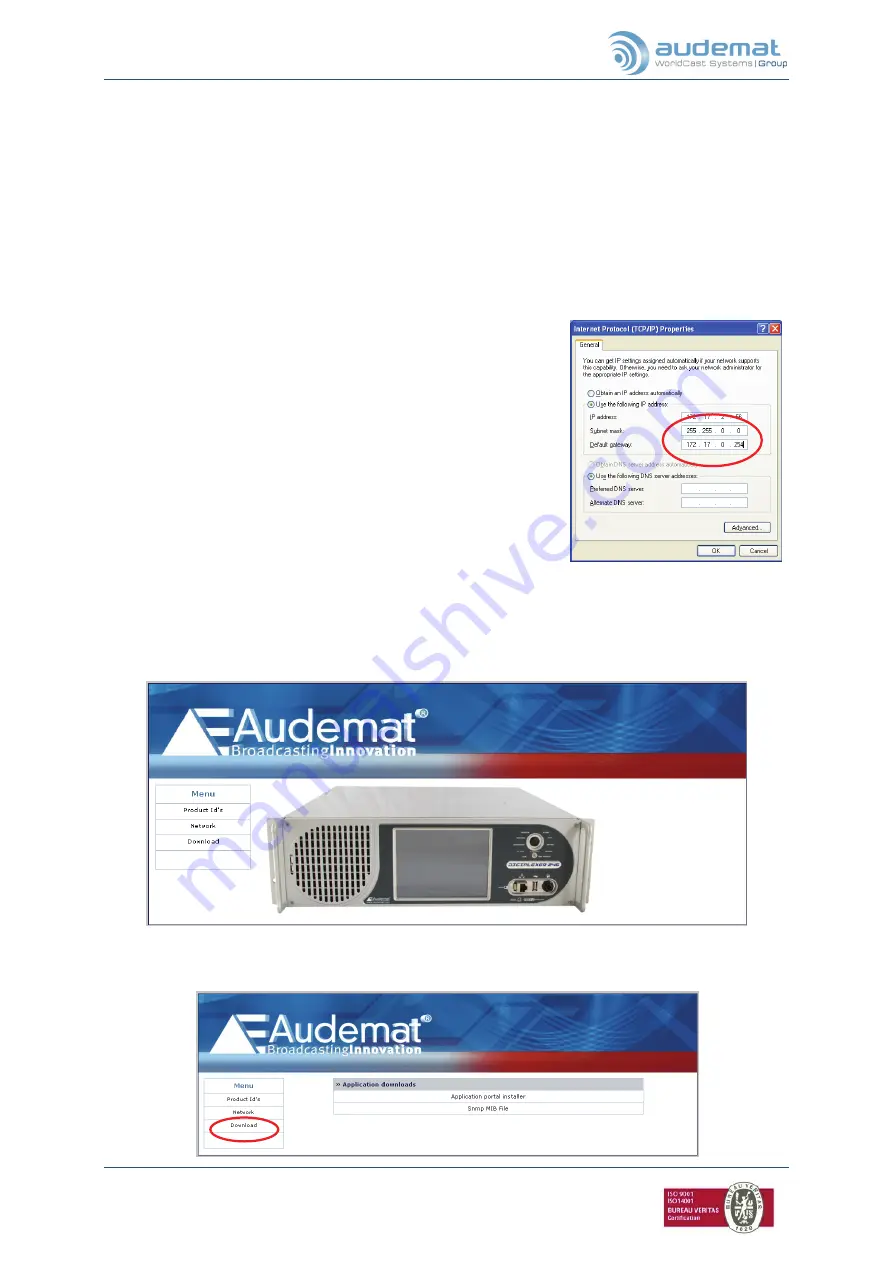
2. In case you are using a direct connection, you will need to set an address on the PC in the same
range as the IP address you just set using the front panel application, so both are compatible.
Example: if the
Digiplexer 246
’s IP address is 172.17.2.35, the PC address must be in the
172.17.2.xx range.
•
For this, if using Windows 2000 or Windows XP, click the “Start” button and:
•
For this, if using Windows 2000 or Windows XP, click the “Start” button and:
¾
Control panel/Network connections / Local Area
Connection / Properties.
¾
Control panel/Network connections / Local Area
Connection / Properties.
¾
Click on Internet Protocol (TCP/IP) in the scroll-
down menu then on “Properties”.
¾
Click on Internet Protocol (TCP/IP) in the scroll-
down menu then on “Properties”.
¾
Add the IP address and the sub-network mask
(for example 172.17.2.56/ Netmask 255.255.0.0).
¾
Add the IP address and the sub-network mask
(for example 172.17.2.56/ Netmask 255.255.0.0).
•
With Vista, click the “Start” button and:
•
With Vista, click the “Start” button and:
¾
Control panel / Network and Internet / Network and
Sharing Center.
¾
Control panel / Network and Internet / Network and
Sharing Center.
¾
Click on “View Status” for your local area connection,
and on Properties.
¾
Click on “View Status” for your local area connection,
and on Properties.
¾
Click on Internet Protocol 6 or 4 depending on your
network, then on Properties.
¾
Click on Internet Protocol 6 or 4 depending on your
network, then on Properties.
¾
Add the IP address and the sub-net mask (for
example 172.17.2.56 / Netmask 255.255.0.0).
¾
Add the IP address and the sub-net mask (for
example 172.17.2.56 / Netmask 255.255.0.0).
3. The installation portal for the remote applications can be downloaded from the Digiplexer 246
embedded web site. Open your web browser (Internet Explorer, Mozilla…) and enter the IP
address you set using the front panel.
Default login and password are: "Admin"/"admin" (case sensitive).
3. The installation portal for the remote applications can be downloaded from the Digiplexer 246
embedded web site. Open your web browser (Internet Explorer, Mozilla…) and enter the IP
address you set using the front panel.
Default login and password are: "Admin"/"admin" (case sensitive).
4. Navigate to the “Download” page.


