CHAPTER 13: FIRMWARE UPDATE & RECOVERY
14-4
MDU Solutions
®
– DVIS/DVISm - Digital Video Insertion System & Mini Digital Video Insertion System - Installation & Operation Manual
14.6.3 Upload Firmware
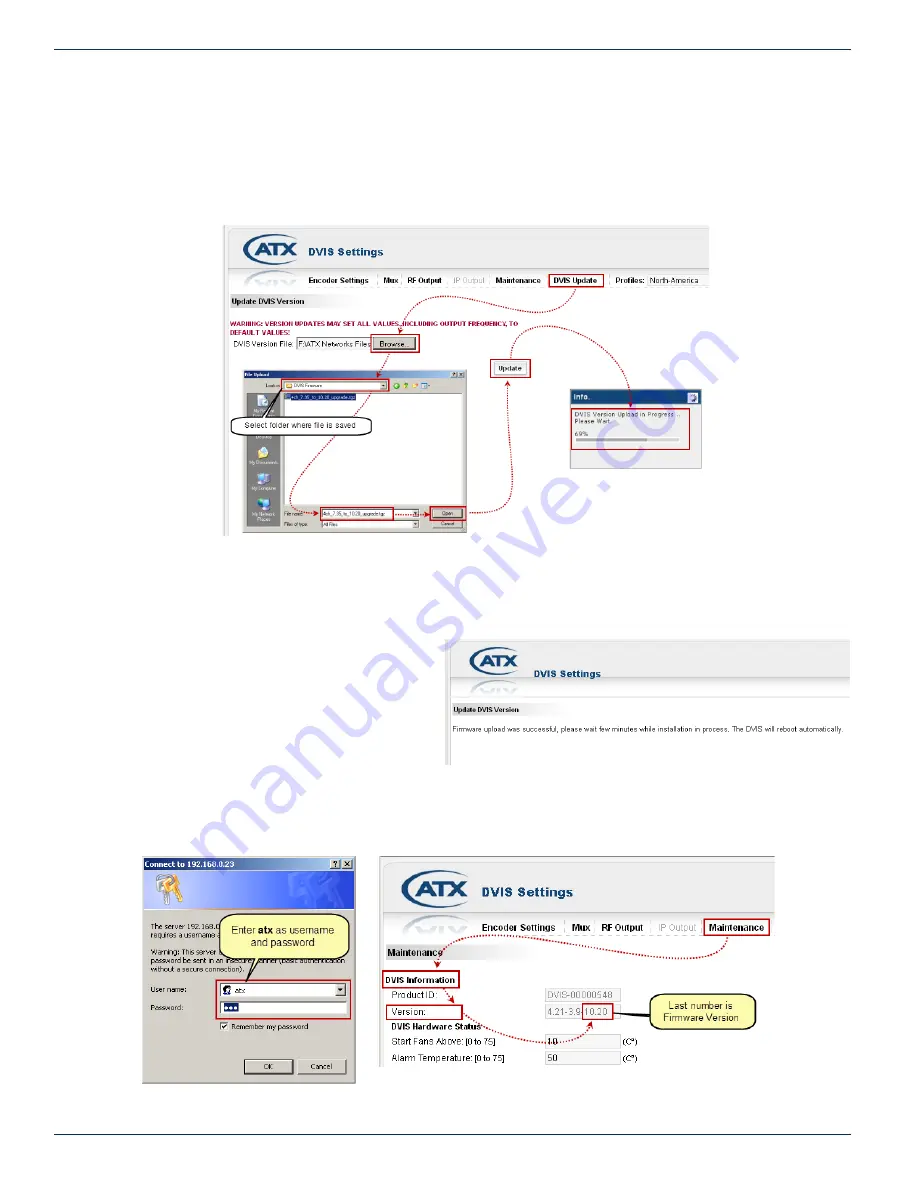
1. Select the ‘DVIS Update’ tab. The ‘Update DVIS Version’ page will appear.
2. Click
Browse
, navigate to the folder on your computer where you saved the .tgz file and click
Open
. The file name
and location appear in the selection box.
3. Click
Update
to begin uploading the file to the DVIS. See Figure 13-3.
4. A progress bar indicates the percentage file upload completion (0 to 100%).
5. When file upload is complete the unit will present the ‘Upload Done’ page, shown in Figure 13-4.
6. When the upload has finished, file installation
begins automatically. The amount of time
required for the firmware file installation
may vary depending on factors such as link
speed and type and size of upgrade file.
7. Close the browser window.
8. When installation has completed, the unit
reboots (indicated when the fans shut off for
a few seconds and then restart).
9. Wait 2 minutes after the fan restarts for the reboot to complete.
10. Open Internet Explorer and enter ‘http://192.168.0.23/site’ in the URL field. When the login screen appears, enter
atx
for both the Username and Password. The DVIS ‘Encoder Settings’ page appears.
Figure 13-3:
Upload Firmware
Figure 13-4:
Upload Done
Figure 13-5: Login
Figure 13-6:
Check New Firmware Version


