


CHAPTER 5: THE MANAGEMENT GUI
MDU Solutions
®
– DVIS/DVISm - Digital Video Insertion System & Mini Digital Video Insertion System - Installation & Operation Manual
5-3
FYI: If you are using a different Operating System or the network address has been changed
from default, adjust the procedures to suit the address or software you are using.
1. Connect the Management Computer’s Ethernet adapter to the device Ethernet port using a Cat5e cable, see Figure
5-6. Link lights should illuminate indicating that the cable connection is correct and working.
2. Set the Management Computer’s Ethernet interface to a static IP address on the 192.168.0.x subnet, as described
in
FYI: If the Management Computer currently has network settings that will need to be used again
after the DVIS system is configured, this would be a good time to makes note of the current
settings if you don’t already know them, so the network adapter may be readily returned to these
values again.
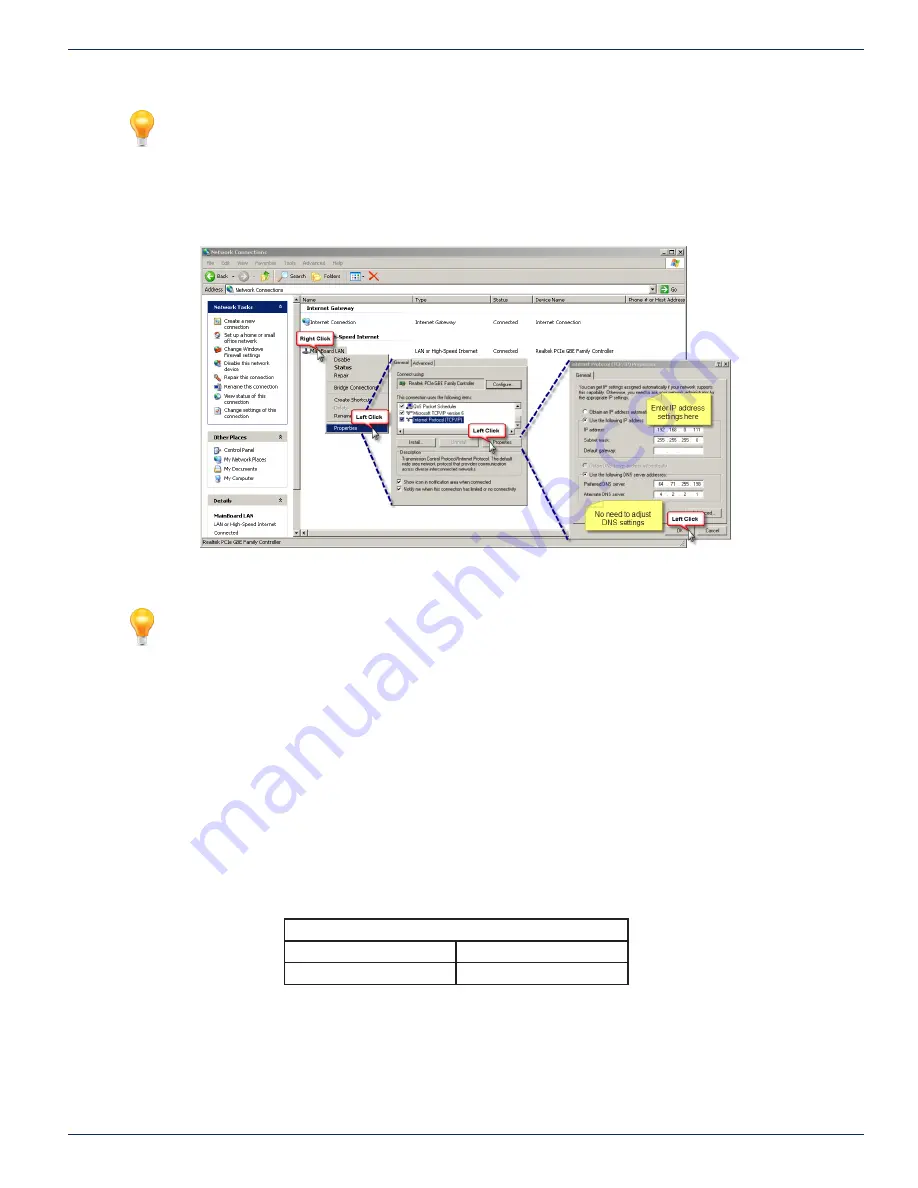
a) From the Control Panel, open ‘Network Connections’ and select the connection associated with the
wired Ethernet adapter to be used for connecting to the DVIS Device (e.g., Local Area Connection).
b) Right click on the connection then select
Properties
.
c) Select ‘Internet Protocol (TCP/IP)’ and click
Properties
.
d) Click the selection box beside
Use the following IP address
.
e) In the ‘IP address’ field, enter
192.168.0.x
(where x represents any number from 1-253 except 23).
f) Click in the ‘Subnet mask’ field and the subnet 255.255.255.0 is automatically entered.
g) Click
OK
and then
OK
again in the previous window.
3.
On the
Management Computer, open a web browser and enter
http://192.168.0.23/site
in the address field.
4. You should get the window shown in Figure 5-4 or similar depending on browser, requesting the username and
password.
Default Username and Password
Username
Password
atx
atx
Figure 5-3:
Setting the Management Computer IP Address


