
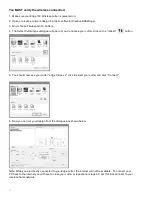

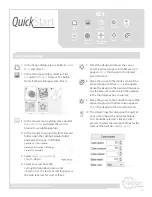

7
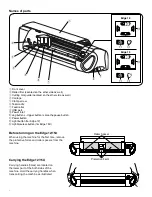
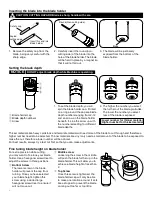
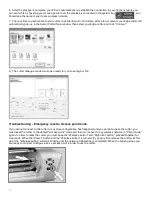
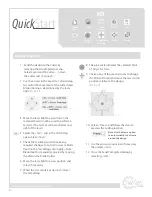
Blade Holder Calibration
To ensure that your blade holder is calibrated correctly with the presets from the software, you may have to make some
adjustments.
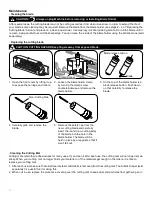
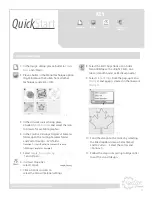
1. Remove the blade frmo the blade
holder to prevent injury. The
Middle Screw is on the same ring
as the number settings. To make
adjustments in the blade depth,
loosen the Middle Screw by
turning counterclockwise using the
smaller hexagonal screwdriver.
2. A.) Use a set of needlenose pliers
to grab the nut around the Blade
Release Button. Turn the dial
clockwise while keeping the Blade
Holder Cap from rotating.
B.) A flathead screwdriver can
also be used to depress the Blade
Release Button until the screwdriver
sits within the grooves of the dial at
the base of the button.
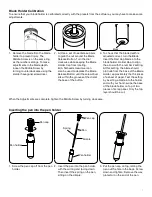
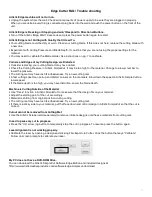
3. To check that the blade depth is
adjusted correct, turn the Blade
Insert the Red Cap blade into the
blade holder. Holder Cap to align
the arrow with the number 2 setting.
At this setting, the blade should
protrude from the base of the Blade
Holder, approximately the thickness
of a sheet of paper. Test the setting
by inserting a blade into the holder
and with your hand, swipe the base
of the blade holder on top of two
pieces of scrap paper. Only the top
layer should be cut.
Blade
When the Adjustments are complete, tighten the Middle Screw by turning clockwise.
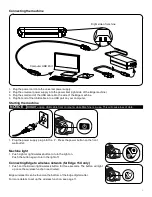
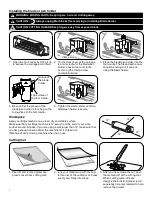
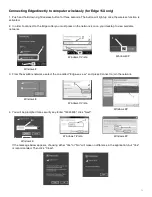
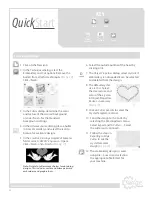
Inserting the pen into the pen holder
Spring
Pen cap
Pen
Pen holder
Pen cap
Pen holder
1. Screw the pen cap off from the pen
holder.
2. Insert the pen into the pen holder,
with the writing end facing down.
Then insert the spring on the pen,
sitting on the dimple.
3. Put the pen cap on top, letting the
pen out the hole in the back. Screw
down and tighten. Remove the wax
protector on the end of the pen.
Dimple