Chapter Seven : Managing the Storage Appliance
171
Storage : NAS Volume Management
This page allows you to manage the existing NAS Volumes, which includes deleting the
NAS Volume, creating User Quotas and NAS Shares. You can access this page by
clicking on any existing NAS Volume.
You can also see a graphical representation of the NAS Volume and Virtual Volume
Statistics.
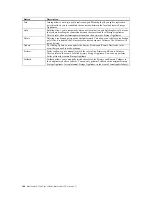
Field Description
Volume Name
This field displays the name of the NAS Volume.
Status
Mounted/In Use
The NAS Volume is mounted and ready to use.
Deleting
The NAS Volume is being deleted
Unmounted/Not-in-Use
The NAS Volume is not mounted and is not in use.
Failed
The NAS Volume has failed.
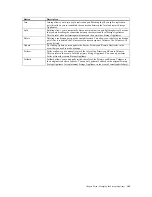
Capacity
This field displays the capacity of the NAS Volume.
Expand Volume
Click on this button if you wish to increase the size of the volume.
Used Space
This field displays the amount of space that has been consumed by data.
Available Space
This field displays the amount of space available for use.
Chunk Size
This field displays the chunk size of the NAS Volume.
Volume Type
This field displays the type of the NAS Volume The default is Redirect on Write (ROW).
Provision Type
This field displays the provisioning type being used on the NAS Volume. It can be either
Thin or Exact Provisioning.
Date Time Created
This field displays when the NAS Volume was created.
Schedule snapshot
This button allows you to access the snapshot schedule configuration page for the volume.
Enable Snap
Validation
This check box will enable snap validation when checked and applied.
Storage : NAS Quota Management
This page allows you to manage storage allocations for local users. This page can be
accessed from the NAS Volume Management page.
Step Action
1
Select the users for whom you want to manage the storage quotas within this NAS
volume.
2
Enter the new storage quota size in MBs and click the
Update
button.
3
Repeat these steps for each user that you want to manage storage quotas for. Click the
Save
button when you are finished.
Note:
You can also set default storage allocations for all new users by placing a check in the
box next to “
Set default quota for new users
” and entering the size of the storage quota in
MBs.
Summary of Contents for ManageTrends 2.7
Page 18: ...StorTrends 1300 User s Guide StorTrends iTX version 2 7 xviii...
Page 24: ...StorTrends 1300 User s Guide StorTrends iTX version 2 7 6...
Page 33: ...Chapter Two Chassis Set Up 15 Accessing the Inside of the System...
Page 60: ...StorTrends 1300 User s Guide StorTrends iTX version 2 7 42...
Page 64: ...StorTrends 1300 User s Guide StorTrends iTX version 2 7 46...
Page 70: ...StorTrends 1300 User s Guide StorTrends iTX version 2 7 52...
Page 100: ...StorTrends 1300 User s Guide StorTrends iTX version 2 7 82...
Page 106: ...StorTrends 1300 User s Guide StorTrends iTX version 2 7 88 Control Panel...
Page 236: ...StorTrends 1300 User s Guide StorTrends iTX version 2 7 218...
Page 256: ...StorTrends 1300 User s Guide StorTrends iTX version 2 7 238...
Page 277: ...Appendix E Replication Overview 259 Snap Assisted Replication Navigating with ManageTrends...
Page 281: ...Appendix E Replication Overview 263 Replication SAR view Primary Box SAR view Secondary Box...
Page 285: ...Appendix E Replication Overview 267 After Failover Operation in Secondary Box...
Page 300: ...StorTrends 1300 User s Guide StorTrends iTX version 2 7 282...
Page 308: ...StorTrends 1300 User s Guide StorTrends iTX version 2 7 290...
Page 330: ...StorTrends 1300 User s Guide StorTrends iTX version 2 7 312...
Page 356: ...StorTrends 1300 User s Guide StorTrends iTX version 2 7 338...


