Electronic Door Fittings of the PegaSys Series
23
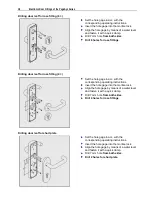
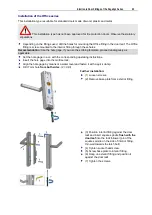
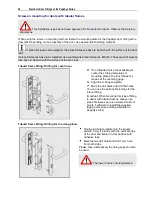
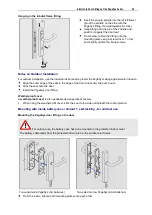
Hanging in the tubular frame fitting
Insert the square spindle into the lock follower
(pin of the spindle on the side with the
PegaSys fitting, thin wall towards the lock).
Hang fitting onto the pin of the spindle and
position it against the door leaf.
From below, fasten the fitting onto the
mounting plate using a screw driver. To this
end, slightly tighten the fixing screws.
Notes on Outdoor Installation
For outdoor installation, use the included rubber seal to protect the PegaSys casing against water intrusion.
Align the outer edge of the seal to the edge of the door and center the punch-outs.
Stick the seal onto the door.
Install the PegaSys door fitting.
Weatherproof cover
A
weatherproof cover
is also available as a separate accessory.
§
When using the weatherproof cover, stick the seal to the side underneath the roof projection.
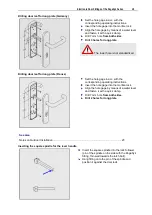
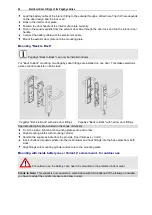
Mounting with inside battery case / Variant 1: self-locking - for outdoor use
Mounting the PegaSys door fitting on the door
For outdoor use, the battery case has to be mounted in the protected indoor area!
The battery cable leads from the protected indoor area to the outdoor electronics.
Two-sided wide PegaSys (AA batteries)
Two-sided narrow PegaSys (AAA batteries)
From the inside, tighten both mounting plates onto each other.
Summary of Contents for PegaSys
Page 2: ......
Page 4: ......
Page 7: ...Installation Instructions for PegaSys Electronic Door Fittings ...
Page 8: ......
Page 34: ......
Page 35: ...Installation Instructions for PegaSys Electronic Lock Cylinders ...
Page 36: ......
Page 52: ......
Page 53: ...Installation Instructions for PegaSys Electronic Locker Locks ...
Page 54: ......
Page 61: ...PegaSys Locker Locks 57 Locking lever type 4 6 5 mm angled ...
Page 63: ...PegaSys Teach In or NetworkOnCard Operation Valid for all PegaSys offline components ...
Page 64: ......
Page 78: ......
Page 83: ......

