


Removing the front bezel
WARNING: Before working inside your computer, read the safety information that shipped with your computer and
follow the steps in
Before working inside your computer
. After working inside your computer, follow the instructions
After working inside your computer
. For more safety best practices, see the Regulatory Compliance home page at
www.dell.com/regulatory_compliance
Prerequisites
1
Remove the
2 Remove the left and right side-panels. See “
3 Remove the
.
Procedure
1
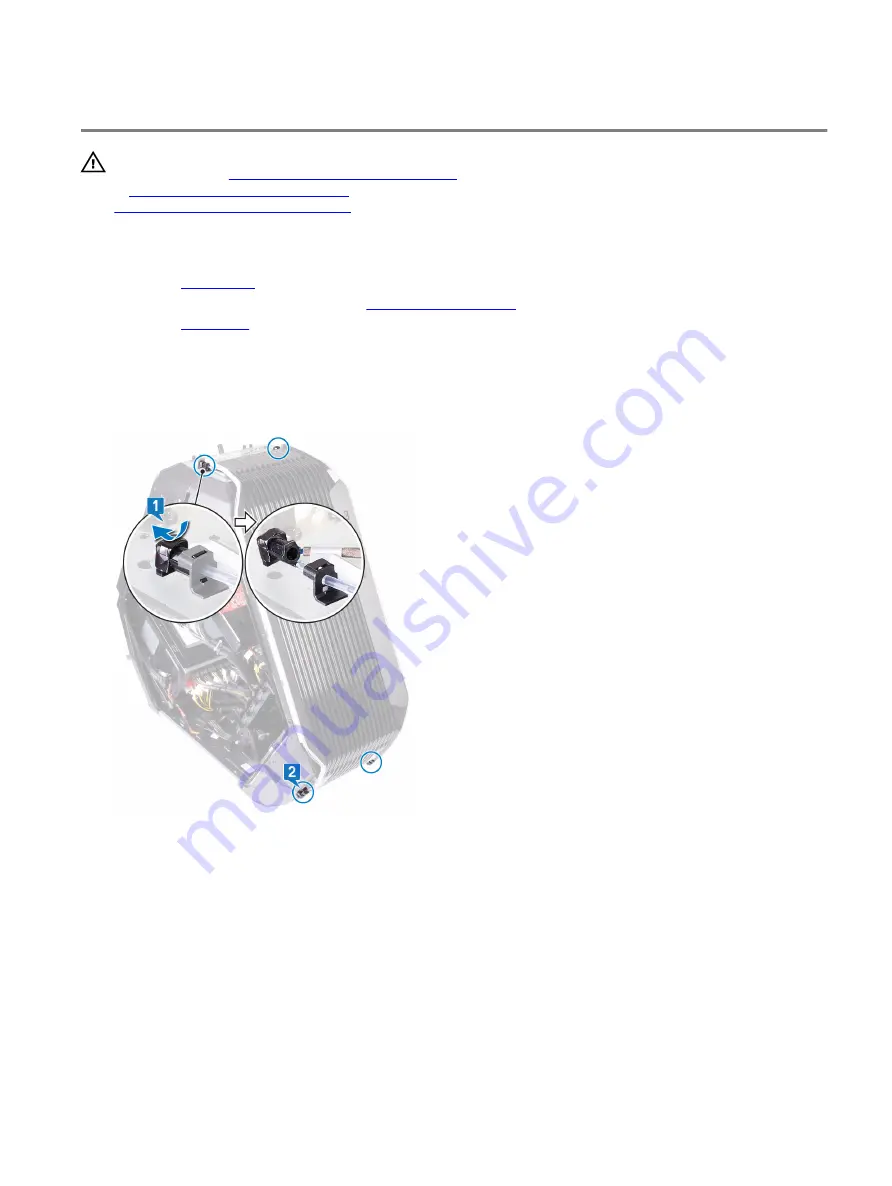
Pull the connector downwards and then disconnect the top tron light-cables from the front bezel.
2 Pull the connector downwards and then disconnect the bottom tron light-cables from the front bezel.
3 Remove the two screws (6-32x5.2) from inside, securing the front bezel to the left side of the chassis.
4 Remove the screw (6-32x5.2) from inside, securing the front bezel to the right side of the chassis.
5 Release the tabs from inside the chassis on the right side, securing the front bezel to the chassis.
108
Summary of Contents for Area-51 Threadripper Edition R7
Page 25: ...4 Tilt the computer back to the upright position 25...
Page 27: ...3 Tilt the computer back to the upright position 27...
Page 53: ...5 Push the release tab and pry the drive bay heat sensor cable off the chassis 53...
Page 59: ...7 Lift the graphics card from the graphics card slot 59...
Page 81: ...5 Push the release tab and pry the front bezel heat sensor cable off the chassis 81...
Page 97: ...4 Lift the system board assembly out of the chassis 5 Remove the processor 97...
Page 103: ...9 Press the bottom handle bar to release the securing tab and remove the bottom handle bar 103...
Page 107: ...2 Replace the stability foot 107...
Page 109: ...6 Pull the front bezel off the chassis 109...
Page 125: ...4 Remove the bottom tron lighting cables from the slot on the chassis 125...
Page 129: ...12 Pull the antenna cables from the slot on the chassis and remove 129...


