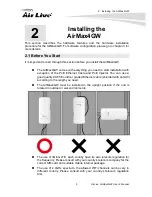


3. Configuring the AirMax4GW
AirLive AirMax4GW User’s Manual
15
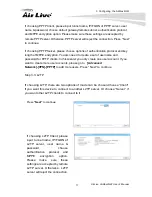
Step 3: Time Zone
Time Zone configuration: It will detect your time zone automatically. If the result of
auto detection is not correct, you can press “ Detect Again” button or select manually.
Press “Next” to continue
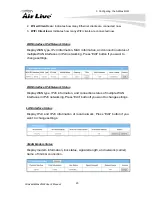
Step 4 WAN
WAN interface Configuration: Choose the physical interface and WAN type for
Internet connection. Because the device provides only 3G/4G physical interface ,
and the only WAN type for the interface is also name as 3G/4G. Leave them without
change. Press “ Next” to continue
Step 4-1 : 3G/4G WAN type
Since the only WAN interface is 3G/4G, please make sure you have inserted one or
two SIM cards. If not, please power off this gateway, and insert SIM cards first. Then
you can select “Auto-Detection” to finish dail-up profile automatically. Press “Next” to
continue.
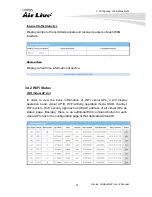
Step 5: Ethernet LAN interface
LAN interface configuration: Change the LAN IP address and subnet mask of this
gateway for the Intranet. You can keep the default setting and go to next step. Press
“Next” to continue.
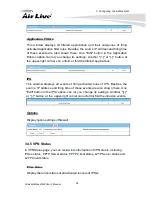
Step 6 WiFi LAN (2.4G)
WiFi LAN interface configuration: Change the SSID, Channel Number,
Authentication and Encryption for first virtual AP of this gateway. You will see on
your PC when doing wireless network scan. It is strongly recommending to add
authentication and encryption in your wireless network to prevent any unknown WiFi
clients and keep transferred data secured. You can also keep the default setting and
go to next step. Press “Next” to continue.
Step 7 Confirm and Apply
Check the new settings again. If all information is correct, please press “Apply”