


4.
Web Management
AirLive AirMax4GW User’s Manual
141
a.
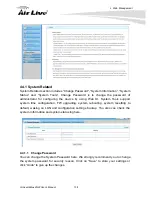
Time Zone
: Select a time zone where this device locates.
b.
Auto-Synchronization
: Check the “Enable” checkbox to enable this function.
Besides, you can select a NTP time server to consult UTC time from the
available list and by default, it is 132.163.4.102.
c.
Daylight Saving Time:
Check the “Enable” checkbox to enable this function.
d.
Set Date & Time Manually:
Set the date and time for system by manual. But
Auto-Synchronization must be unchecked beforehand to do it.
Above is the first way to setup system date and time. That is, it is the manual
way. The second way is “Sync with Timer Server”. Based on your selection
of time server in basic information configuration, system will communicate
with time server by NTP Protocol to get system date and time after you click
on the button. The last way is “Sync with my PC”. Click on the button to let
system synchronizes its date and time to the ones of the configuration PC.
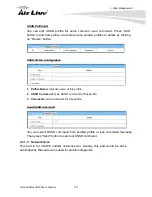
2.
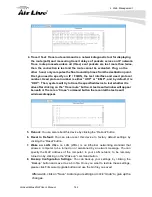
FW Upgrade:
If new firmware is available, you can upgrade router firmware
through the WEB GUI here. After clicking on the “FW Upgrade” command button,
you need to specify the file name of new firmware by using “Browse” button, and
then click “Upgrade” button to start the FW upgrading process on this device. If
you
want to upgrade a firmware which is from GPL policy, please check “Accept
unofficial firmware”.
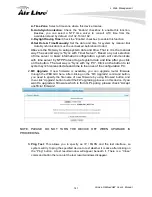
NOTE. PLEASE DO NOT TURN THE DEVICE OFF WHEN UPGRADE IS
PROCEEDING.
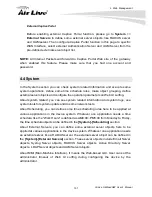
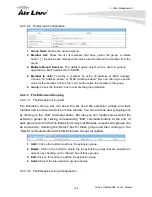
3. Ping Test
: This allows you to specify an IP / FQDN and the test interface, so
system will try to ping the specified device to test whether it is alive after clicking on
the “Ping” button. A test result window will appear beneath it. There is a “Close”
command button there can let the test result windows disappear.