4
Gen IV Controller with Smart Arm Setup Instruction Manual
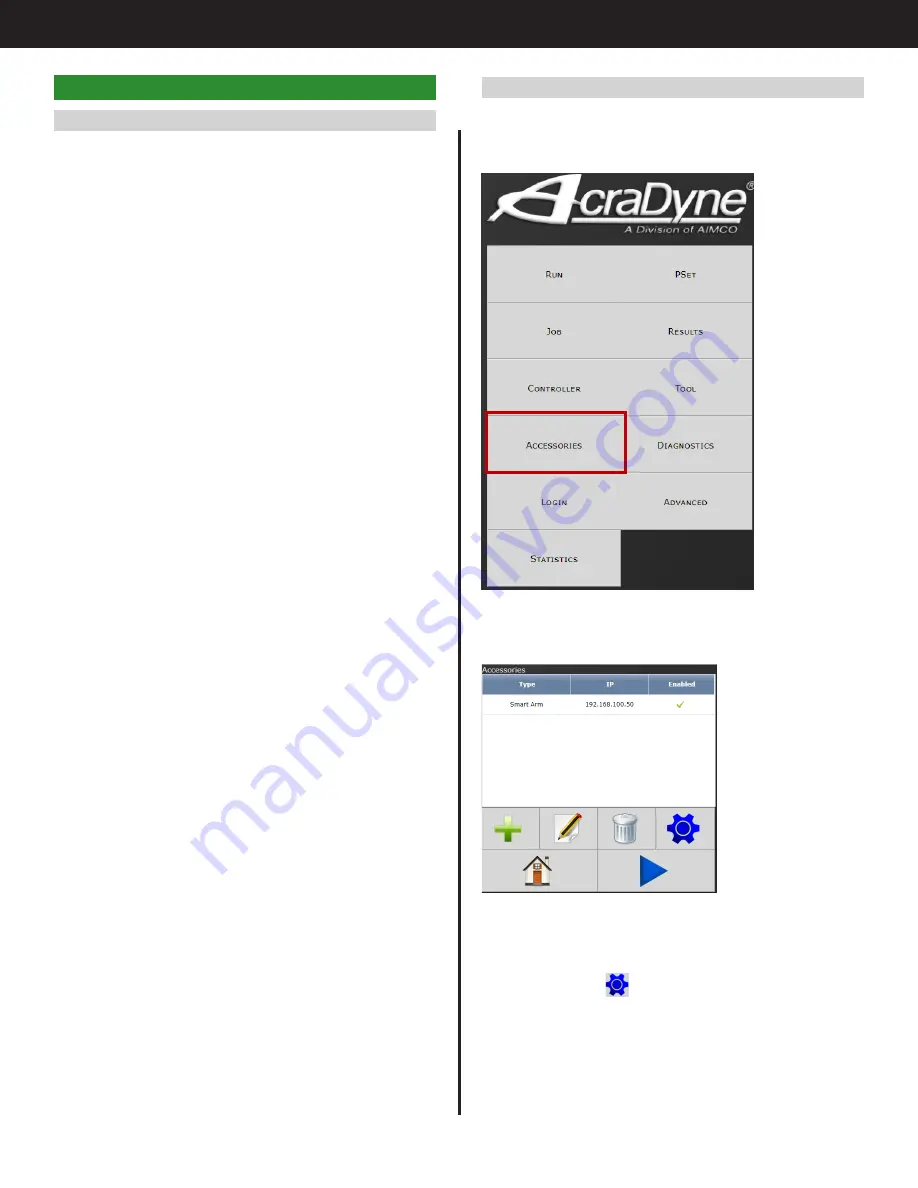
7.2 Accessory Setup Screen
To configure the Smart Arm Accessory, from the
main Gen IV controller screen, select "Accessories."
This will open the Accessory Setup Screen.
This screen shows accessories recognized by the
controller. New accessories can be added, edited,
and deleted using the buttons at the bottom of
the table. Select
to navigate to the Accessory
Scanning and Setup page.
7. Configuration of the Smart Arm Accessory
7.1 Configuration Overview
The smart arm and runscreen can be configured in
many different ways to fit the user’s needs. Almost
any IO functionality works in conjunction with the
smart arm display. The most common setups are
shown below but a wider array of IO, Job, and Arm
functions are available.
1. Arm position selects PSets
a. The controller changes PSet based on arm
location. No fastening sequence is needed
by the application. The screen will show all
locations as valid positions to insert a fastener.
2. Job enabled, Arm selects job sequence
b. The sequence of inserting fasteners is
determined by the arm. The job system will
disable the controller if the arm is positioned
over a fastener that is part of has already
been completed. The locations on the screen
will reset when the job is complete or the
‘Job Complete’ IO is triggered. This system
also allows more flexibility with PSet choice.
If a set of fastenings have different torque/
angle requirements depending on if the
part is new or being reworked then the job
can be changed so a different set of PSets is
associated with the same fastener locations.
3. Job enabled, IO Selects job sequence, Arm
verifies job sequence
c. This setup works best if the line side control
determines which fasteners can be inserted.
The IO will select the job sequence and
the controller will be disabled until the
arm is positioned over a location in that
job sequence. This is a good option when
each fastener needs to be individually
commanded to be run via IO.
Each job sequence can contain one fastener and
the job sequence is equivalent to the location
number. This way the smart arm position location
number and parameter can be matched to the
job sequence number. This way the same PSet
can be used for multiple fasteners because the
job sequence number is the value tied to the
location number. The job number can be changed
which allows different fastening parameters to be
connected to the same locations.
Summary of Contents for AcraDyne
Page 15: ......


