10
Gen IV Controller with Smart Arm Setup Instruction Manual
controller over a web connection. Image must be
470 x 550 pixels for best fit to controller screen.
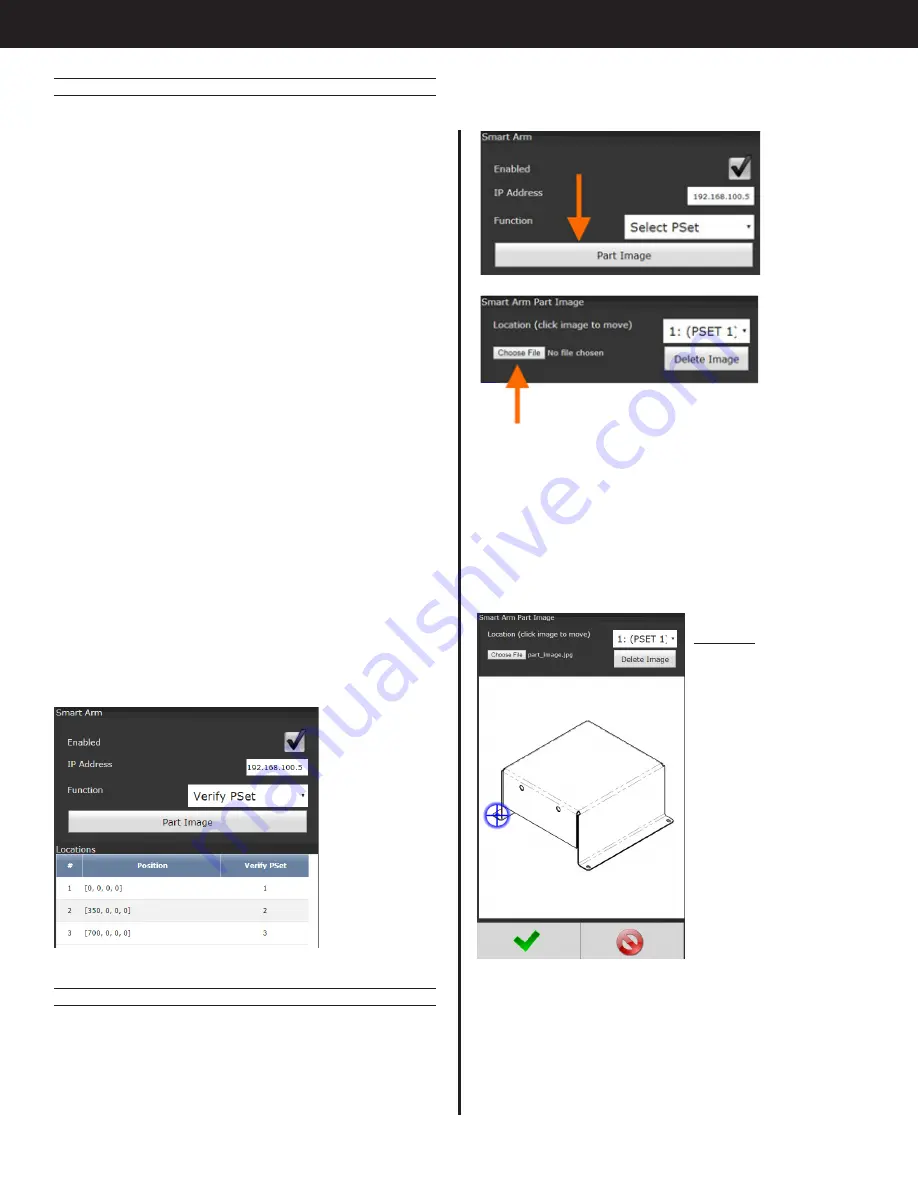
9.1.3.2 Add Locations on the Image
Once an image is selected it will show up in the
space below. Now select a previously set up
location from the top right and then select the
space to associate with that location. Do this for
every location and then save. Save again on the
Smart Arm configuration screen.
Image 1
Adding locations #1
9.1.3.3 Runscreen Behavior
Return to the main Gen IV runscreen and click
left/right arrows until the screen with the part
image is shown. The system is now set up to allow
the controller to change psets based on the arm
position. All valid positions will be blinking with a
green target. When the arm encoder values match
9.1.2 Accessory Setup
Navigate to the Accessories screen, select the
Smart Arm accessory configured in the ‘Initial Setup’
portion and click the edit button.
Set up the accessory function as ‘Select PSet’. This
allows the controller to select the correct PSet for
the arm location.
Before adding locations be sure to move the arm to
the home position and press the ‘Home’ button on
the accessory box. This will be the reference position
for all added locations.
Add three fastener locations. Click the Add(+)
button to add a new location. Move the tool onto
the first fastener. The encoder values in the ‘Current’
column will update with the encoder counts for
this position. Click ‘Use Current Position’ to use
the current arm position for the location. Set the
‘Parameter’ field to 1 to select PSet 1 for this position.
Click OK/Check to save this position.
Repeat this sequence for fasteners 2 and 3. Set
PSet 2 for location 2 and PSet 3 for location 3. Click
the OK/Check button on the main Smart Arm
configuration screen to save all the location.
The controller will now select the correct PSet when
it is located over a defined location. Once located
over the fastener all Smart Arm stops will be cleared,
the correct PSet will be selected, and the tool will
become enabled.
9.1.3 Add Image for Runscreen
9.1.3.1 Upload the Image
Click on the ‘Part Image’ button on the Smart Arm
configuration screen and then ‘Choose File’ from
the image selection screen. The image can be
uploaded from a USB drive from the controller touch
screen or uploaded from a PC when accessing the
Summary of Contents for AcraDyne
Page 15: ......


