13
Gen IV Controller with Smart Arm Setup Instruction Manual
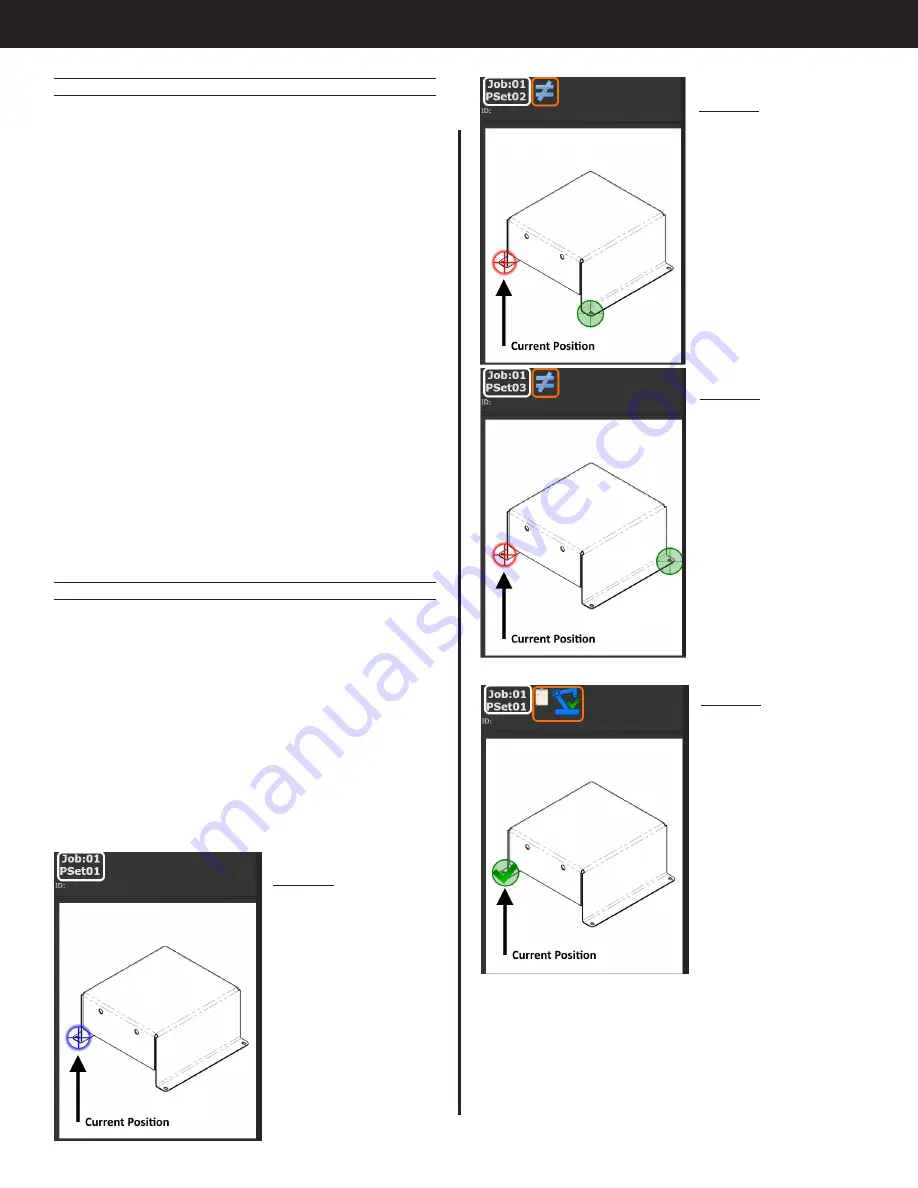
Image 5
Job Seq 2 is selected.
Arm is in position
1 (shown in red as
incorrect position) and
screen shows green
target highlighting
fastener to be
inserted. Stopped icon
appears showing that
the tool is disabled.
Image 6
Job Seq 3 is selected.
Arm is in position
1 (shown in red as
incorrect position)
and screen shows
green target
highlighting fastener
to be inserted.
Stopped icon
appears showing that
the tool is disabled.
Image 7
First fastener has been
inserted successfully.
Current position is
marked OK. Status
bar shows 'Job
Sequence Complete'
and 'Location
Complete'.
9.2.4 External Control
Line side control can be used to command which
fastener needs to be run. Select the Job that
matches the work type (initial or rework) and
select the job sequence number that is tied to the
fastener location. Configure the assignable IO for
the required interface type (CC-Link, Anybus, etc.)
to select a job number and job sequence number.
Refer to the white paper for the specific interface for
configuration details.
In this example, selecting Job 1 and Job Sequence
2 will select PSet 2 and disable the controller until the
arm is in the correct position for fastener 2.
Selecting Job 2 and Job Sequence 3 will select PSet
6 and disable the controller until the arm is in the
correct position for fastener 3.
The front panel and physical IO can be used to
select job number, sequence number, and reset
job if needed for testing. The job can be changed
by holding the toggle button and pressing an up/
down button. Job sequence can be changed by
just pressing an up or down button when jobs are
enabled.
9.2.5 Add Image for Runscreen
Add the image and three locations as shown in "9.1
9.2.5.1 Runscreen Behavior
Return to the Gen IV Runscreen and navigate to
the screen with the part image. The image will
now direct the user to fasten the bolt that is being
commanded from the ‘Select Job Sequence’ input.
The next images show what happens when the
Arm is over location 1 but the commanded Job
Sequence from IO changes from 1, 2, and then 3.
Image 4
Job Seq 1 is selected.
Arm is in correct
position.
Summary of Contents for AcraDyne
Page 15: ......


