12
Gen IV Controller with Smart Arm Setup Instruction Manual
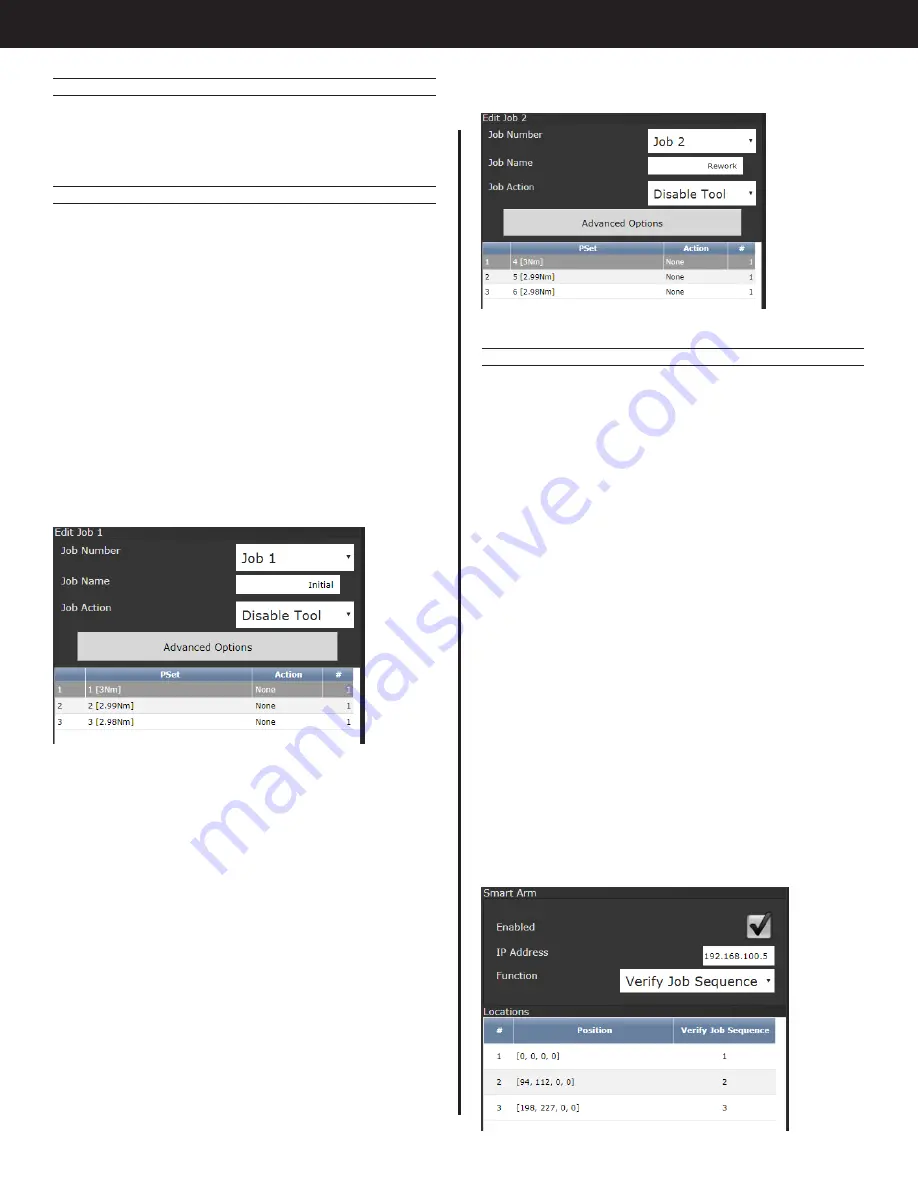
The setup should result in a job that is shown below.
9.2.3 Accessory Setup
Navigate to the Accessories screen, select the
Smart Arm accessory configured in the ‘Initial Setup’
portion and click the edit button.
Set up the accessory function as ‘Verify Job
Sequence’. This allows an external system to select
the job number and job sequence number to define
which fastener needs to be run and whether it
should be from the ‘Initial work’ job or the ‘Rework’
job.
Add three fastener locations. Click the Add(+)
button to add a new location. Set ‘Parameter’ to
1 so that job sequence 1 needs to be selected for
the tool to be enabled. Move the tool onto the
fastener for this location. Click ‘Use Current Position’
to populate the target fields with this locations
encoder values. Click OK/Check. Repeat this for
location 2 and 3. Set ‘Parameter’ to 2 for location 2
and 3 for location 3. Click OK/Check until all Smart
Arm configurations are saved.
Each location is now paired with a job sequence
number. Now configure the line side control to
select the job and job sequence paired to the
fastener and the tool will not be enabled until the
tool is located over the correct fastener.
9.2.1 PSet Setup
Set up six PSets. These can be named in the
advanced settings to make it more clear which PSet
is for which bolt.
9.2.2 Job Setup
Set up two Jobs. Name Job 1 as ‘Initial’ and Job 2 as
‘Rework’.
In job 1 set up the job sequence as the following
•
Sequence 1: PSet 1
○
Action: None
○
Count: 1
•
Sequence 2: PSet 2
○
Action: None
○
Count: 1
•
Sequence 3: PSet 3
○
Action: None
○
Count: 1
The setup should result in a job that is shown below.
In job 2, set up the job sequence as the following:
•
Sequence 1: PSet 4
○
Action: None
○
Count: 1
•
Sequence 2: PSet 5
○
Action: None
○
Count: 1
•
Sequence 3: PSet 6
○
Action: None
○
Count: 1
Summary of Contents for AcraDyne
Page 15: ......


