27
Designing labels
The best way of designing labels will depend on your printer and your label design software. The
following information may be helpful although it may not be relevant in all cases.
•
If possible, use the file that was sent to the die manufacturer as the template for your artwork
file.
The cut lines will be positioned and sized correctly for you already, allowing easier
alignment of the artwork.
o
Do not move the cut lines!
Align the artwork to the cut lines.
•
Set the page length to the die plate length as indicated.
•
Set the page width to your media width, which should be wider than the die plate width to allow
for a black mark that is at least 7mm wide.
•
Most graphics packages use guidelines or grids that can be used to separate the artboard into
sections that relate to the die to allow for better sizing and alignment.
o
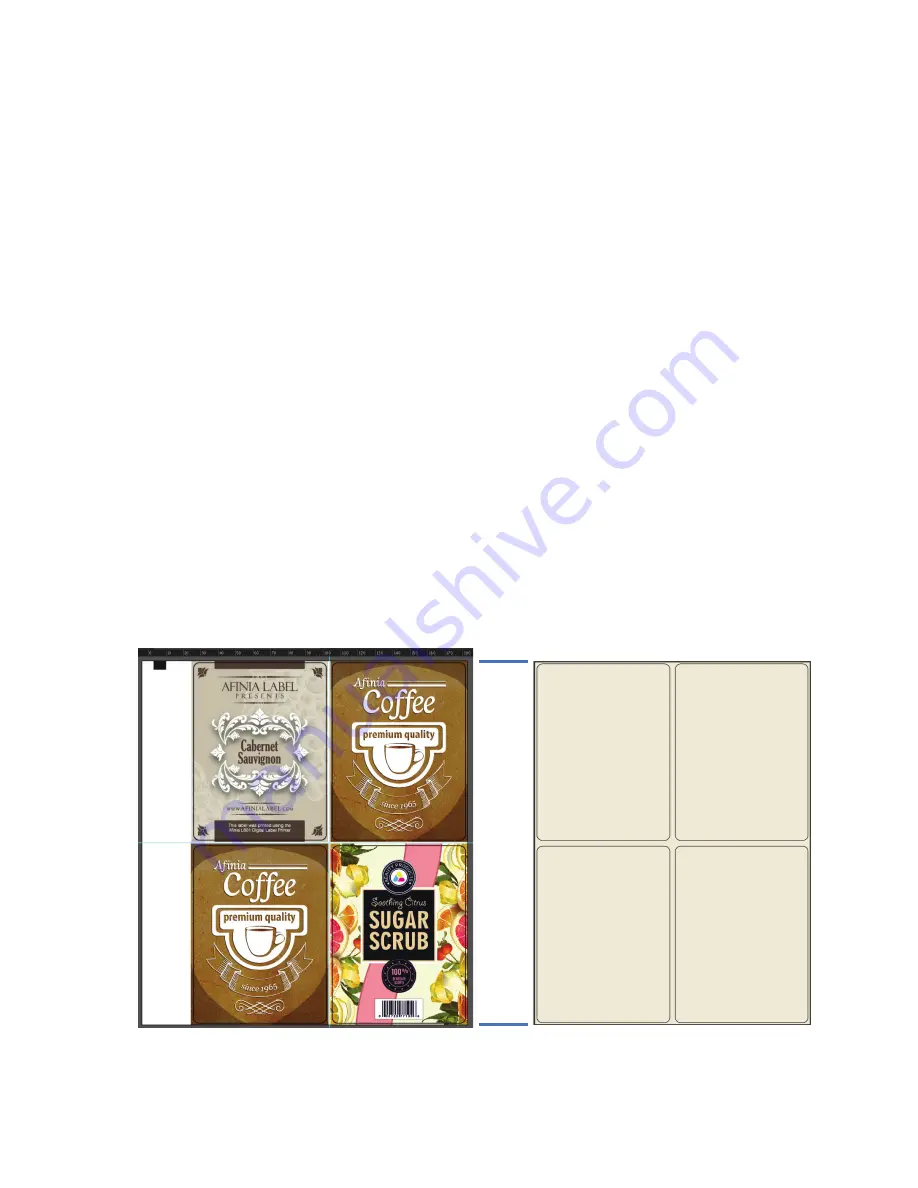
The example below shows a die that is 2 across, 2 up. The blue guidelines in the artwork
split the screen area into four quadrants, one for each individual label.
•
For full bleed labels, create artwork that extends beyond the cut lines.
•
Place your black mark, which should be at least 7mm across the web and 5mm along the web, at
the top of the label, left side.
•
There cannot be any artwork in a vertical line with the mark as this will interfere with
registration!
o
A good practice is to always place the mark in the same position when creating new
artwork. This will reduce the sensor position adjustments needed for cutting.
o
A wider registration mark will also reduce the need for sensor adjustments.
•
Hide the cut lines (in black below) for the print file.
TIP: Create a page template with your software program for each die plate that you use.
Include all details such as page size and black mark size and position. Once you have a
template you will find label design extremely simple.
Di
e P
la
te
Len
gth


