background image

10

SP

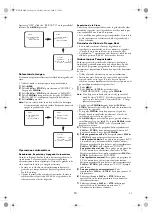
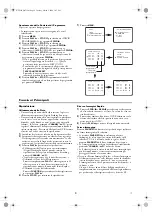
Aparecerá “OFF” al lado de “REP. AUTO” en la pantalla del 
televisor. Pulse 

MENU

 para salir.

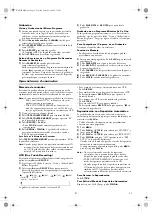
Selección de Imagen

Esta función le permite seleccionar la calidad de imagen de una 
cinta.
• Utilice el mando a distancia para este procedimiento.

1)

Pulse 

MENU

.

2)

Pulse 

PLAY

/

o

 o 

STOP

/

p

 para seleccionar “AJUSTES”, y 

luego pulse 

F.FWD

/

B

.

3)

Pulse 

PLAY

/

o

 o 

STOP

/

p

 para seleccionar “IMAGEN”.

4)

Pulse 

F.FWD

/

B

 hasta que el modo deseado (NORMAL, 

BAJO o ALTO) se indique en la pantalla del televisor.

5)

Pulse 

MENU

 para salir.

Nota:

Una vez seleccionado el modo de selección de imagen, 
éste permanecerá en efecto incluso después de que usted 
apague la grabadora de vídeo.

Operaciones Automáticas

Rebobinado, Expulsión y Apagado Automáticos

Cuando se llegue al final de la cinta durante la grabación, la 
reproducción o el avance rápido, la cinta se rebobinará 
automáticamente hasta el principio. Después, la grabadora de 
vídeo expulsará la cinta y se apagará a sí misma.
• La cinta no se rebobinará automáticamente durante la 

grabación por temporizador ni durante la grabación One 
Touch Recording.

• Cuando la memoria de contador esté activada, la cinta se 

rebobinará hasta la posición M0:00:00 y la grabadora de 
vídeo entrará en el modo de parada.

Expulsión de la Cinta

Una cinta podrá ser expulsada estando la grabadora de vídeo 
encendida o apagada (pero la grabadora de vídeo tendrá que 
estar enchufada a una toma de corriente). 
• Si se establece una grabación por temporizador, la cinta sólo 

podrá expulsarse con la alimentación de la grabadora de 
vídeo conectada.

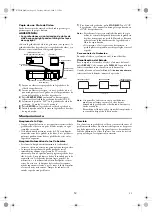
Contador de Cinta de Tiempo Real

• Este contador muestra el tiempo de grabación o 

reproducción transcurrido en horas, minutos y segundos. 
(Cuando la cinta está en blanco no se muestra nada.)

• La indicación “-” aparecerá cuando la cinta se rebobine más 

allá de la posición “0:00:00” del contador de cinta.

Grabación por Temporizador

Puede programar la grabadora de vídeo para que inicie y 
finalice una grabación mientras usted está ausente. Puede 
establecer 8 programas para grabarlos en días específicos, 
diariamente o semanalmente dentro de un período de máximo 
de 1 año. 
• Utilice el mando a distancia para este procedimiento.
• Inserte una cinta de casete con su pestaña de protección 

contra borrado en su lugar. (En caso de ser necesario, 
rebobine o avance rápidamente la cinta hasta el punto en el 
que usted quiera empezar la grabación.)

1)

Pulse 

MENU

.

2)

Pulse 

PLAY

/

o

 o 

STOP

/

p

 para seleccionar 

“TEMPORIZADOR”, y luego pulse 

F.FWD

/

B

.

Nota:

Si no ha puesto todavía en hora el reloj aparecerá el 
menú de ajuste “RELOJ”. Si el reloj está puesto en hora, 
siga los pasos de la sección “Ajuste del Reloj”. Y luego 
ajuste el temporizador.

• Cuando pulse 

F.FWD

/

B

 después de pulsar 

PLAY

/

o

 o 

STOP

/

p

 durante los pasos 

3)

 a 

9)

, el modo de introducción 

pasará al paso siguiente.

• Si no pulsa 

F.FWD

/

B

 antes de que pasen 5 segundos 

después de haber establecido un elemento, el modo de 
introducción pasará al paso siguiente.

• Pulse 

REW

/

s

 para retroceder un paso a partir del ajuste 

actual durante los pasos 

4)

 a 

9)

. Si se pulsa 

REW

/

s

 cuando 

parpadea NÚMERO TEMP., todo el contenido del 
programa se borrará.

3)

El número programado parpadea. Pulse repetidamente 

PLAY

/

o

 o 

STOP

/

p

 hasta que aparezca el número del 

programa deseado. Luego, pulse 

F.FWD

/

B

.

4)

Para una grabación única :

 Pulse repetidamente 

PLAY

/

o


STOP

/

p

 hasta que aparezca el mes pertinente. 

Para la grabación diaria : 

Para grabar un programa de TV 

a la misma hora y del mismo canal de lunes a viernes. 
Mientras parpadea el dígito del mes, pulse repetidamente 

PLAY

/

o

 o 

STOP

/

p

 para seleccionar “LUN-VIE”.

Para grabar todos los días :

 Para grabar un programa de 

TV a la misma hora y del mismo canal todos los días. 
Mientras parpadea el mes, pulse repetidamente 

PLAY

/

o

 o 

STOP

/

p

 para seleccionar “LUN-DOM”.

Para la grabación semanal :

 Para grabar un programa de 

TV a la misma hora y del mismo canal cada semana. 
Mientras parpadea el dígito del mes, pulse repetidamente 

PLAY

/

o

 o 

STOP

/

p

 para seleccionar “S-LUN” (Ejemplo: 

cada lunes).

5)

Para una grabación única solamente :

 Pulse 

repetidamente 

PLAY

/

o

 o 

STOP

/

p

 hasta que aparezca el 

día pertinente.

6)

Pulse repetidamente 

PLAY

/

o

 o 

STOP

/

p

 hasta que 

aparezca la hora de inicio pertinente. A continuación 
introduzca el minuto.

7)

Pulse repetidamente 

PLAY

/

o

 o 

STOP

/

p

 hasta que 

aparezca la hora de finalización pertinente. A 
continuación introduzca el minuto.

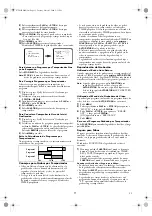
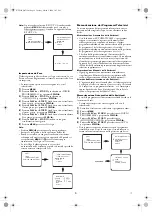
MENÚ

TEMPORIZADOR
AJUSTES
INICIALIZACIÓN

MENÚ

TEMPORIZADOR
AJUSTES
INICIALIZACIÓN

AJUSTES

REP .AUTO

[ON]

IMAGEN

[NORMAL]

REBOB AUT 

[ON]

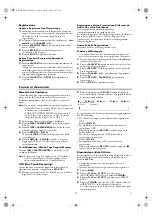
MENÚ

TEMPORIZADOR
AJUSTES
INICIALIZACIÓN

MENÚ

TEMPORIZADOR
AJUSTES
INICIALIZACIÓN

AJUSTES

REP .AUTO

[ON]

IMAGEN

[NORMAL]

REBOB AUT 

[ON]

HG210ED(SP).fm  Page 10  Tuesday, March 2, 2004  2:33 PM

Summary of Contents for VCR 4505

Page 1: ...ial kann geltendes Urheberrecht verletzen Wir übernehmen keine Verantwortung für die unberechtigte Duplizierung Verwendung oder andere Tätigkeiten die die Rechte der Urheber beeinträchtigen EIN HINWEIS ZUM RECYCLING Die Verpackungsmaterialien dieses Gerätes sind recyclebar und können wieder verwendet werden Entsorgen Sie bitte jegliche Materialien entsprechend der regionalen Umweltschutzgesetze Ba...

Page 2: ...Luftfeuchtigkeit kann im Inneren des Gerätes Feuchtigkeit kondensieren Warten Sie mindestens 2 Stunden bis das Gerät innen getrocknet ist bevor Sie den Videorecorder einschalten AUFSTELLUNG Stellen Sie den Videorecorder nicht direkt auf oder unter Ihren Fernseher Stellen Sie sicher dass Videorecorder und Fernseher mindestens 20 cm Abstand haben und dass die Luft frei durch die Lüftungsöffnungen de...

Page 3: ...nd By 12 FUNCTION Anzeige Betrieb 13 TAPE IN Anzeige Kassette 14 TIMER Anzeige Timer 15 REC Anzeige Aufnahme Rückansicht 16 Netzkabel 17 AV2 DECODER Anschluss 18 AV1 TV Anschluss 19 RF OUT Buchse Antennenausgang 20 AERIAL Anschluss Antenneneingang STANDBY FUNCTION TAPE IN TIMER REC FUNCTION CHANNEL STOP EJECT REW PLAY F FWD REC OTR AUTO RETURN 10 9 8 5 4 3 2 6 7 1 11 12 13 14 15 STANDBY FUNCTION T...

Page 4: ...ennenkabel mit dem Videorecorder 4 Schließen Sie den Videorecorder mit dem koaxialen Kabel an den Fernseher an 5 Stecken Sie die Netzkabel des Videorecorders und des Fernsehers in die jeweiligen Steckdosen Andere Anschlüsse EURO SCART AV BUCHSEN Ihr Videorecorder besitzt zwei Scartbuchsen an die Sie andere Geräte mit Scartbuchsen anschließen können Wir empfehlen diese Anschlussart um eine bessere ...

Page 5: ...Y o oder STOP L um Ihre gewünschte Sprache auszuwählen 5 Drücken Sie MENU Videokanaleinstellung Die Einstellung des Videokanals ist notwendig wenn der Videorecorder über das Antennenkabel mit dem Fernseher verbunden ist Verwenden Sie für diesen Vorgang die Fernbedienung 1 Legen Sie eine bereits bespielte Kassette in den Videorecorder ein Der Videorecorder schaltet sich ein und beginnt automatisch ...

Page 6: ...r erste gefundene Kanal wird auf dem Speicherplatz 1 des Videorecorder gesichert der zweite gefundene Kanal wird auf dem Speicherplatz 2 des Videorecorder gesichert usw Das Ausführen der Automatischen Kanaleinstellung löscht alle voreingestellten Kanäle Verwenden Sie NICHT diese Funktion falls Sie einige der voreingestellten Kanäle verwenden möchten Verwenden Sie die Manuelle Kanal Voreinstellung ...

Page 7: ... den numerischen Tasten auswählen Richten Sie sich nach der folgenden Kanalplantabelle und drücken Sie drei Ziffern zur Wahl der Kanalnummer Zum Wählen von Kanal 24 drücken Sie zuerst die Taste 0 und danach 2 und 4 Drücken Sie wenn dies der gewünschte Kanal ist F FWD B Dieser Videorecorder kann Hyper und Oscar Frequenzbänder empfangen 8 Drücken Sie MENU zum Verlassen HINWEIS Drücken Sie zur Bestät...

Page 8: ...ontrolle wenn Sie die Wiedergabe starten Für die manuelle Einstellung der Spurlage drücken Sie bitte auf CHANNEL o p Wenn sich bereits eine Kassette im Videorecorder befindet Verwenden der Tasten am Videorecorder Drücken Sie einfach PLAY am Videorecorder Das Gerät schaltet sich automatisch ein und die Wiedergabe beginnt Direkter Tastenbetrieb Verwenden der Tasten auf der Fernbedienung Drücken Sie ...

Page 9: ... Punkt einfach gefunden werden HINWEIS Es kann sein dass diese Funktion nicht richtig arbeitet wenn auf einer Kassette zwei Sendungen im PAL System und eine Sendung im NTSC System aufgenommen wurden TAPE COUNTER MEMORY funktioniert nicht wenn die automatische Wiederholfunktion auf EIN gestellt wurde Stellen Sie in diesem Fall die automatische Wiederholfunktion auf AUS 1 Halten Sie die Kassette an ...

Page 10: ...r schaltet sich aus Das Band spult bei Timer Aufnahmen oder One Touch Aufnahmen nicht automatisch zurück Wenn der Zählwerksspeicher aktiviert ist spult die Kassette bis zur M0 00 00 Position zurück und stoppt Kassettenauswurf Eine Kassette kann bei ein oder ausgeschaltetem Videorecorder ausgeworfen werden der Videorecorder muss jedoch eingesteckt sein Falls eine Timer Aufnahme programmiert ist kan...

Page 11: ...lossen haben 1 Wiederholen Sie die Schritte 1 bis 3 im Abschnitt Timer Aufnahme 2 Wählen Sie die Einstellung die Sie ändern möchten mit F FWD B oder REW s aus 3 Geben Sie die korrekten Werte mit PLAY o oder STOP L ein und drücken Sie dann F FWD B 4 Drücken Sie MENU zum Verlassen 5 Drücken Sie FUNCTION um zu dem Timer Standby Modus zurück zu kehren UM DIE ANFANGS ENDZEIT ZU LÖSCHEN ODER ZU KORRIGIE...

Page 12: ...in 2 Legen Sie eine leere Videokassette oder die die Sie überschreiben möchten in das Kassettenfach des aufnehmenden Videorecorders ein 3 Drücken Sie SPEED SYSTEM auf der Fernbedienung um die gewünschte Aufnahmegeschwindigkeit SP LP auszuwählen 4 Wählen Sie am aufnehmenden Videorecorder die Position AV2 Weitere Informationen hierzu finden Sie unter Andere Anschlüsse 5 Drücken Sie REC OTR am aufneh...

Page 13: ...nde Feld der Spalte ABHILFEMASSNAHMEN um das Problem ausfindig zu machen und zu beseitigen Leisten Sie Ihren Beitrag zum Umweltschutz Verbrauchte Batterien dürfen nicht weggeworfen werden Sie können diese an einer Sammelstelle für Altbatterien oder Sondermüll entsorgen Wenden Sie sich für weitere Informationen an Ihre Gemeinde SYMPTOM ABHILFEMASSNAHMEN Kein Strom Prüfen Sie ob das Netzkabel mit ei...

Page 14: ... A H nur Italien CATV HF Konverter Eingebauter UHF Konverter Konverterausgang UHF Kanal 22 bis 69 einstellbar Timeranzeige 24 Stundensystem Betriebstemperatur 5 C 40 C Anschlüsse AERIAL RF OUT AUDIO VIDEO Koaxial Buchse Koaxial Stecker 2 St 21 Pin Scartbuchse Videoausgangspegel 1Vp p Videoausgangsimpedanz 75Ω unsymmetrisch Audioausgangspegel 6 dBv Videoeingangspegel 0 5 2 0 Vp p Audioeingangspegel...

Page 15: ... Niederspannungs Richtlinie 73 23 EEC CE Kennzeichnung 93 68 EEC Der Videorecorder VCR 4505 entspricht den folgenden Normen EN55013 2001 EN55020 2002 EN61000 3 2 2000 EN61000 3 3 1995 A1 2001 EN60065 1998 HG210ED GE fm Page 15 Tuesday March 2 2004 5 45 PM ...

Page 16: ...ät in der Originalverpackung zusammen mit dem Kassenbon an Ihren Händler Schäden an Zubehörteilen führen nicht automatisch zum kostenlosen Umtausch des kompletten Gerätes Wenden Sie sich in desem Fall bitte an unsere Hotline Glasbruchschäden bzw Brüche von Kunststoffteilen sind grundsätzlich kostenpflichtig Sowohl Defekte an Verbrauchszubehör bzw Verschleißteilen z B Motorkohlen Knethaken Antriebs...

Page 17: ... gebruik van televisieprogramma s videocassettes film of ander door auteursrechten beschermd materiaal kan door auteursregisterwetten zijn verboden Wij zijn niet aansprakelijk voor een illegale duplicatie het gebruik of andere handelingen die mogelijk in strijd zijn met de rechten van de auteursrechthouders Meer over hergebruik De verpakking van dit toestel is voor recycling geschikt en kan opnieu...

Page 18: ...de verwarming in de kamer wordt aangezet of bij een hoge vochtigheidsgraad Wacht ongeveer 2 uur met gebruik van de videorecorder zodat condens in het toestel goed is verdampt Installeren Plaats de videorecorder niet direct op of onder uw TV Zorg dat er tenminste 20 cm vrije ruimte tussen de videorecorder en de TV is en dat de luchtcirculatie via de ventilatie openingen van de videorecorder niet wo...

Page 19: ...NCTION indicator 13 TAPE IN indicator 14 TIMER indicator 15 REC indicator Achterpaneel 16 Netsnoer 17 AV2 DECODER aansluiting 18 AV1 TV aansluiting 19 RF OUT aansluiting 20 AERIAL aansluiting STANDBY FUNCTION TAPE IN TIMER REC FUNCTION CHANNEL STOP EJECT REW PLAY F FWD REC OTR AUTO RETURN 10 9 8 5 4 3 2 6 7 1 11 12 13 14 15 STANDBY FUNCTION TAPE IN TIMER REC RF OUT AERIAL AV2 DECODER AV1 TV 16 17 ...

Page 20: ...orecorder en de TV in een stopcontact Overige verbindingen Euro scart A V aansluitingen Uw videorecorder heeft twee Scart aansluitingen die u met andere van Scart aansluitingen voorziene apparatuur kunt verbinden Gebruik deze verbinding voor een betere geluid en beeldkwaliteit Euro Scart kabels zijn los in de winkel verkrijgbaar AV1 TV verbinding met tv Indien uw TV Scart aansluitingen heeft kunt ...

Page 21: ...n van het videokanaal U moet het videokanaal instellen indien de videorecorder middels de coaxkabel met de TV is verbonden Gebruik de afstandsbediening voor deze handelingen 1 Plaats een opgenomen cassette in de videorecorder De videorecorder wordt ingeschakeld en de weergave start automatisch Druk op PLAY o indien de weergave niet automatisch start 2 Kies kanaal 36 met uw TV en stel in Ga naar st...

Page 22: ...n zender wordt op kanaalpositie 1 de tweede zender op kanaalpositie 2 etc in het geheugen van de videorecorder vastgelegd Door het Automatisch vastleggen van zenders worden alle reeds vastgelegde zenders gewist Gebruik deze functie NIET indien u bepaalde reeds vastgelegde zenders nog wilt gebruiken Gebruik in dat geval de Handmatig methode om de gewenste extra zenders vast te leggen Handmatig vast...

Page 23: ...wenst kanaalnummer met de cijfertoetsen kiezen Raadpleeg de Lijst met Kanalen hieronder en toets de drie cijfers voor het kanaalnummer in Voor kanaal 24 drukt u eerst op 0 en dan op 2 en 4 Druk op F FWD B indien dit het gewenste kanaal is Deze videorecorder kan Hyper en Oscar frequentiebanden ontvangen 8 Druk op MENU om te stoppen Opmerking Druk op CHANNEL o p om te controleren dat een kanaal is t...

Page 24: ...tracking manueel bij te stellen Met reeds een cassette in de videorecorder geplaatst Met gebruik van de toetsen van de videorecorder Druk eenvoudigweg op PLAY van de videorecorder De stroom wordt automatisch ingeschakeld en de weergave start Directe bediening Met gebruik van de toetsen van de afstandsbediening Druk op FUNCTION om in te schakelen en druk vervolgens op PLAY o 4 Druk op STOP p om de ...

Page 25: ... PAL systeem en NTSC systeem zijn opgenomen TAPE COUNTER MEMORY werkt niet indien de automatische herhaalfunctie op AAN is gesteld Stel in dat geval de automatische herhaalfunctie op UIT 1 Stop de cassette bij het gewenste punt 2 Druk op TAPE COUNTER RESET om 0 00 00 te tonen 3 Druk op TAPE COUNTER MEMORY zodat M verschijnt op het TV scherm 4 Druk op REC OTR of PLAY o Druk op STOP L wanneer de opn...

Page 26: ...etijd wordt in uren minuten en seconden aangegeven In geval van een lege cassette verschijnt er niets De aanduiding verschijnt indien de band verder dan 0 00 00 wordt teruggespoeld Timeropname U kunt de videorecorder programmeren voor het starten en stoppen van een opname terwijl u afwezig bent U kunt 8 programma s instellen voor opnamen op bepaalde dagen dagelijks of elke week binnen een periode ...

Page 27: ...n cassette in de videorecorder zit kan er geen timeropname worden gemaakt en zal de TIMER indicator knipperen Als het wispreventielipje van de cassette uitgebroken is zal de cassette worden uitgeworpen en zal de TIMER indicator knipperen Doe een band in het toestel waarop wel kan worden opgenomen Wanneer alle timeropnamen klaar zijn zal de TIMER indicator ook gaan knipperen Om de opgenomen cassett...

Page 28: ... afgebeeld Kies het gewenste kanaal positienummer wanneer u het kanaal kiest met cijfertoetsen Opmerking Als het in beeld display of de indicators op het voorpaneel abnormale of helemaal geen aanduidingen vertonen haal dan de stekker van de videorecorder 2 minuten lang uit het stopcontact en doe de stekker dan weer terug Vergeet niet dat na deze onderbreking van de stroomvoorziening de instellinge...

Page 29: ...keld Controleer dat de klok van de videorecorder juist is ingesteld Opnamefunctie werkt niet Controleer dat het wispreventielipje van de cassette niet is verwijderd Indien verwijderd bedek dan de ontstane opening met plakband Geen beeld of slecht beeld bij weergave Kies het videokanaal van uw TV Stem uw TV nauwkeuriger af Geen beeld maar geluid is goed bij weergave De kop moet worden gereinigd Raa...

Page 30: ... H Uitsluitend Italië CATV RF converter Ingebouwde UHF converter Converter uitgang UHF kanaal 22 t m 69 instelbaar Timeraanduiding 24 uur systeem Bedrijfstemperatuur 5 C 40 C Aansluitingen AERIAL RF OUT AUDIO VIDEO Coaxiaal type vrouwelijk Coaxiaal type mannelijk 21 Pin scart aansluiting x 2 Video uitgangsniveau 1Vp p Video uitgangsimpedantie 75Ωongebalanceerd Audio uitgangsniveau 6 dBv Video inga...

Page 31: ...001 EN 55020 2002 EN 61000 3 2 2000 EN 61000 3 3 1995 A1 2001 EN 60065 1998 DENK AAN HET MILIEU Gebruikte oude batterijen welke met de ISO Symbol voorzien zijn zowel de oplaadbare batterijen accumulatorcellen knopcellen en starter auto cellen mogen niet in het huisvuil Geef deze batterijen af bij een van de speciale verzamelplaatsen HG210ED DU fm Page 15 Tuesday March 2 2004 3 38 PM ...

Page 32: ...compleet met de aankoopbon te retourneren aan de zaak waar u het gekocht heeft Een gebrek aan een accessoire leidt niet noodzakelijkerwijs tot de kosteloze vervanging van het gehele product Bel in voorkomende gevallen onze hotline Gebroken glazen of plastic onderdelen worden doorgaans niet kosteloos vervangen Gebrekkige accessoires of versleten onderdelen bijv motorelektroden deeghaken drijfriemen...

Page 33: ...zación de programas de televisión cintas de vídeo películas u otros materiales con copyright puede violar las leyes aplicables al copyright No asumimos ninguna responsabilidad por la duplicación o utilización llevadas a cabo sin autorización ni tampoco por otros actos que puedan infringir los derechos de los propietarios del copyright Nota Acerca del Reciclado Los materiales de embalaje de este pr...

Page 34: ...otro caliente después de calentar una habitación fría o bajo condiciones de alta humedad No utilice la grabadora de vídeo durante un mínimo de 2 horas hasta que se seque su interior Posicionamiento No coloque la grabadora de vídeo directamente encima o debajo de su televisor Asegúrese de que haya un mínimo de 20 cm entre la grabadora de vídeo y el televisor y de que el aire pueda circular libremen...

Page 35: ...ador 11 Indicador STANDBY 12 Indicador FUNCTION 13 Indicador TAPE IN 14 Indicador TIMER 15 Indicador REC Panel Trasero 16 Cable de alimentación 17 Toma AV2 DECODER 18 Toma AV1 TV 19 Toma RF OUT 20 Toma AERIAL STANDBY FUNCTION TAPE IN TIMER REC FUNCTION CHANNEL STOP EJECT REW PLAY F FWD REC OTR AUTO RETURN 10 9 8 5 4 3 2 6 7 1 11 12 13 14 15 STANDBY FUNCTION TAPE IN TIMER REC RF OUT AERIAL AV2 DECO...

Page 36: ...izando el cable coaxial 5 Enchufe los cables de alimentación de la grabadora de vídeo y del televisor en las tomas de CA Otras Conexiones Tomas Euro Scart A V Su grabadora de vídeo dispone de dos tomas Scart que usted podrá conectar a otros dispositivos externos que dispongan de tomas Scart Le recomendamos hacer esta conexión para garantizar una mejor calidad de sonido e imagen Los cables Euro Sca...

Page 37: ...deo está conectada al televisor mediante el cable coaxial será necesario ajustar el canal de vídeo Utilice el mando a distancia para este procedimiento 1 Inserte una cinta pregrabada en la grabadora de vídeo La grabadora de vídeo se encenderá e iniciará automáticamente la reproducción Si la reproducción no empieza pulse PLAY o 2 Seleccione y ajuste su televisor al canal 36 Si la imagen de reproduc...

Page 38: ...e canal 1 de la grabadora de vídeo el segundo canal encontrado se memorizará en la posición de canal 2 de la grabadora de vídeo y así sucesivamente La ejecución del preajuste Automático de canales cancela todos los canales preajustados NO utilice esta función si piensa utilizar algunos de los canales presintonizados Utilice la función de preajuste Manual de canales para sintonizar más canales si l...

Page 39: ...r Puede seleccionar un número de canal deseado utilizando los botones de número Deberá consultar el siguiente plan de canales y pulse los tres dígitos para seleccionar el número del canal para seleccionar el canal 24 pulse primero el botón 0 y después pulse 2 y 4 Si éste es el canal que usted quiere pulse F FWD B Esta grabadora de vídeo puede recibir bandas de frecuencias Hyper y Oscar 8 Pulse MEN...

Page 40: ... la reproducción Para ajustar manualmente el seguimiento pulse CHANNEL o p Si ya hay una cinta en la grabadora de vídeo Utilizando los botones de la grabadora de vídeo Pulse PLAY o en la grabadora de vídeo La alimentación se conectará automáticamente y la reproducción empezará operación directa de botón Utilizando los botones del mando a distancia Pulse FUNCTION para encender y luego pulse PLAY o ...

Page 41: ... en la pantalla del televisor 4 Pulse REC OTR o PLAY o Pulse STOP L cuando termine la grabación o la reproducción 5 Pulse REW s o F FWD B La grabadora de vídeo se parará automáticamente cuando el contador vuelva a 0 00 00 aproximadamente Para Salir de la Memoria del Contador Pulse TAPE COUNTER MEMORY para que desaparezca M de la pantalla del televisor Nota Cuando ponga el modo de repetición automá...

Page 42: ...borrado en su lugar En caso de ser necesario rebobine o avance rápidamente la cinta hasta el punto en el que usted quiera empezar la grabación 1 Pulse MENU 2 Pulse PLAY o o STOP p para seleccionar TEMPORIZADOR y luego pulse F FWD B Nota Si no ha puesto todavía en hora el reloj aparecerá el menú de ajuste RELOJ Si el reloj está puesto en hora siga los pasos de la sección Ajuste del Reloj Y luego aj...

Page 43: ...CTION y pulse PLAY o o EJECT Para rebobinar la cinta al principio de los programas grabados pulse AUTO RETURN en la grabadora de vídeo El televisor que esté conectado a su grabadora de vídeo puede ser encendido o apagado cuando la grabadora de vídeo se encuentre en el modo de grabación por temporizador La grabadora de vídeo sólo realizará una grabación por temporizador una vez que haya sido puesta...

Page 44: ...Nota Si la pantalla o indicadores en el panel delantero muestran una lectura anormal o no hay lectura desenchufe la grabadora de vídeo durante 2 minutos y vuelva a enchufar Recuerde que el idioma reloj y ajustes del temporizador se cancelarán después de la desconexión Mantenimiento Limpieza de la Caja Limpie el panel delantero y otras superficies exteriores de la grabadora de vídeo con un paño bla...

Page 45: ... de que el bloqueo de la grabadora de vídeo esté ajustado correctamente El modo de grabación no se puede activar Asegúrese de que la pestaña contra borrado esté intacta Si ha sido retirada tapa el agujero que ha quedado al quitarla con cinta adhesiva No hay imagen o la reproducción no es de buena calidad Ajuste el canal de vídeo en su televisor Haga la sintonización fina de su televisor No se repr...

Page 46: ...ente CATV Convertidor de RF Convertidor UHF incorporado Salida de convertidor Canales 22 a 69 de UHF ajustables Indicación del temporizador Sistema de 24 horas Temperatura de funcionamiento 5ºC 40ºC Terminales AERIAL RF OUT AUDIO VIDEO Tipo coaxial hembra Tipo coaxial macho 2 tomas scart de 21 pins Nivel de salida de vídeo 1Vp p Impedancia de salida de vídeo 75Ω desequilibrada Nivel de salida de a...

Page 47: ...C Directiva de baja tensión 73 23 EEC Marca CE 93 68 EEC La grabadora de vídeo VCR 4505 cumplen con las normas siguientes EN 55013 2001 EN 55020 2002 EN 61000 3 2 2000 EN 61000 3 3 1995 A1 2001 EN 60065 1998 HG210ED SP fm Page 15 Tuesday March 2 2004 2 33 PM ...

Page 48: ...o no implica necesariamente el cambio gratuito de todo el aparato En este caso llame a nuestra línea de urgencia El cambio de las piezas de vidrio o plástico rotas deberá pagarse Los accesorios defectuosos o piezas gastadas por ejemplo electrodos del motor ganchos de masa correas de mando control remoto de repuesto cepillos de dientes de repuesto hojas de sierra etc así como la limpieza mantenimie...

Page 49: ...ssioni televisive o il loro utilizzo e la duplicazione o la copia di video film e altro materiale protetto dai diritti d autore copyright Non ci assumiamo alcuna responsabilità per le conseguenze derivanti dalla duplicazione e l utilizzo non autorizzati di tali materiali e da altri atti di violazione dei diritti d autore Un Cenno Sul Riciclo Degli Imballaggi I materiali d imballaggio di questo pro...

Page 50: ...ito al riscaldamento di una stanza fredda o in condizioni di elevata umidità potrebbe formarsi condensa all interno dell apparecchio Attendete almeno 2 ore prima di utilizzare l apparecchio affinché l umidità condensata al suo interno possa asciugarsi Sistemazione del Videoregistratore Non collocate il videoregistratore direttamente sopra o sotto il televisore Accertatevi che ci sia uno spazio di ...

Page 51: ...NDBY 12 Indicatore FUNCTION 13 Indicatore TAPE IN 14 Indicatore TIMER 15 Indicatore REC Pannello Posteriore 16 Cavo di alimentazione 17 Presa AV2 DECODER 18 Presa AV1 TV 19 Uscita antenna RF OUT 20 Ingresso antenna AERIAL STANDBY FUNCTION TAPE IN TIMER REC FUNCTION CHANNEL STOP EJECT REW PLAY F FWD REC OTR AUTO RETURN 10 9 8 5 4 3 2 6 7 1 11 12 13 14 15 STANDBY FUNCTION TAPE IN TIMER REC 18 17 19 ...

Page 52: ...mentazione del videoregistratore e del televisore nelle prese di corrente Altri Collegamenti Collegamenti Euro A V Scart Il videoregistratore è dotato di due prese audio video EURO A V previste per il collegamento con altri apparecchi esterni provvisti a loro volta di prese audio video Questo tipo di collegamento è consigliato in quanto garantisce una migliore qualità audio e video I cavi Euro aud...

Page 53: ... 4 Premete PLAY o o STOP p ripetutamente per selezionare la lingua desiderata 5 Premete MENU Impostazione del Canale Video L impostazione del canale video è necessaria se il videoregistratore è collegato al televisore tramite il cavo per antenna coassiale Le impostazioni possono essere eseguite solo con il telecomando 1 Inserite una videocassetta registrata Il videoregistratore si accenderà automa...

Page 54: ...ndo programma individuato viene memorizzato nella posizione di programma 2 del videoregistratore e così via L utilizzo della memorizzazione Automatica delle emittenti cancella tutti i canali memorizzati Non utilizzate questa funzione se desiderate conservare le posizioni di alcuni dei programmi già memorizzati nel videoregistratore In questo caso servirsi della funzione di memorizzazione Manuale d...

Page 55: ...pparirà sullo schermo televisivo Selezionate il numero del canale desiderato con i tasti numerici Consultate il seguente Schema dei canali e digitate un numero a tre cifre per selezionare il numero del canale per selezionare il canale 24 premete prima il tasto 0 e poi 2 e 4 Se questo è il canale desiderato premete F FWD B Questo videoregistratore riceve le bande HYPER e OSCAR 8 Premete MENU per te...

Page 56: ...mente il tracking premete CHANNEL o p Se nel videoregistratore c è già una videocassetta Utilizzando il tasto del videoregistratore Premete semplicemente PLAY sul videoregistratore Il videoregistratore si accende automaticamente e la riproduzione comincia Funzione di Inizio Rapido Utilizzando il tasto del telecomando Premete FUNCTION per accendere il videoregistratore e poi premete PLAY o 4 Premet...

Page 57: ...azione non funziona correttamente TAPE COUNTER MEMORY non funziona se il modo Ripeti Auto è impostato su ON In tal caso impostare il modo Ripeti Auto su OFF 1 Fermate una videocassetta nel punto desiderato 2 Premete TAPE COUNTER RESET in modo che appaia 0 00 00 3 Premete TAPE COUNTER MEMORY in modo che sullo schermo televisivo appaia la lettera M 4 Premete REC OTR o PLAY o Premete STOP L alla fine...

Page 58: ... 0 00 00 del contatore Registrazione col Timer Potete programmare il videoregistratore in modo tale che in vostra assenza si accenda da solo registri una trasmissione e poi si spenga E possibile programmare in anticipo fino a 8 registrazioni in determinati giorni giornalmente o settimanalmente nell arco di un anno Le impostazioni possono essere eseguite solo con il telecomando Inserite una videoca...

Page 59: ...nca la corrente o se il videoregistratore rimane scollegato per più di 30 secondi l impostazione dell orario e tutte le altre impostazioni del timer andranno perse Se il nastro termina prima della fine della registrazione il videoregistratore entra subito nel modo Stop espelle il nastro e si spegne L indicatore TIMER lampeggia Se nel videoregistratore non è inserita una videocassetta non è possibi...

Page 60: ... Accendete il televisore e selezionate il programma video Display Sullo Schermo Per verificare il Contatore l Orologio e il numero di canale premete DISPLAY Ogni volta che DISPLAY viene premuto lo schermo del televisore cambia come raffigurato nello schema sottostante Quando si sceglie il canale mediante i tasti del telecomando scegliete il canale desiderato numero della posizione Nota Se le istru...

Page 61: ...atevi che l ora nel videoregistratore sia impostata correttamente La registrazione non avviene La linguetta di protezione della cassetta è stata rimossa Coprite il foro con del nastro adesivo Immagini di pessima qualità o nessuna immagine durante la riproduzione Selezionate il programma video sul televisore Regolate la sintonia fine del televisore Nessuna immagine durante la riproduzione sebbene s...

Page 62: ...tonizzatore E2 E12 E21 E69 A H solo per l Italia CATV Convertitore RF Convertitore di segnale UHF incorporato Uscita modulare Canale UHF dal 22 al 69 regolabile Indicatore ora Sistema 24 ore Temperatura di funzionamento 5 C 40 C Collegamenti AERIAL RF OUT AUDIO VIDEO Presa coassiale femminae Spina coassiale maschio Presa Scart a 21 pini x 2 Livello uscita video 1 Vp p Impedenza uscita video 75Ω no...

Page 63: ...O NELL ARTICOLO 2 COMMA 1 DELLO STESSO DECRETO L AZIENDA AL FINE DI MIGLIORARE I PRODOTTI E PER ESIGENZE DI PRODUZIONE SI RISERVA IL DIRITTO DI APPORTARE VARIAZIONI TECNOLOGICHE ESTETICHE DIMENSIONALI SENZA OBBLIGO DI PREAVVISO EN 55013 2001 EN 55020 20021 EN 61000 3 2 2000 EN 61000 3 3 1995 A1 2001 EN 60065 1998 HG210ED IT fm Page 15 Tuesday March 2 2004 3 45 PM Dichiarazione di Conformita ...

Page 64: ... proprio rivenditore I danni agli accessori non implicano automaticamente la sostituzione gratuita dell intero apparecchio In questo caso si prega di rivolgersi alla nostra linea diretta La riparazione di parti in vetro o in plastica danneggiate è di norma a pagamento I difetti agli accessori o alle parti soggette a usura ad es elettrodi motore ganci plastici cinghie di trasmissione telecomando di...

Page 65: ...dcast television programming video tape film or other copyrighted material may violate applicable copyright laws We do not take responsibility for the unauthorised duplication use or other acts which infringe upon the rights of copyright owners A Note About Recycling This product s packaging materials are recyclable and can be reused Please dispose of any materials in accordance with your local re...

Page 66: ...ng up a cold room or under conditions of high humidity Do not use the VCR for at least 2 hours until it is dry inside Positioning Do not place the VCR directly on top of or underneath your TV set Ensure that there is at least 20 cm between the VCR and the TV set and that air can circulate freely through the ventilation openings of the VCR Before Using This Product Video Cassette Tape This VCR will...

Page 67: ...STANDBY indicator 12 FUNCTION indicator 13 TAPE IN indicator 14 TIMER indicator 15 REC indicator Rear Panel 16 Power cord 17 AV2 DECODER socket 18 AV1 TV socket 19 RF OUT socket 20 AERIAL socket STANDBY FUNCTION TAPE IN TIMER REC FUNCTION CHANNEL STOP EJECT REW PLAY F FWD REC OTR AUTO RETURN 10 9 8 5 4 3 2 6 7 1 11 12 13 14 15 STANDBY FUNCTION TAPE IN TIMER REC RF OUT AERIAL AV2 DECODER AV1 TV 16 ...

Page 68: ...ect the VCR to the TV using the coaxial cable 5 Plug the power cords of the VCR and TV into the AC outlets Other Connections Euro Scart AV Sockets Your VCR is provided with two Scart sockets which you may connect to other external devices with Scart sockets We recommend this connection to ensure a better audio and picture quality Euro Scart cables are obtainable at your dealer AV1 TV Connection to...

Page 69: ... 4 Press PLAY o or STOP L repeatedly to select your desired language 5 Press MENU Video Channel Setting Video channel setting will be necessary if your VCR is connected to the TV via the coaxial cable Use the remote control for this procedure 1 Insert a pre recorded tape into the VCR The VCR will turn on and start playback automatically If playback does not start press PLAY o 2 Select and adjust y...

Page 70: ... be memorized into the VCR s channel position 1 the second channel found will be memorized into the VCR s channel position 2 and so on Execution of the Automatic channel presetting cancels all the preset channels DO NOT use this feature if you intend to use some of the pre tuned channels Use the Manual channel presetting function to tune in the additional channels you require Manual Channel Preset...

Page 71: ...elect desired channel number by using the number buttons You must refer to the following Channel Plan table and press three digits to select the channel number To select channel 24 press 0 button first and then press 2 and 4 If this is the channel you want press F FWD B This VCR can receive Hyper and Oscar frequency bands 8 Press MENU to exit Note To confirm that a channel has been added press CHA...

Page 72: ... To adjust the tracking manually press CHANNEL o p If a tape is already in the VCR Using the buttons on the VCR Just press PLAY on the VCR Power will automatically turn on and playback will start Direct Button Operation Using the buttons on the remote control Press FUNCTION to turn on and then press PLAY o 4 Press STOP L to stop playback Speed Search 1 Press F FWD B or REW s during playback to vie...

Page 73: ...at the desired point 2 Press TAPE COUNTER RESET to display 0 00 00 3 Press TAPE COUNTER MEMORY so that M appears on the TV screen 4 Press REC OTR or PLAY o Press STOP L when recording or playback is completed 5 Press REW s or F FWD B The VCR will automatically stop when the counter returns to 0 00 00 approx To Exit the Counter Memory Press TAPE COUNTER MEMORY so that the M disappears from the TV s...

Page 74: ...ct TIMER then press F FWD B Note If you have not set the clock yet CLOCK setting menu appears If so follow the steps outlined in the Setting the Clock section Then set the timer When you press F FWD B after pressing PLAY o or STOP L during steps 3 to 9 the input mode will move to the next step If you do not press F FWD B within 5 seconds of setting an item the input mode will move to the next step...

Page 75: ...es press AUTO RETURN on the VCR The TV that is connected to your VCR may be turned on or off when the VCR is in the Timer recording mode The VCR will only perform a timer recording after it has been placed into timer standby mode Auto Return Using the AUTO RETURN Button When all the Timer Recordings are completed TIMER indicator flashes press AUTO RETURN on the VCR first The VCR will rewind to the...

Page 76: ...ease note that language clock and timer settings will be cleared after disconnection Maintenance Cabinet Cleaning Wipe the front panel and other exterior surfaces of the VCR with a soft cloth that has been immersed in lukewarm water and wrung dry Never use a solvent or alcohol Do not spray insecticide liquid near the VCR Such chemicals may cause damage and discolouration to the exposed surfaces Au...

Page 77: ... the VCR clock is set correctly Recording mode cannot be engaged Make sure the erase prevention tab on the tape is intact If removed cover the hole after the tab with adhesive tape No picture or poor picture on playback Set your TV to the video channel Fine tune your TV No picture but the audio is OK in playback Head cleaning is necessary consult the nearest Authorized Service Centre Playback pict...

Page 78: ...aly CATV RF converter Built in UHF converter Converter output UHF Channel 22 to 69 adjustable Timer indication 24 hour system Operating temperature 5 C 40 C Terminals AERIAL RF OUT AUDIO VIDEO Coaxial type female Coaxial type male 21 pin scart socket x 2 Video output level 1Vp p Video output impedance 75Ω unbalanced Audio output level 6dBv Video input level 0 5 2 0Vp p Audio input level 10dBv Vide...

Page 79: ... Voltage Directive 73 23 EEC CE Marking 93 68 EEC The Video Cassette Recorder VCR 4505 is in compliance with following norms EN 55013 2001 EN 55020 2002 EN 61000 3 2 2000 EN 61000 3 3 1995 A1 2001 EN 60065 1998 HG210ED EN fm Page 15 Tuesday March 2 2004 4 08 PM ...

Page 80: ...ether with the receipt to your retailer Defective accessories do not necessarily imply the replacement of the whole appliance free of charge In this case please call our hotline Broken glass or plastic parts are usually subject to charges Defective accessories or worn parts e g motor electrodes dough hooks driving belts spare remote control spare tooth brushes sawing blades etc as well as cleaning...

Reviews: