background image

16

E

S

PA

Ñ

O

L

ESP

AÑOL

Indicaciones generales de seguridad

Antes de la puesta en servicio de este aparato lea detenida-
mente el manual de instrucciones y guarde este bien incluido la 
garantía, el recibo de pago y si es posible también el cartón de 
embalaje con el embalaje interior. En caso de dejar el aparato a 
terceros, también entregue el manual de instrucciones.

•  Vd. no debe dejar expuesto el aparato ni a la lluvia ni a la 

humedad, a fi n de disminuir así el riesgo de incendio o de 
sacudida eléctrica. Por tanto, no debe utilizar el aparato 
cerca de agua – por ejemplo, cerca de la bañera, de una 
piscina o de un sótano húmedo.

•  Utilice el aparato únicamente para la fi nalidad para la que 

ha sido construido.

•  El aparato se ha de conectar únicamente a una caja de 

toma de corriente instalada reglamentariamente. Cerciórese 
de que la tensión indicada concuerda con la tensión de la 
caja de enchufe.

•  Preste atención a que sea correcta la polaridad cuando se 

empleen fuentes de alimentación externas. Las pilas se han 
de introducir siempre correctamente.

•  El aparato se ha de dejar puesto de modo que no se tapen 

los orifi cios de aireación existentes.

•  Jamás se abrirá la carcasa del cuerpo del aparato. Las repa-

raciones mal hechas pueden generar considerables peligros 
para el usuario. En caso de estar deteriorado el aparato, en 
especial el cable de conectar a red, ya no se ha de poner 
más en servicio el aparato, sino que se hará que lo repare un 
especialista. Controle periódicamente el cable de conexión a 
red para ver si se ha deteriorado.

•  Sólo el fabricante, nuestro servicio posventa o un técnico 

con una cualifi cación similar pueden cambiar un cable 
defectuoso por otro similar, para evitar todo tipo de riesgo.

•  Saque de la toma de corriente la clavija de conectar a la red 

o bien quite las pilas cuando no se vaya a usar el aparato 
durante largo tiempo.

Estos símbolos pueden encontrarse en caso dado en el apara-
to, y son para indicar lo siguiente:

El símbolo del rayo advierte al usuario que hay 
componentes internos del aparato que pueden 
tener tensiones peligrosamente altas.

El símbolo con el signo de exclamación advierte 
al usuario que hay instrucciones de manejo y de 
mantenimiento importantes en la documentación 
que va adjunta.

Aparatos que llevan puesto este símbolo operan 
con un ”Lector Clase 1” para explorar el CD. Los 
interruptores de seguridad incorporados sirven para 
impedir que el usuario esté expuesto a luz láser 
invisible peligrosa para la vista del usuario cuando 
está abierto el compartimiento del CD.

Bajo ningún concepto se ha de hacer un puenteado sobre estos 
interruptores de seguridad ni deben ser manipulados. De hacer-
lo, existe el peligro de que Vd. esté expuesto a la luz láser.

Niño

•  Para la seguridad de sus niños no deje material de embalaje 

(Bolsas de plástico, cartón, poliestireno etc.) a su alcance.


¡Atención! 

No deje jugar a los niños con la lámina. 

¡Existe peligro de asfi xia!

•  Para evitar que los niños se hagan daños eléctricos, siemp-

re tenga atención, que el cable no cuelgue hacia abajo y 
que los niños no tengan acceso al aparato.

Advertencias de seguridad especiales

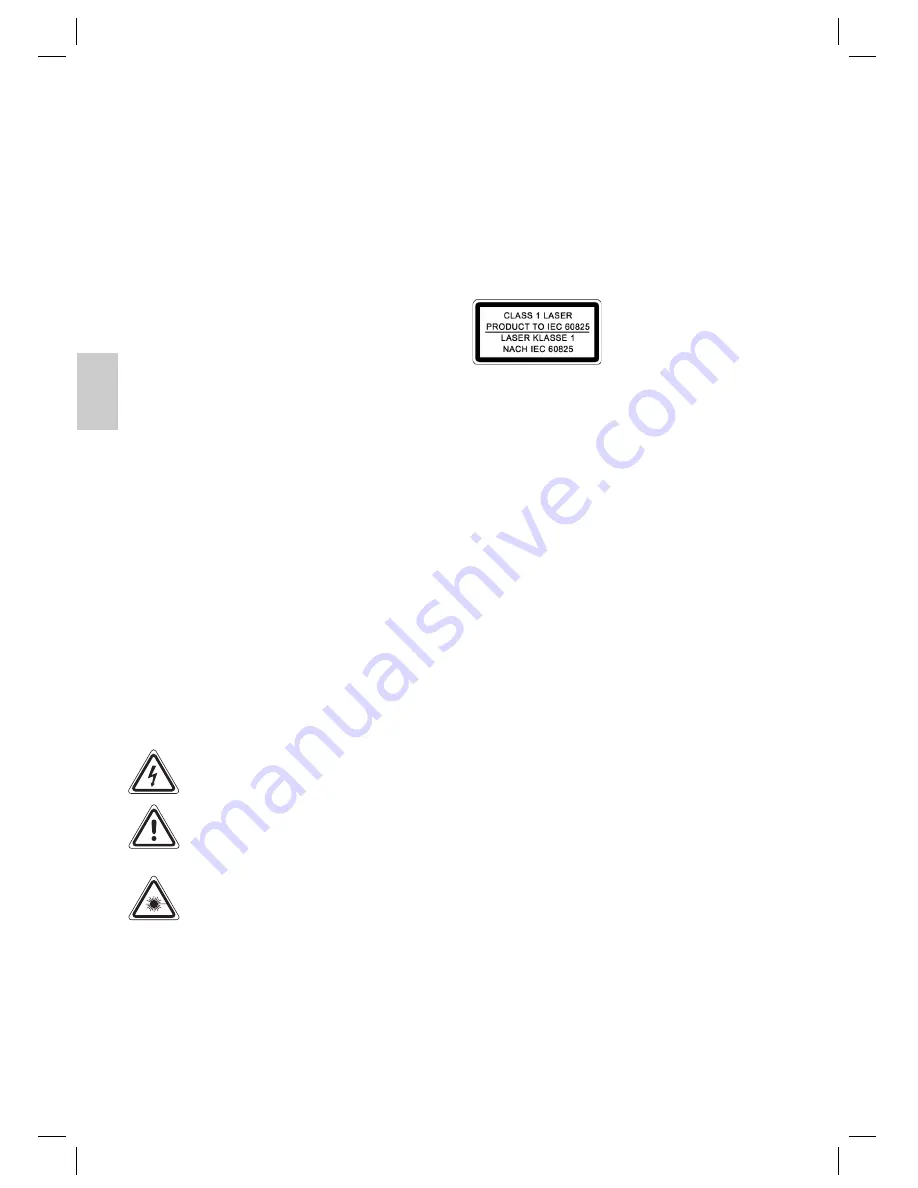
Este aparato trabaja con un láser 
de la clase 1.

Indicación de los elementos de manejo 


1  PHONES Conexión para auriculares


2  Lámpara de control FM.ST 

 3 

Empuñadura

 4 

Altavoces


5   / - (regulador de volumen)


6  Botón selectora de función 


  (CD/USB / OFF / AM / FM)


7  Conexión USB 


8  Regulador TUNING


9  Tecla CD/USB MODE (Conmutación USB-CD)


10  Tecla FOLDER/UP (Album hacia arriba)


11  Compartimento de CD


12  OPEN/CLOSE Compartimento de CD 

 13 

Visualizador 

LCD

 14 

Tecla 

PLAY/PAUSE 

(Reproducción/Pausa)


15  Tecla UP-SKIP (Búsqueda en avance)


16  Tecla DN-SKIP (Búsqueda en retroceso)


17  Tecla STOP 

 18 

Tecla 

PROGRAM 

(Memoria)

 19 


Tecla MODE (Repetir/Reproducción casual)


Parte 

posterior


20  Compartimento para baterías


21  Conexión a la red AC~ IN

 22 

UKW/FM 

Antena 

Puesta en servicio del aparato / Introducción

•  ¡Antes de la puesta en servicio, lea detenidamente el 

manual de instrucciones!

•  Elija una ubicación apropiada para su aparato, p.ej. una su-

perfi cie seca, llana y antideslizante, donde pueda manejar 
bien su aparato.

•  ¡Tenga atención que su aparato tenga sufi ciente ventilación!
•  Enchufe el cable de red (vea en caso de necesidad la 

cámara de baterías (20)) adjunto en una caja de enchufe 
con puesta a tierra debidamente instalada de 230 V/50 Hz 
y en el clavijero de red AC~ IN (21) en el dorso del aparato. 
Preste atención a que la tensión de red coincida con los 
datos en la placa de características.

05-SR 4310 AEG NEU   16

12.10.2006, 14:40:38 Uhr

Summary of Contents for SR4310

Page 1: ...sználati utasítás Garancia Руководство по эксплуатации Гарантия Stereo Radio CD Player Stereo Radio CD Player Stereo radio CD speler Lecteur de CD radio stéréo CD Player Radio Estereo Rádio e leitor de CDs estereofónico Lettore CD con stereo e radio Stereo radio og CD spiller Stereo Radio CD Player Radio stereo z odtwarzaczem płyt CD Stereofonní radiopřijímač s CD přehrávačem Sztereó rádió CD lejá...

Page 2: ... Manual de instruções Página 20 Características técnicas Página 23 Garantía Página 23 ITALIANO ITALIANO Indice Elementi di comando Pagina 3 Istruzioni per l uso Pagina 24 Dati tecnici Pagina 27 Garanzia Pagina 27 NORSK NORSK Innhold Oversikt over betjeningselementene Side 3 Bruksanvisning Side 28 Tekniske data Side 30 Garanti Side 31 ENGLISH ENGLISH Contents Overview of the Components Page 3 Instr...

Page 3: ...e commande Indicación de los elementos de manejo Descrição dos elementos Elementi di comando Oversikt over betjeningselementene Overview of the Components Przegląd elementów obsługi Přehled ovládacích prvků A kezelő elemek áttekintése Обзор деталей прибора 05 SR 4310 AEG NEU 3 12 10 2006 14 40 10 Uhr ...

Page 4: ...en Begleitpapieren hinweisen Geräte mit diesem Symbol arbeiten mit einem Klasse 1 Laser zur Abtastung der CD Die einge bauten Sicherheitsschalter sollen verhindern dass der Benutzer gefährlichem für das menschliche Auge nicht sichtbarem Laserlicht ausgesetzt wird wenn das CD Fach geöffnet ist Diese Sicherheitsschalter sollten auf keinen Fall überbrückt oder manipuliert werden sonst besteht die Gef...

Page 5: ...Wichtig Bevor Sie das USB Speichermedium entfernen schal ten Sie den Funktionswahlschalter 6 auf die Position OFF Radio hören 1 Stellen Sie den Funktionswahlschalter 6 auf Position AM oder FM UKW FM Mittelwelle AM Mono 2 Stimmen Sie mit dem TUNING Regler 8 den gewünschten Sender ab 3 Die FM ST Kontrollleuchte 2 leuchtet nur wenn Sie UKW Stereo ausgewählt haben und den Sender in Stereo Qualität emp...

Page 6: ...gabe der CD Wird die Taste im Stopp Modus gedrückt blinkt ebenfalls die Anzeige im Display Starten Sie danach die Wiedergabe mit der PLAY PAUSE Taste 14 Programmierte Wiedergabe Lässt die Programmierung einer beliebigen Titelfolge zu 1 Drücken Sie STOP 17 2 Drücken Sie die PROGRAM Taste 18 Im Display 13 blinkt P01 Speicherplatz und die Anzeige PROG Wählen Sie mit den UP DN SKIP Tasten 15 16 den ge...

Page 7: ...ntienachweis gilt der Kaufbeleg Ohne diesen Nachweis kann ein kostenloser Austausch oder eine kostenlose Reparatur nicht erfolgen Im Garantiefall geben Sie bitte das komplette Gerät in der Originalverpackung zusammen mit dem Kassenbon an Ihren Händler Sowohl Defekte an Verbrauchszubehör bzw Verschleißtei len als auch Reinigung Wartung oder der Austausch von Verschleißteilen fallen nicht unter die ...

Page 8: ...es in de begeleidende documentatie Apparaten met dit symbool werken met een klasse 1 laser voor de aftasting van de CD De ingeboude veiligheidsschakelaars moeten voorkomen dat de gebruiker wordt blootgesteld aan gevaarlijke voor het menselijk oog onzichtbaar laserlicht wanneer het CD vak geopend is Deze veiligheidsschakelaars mogen in geen geval overbrugd of gemanipuleerd worden omdat u anders gev...

Page 9: ...de CD modus Belangrijk zet de functieschakelaar 6 op de positie OFF voordat u het USB geheugenmedium verwijdert De radio beluisteren 1 Zet de functiekeuzeschakelaar 6 op de positie AM of FM UKW FM middengolf AM Mono 2 U stemt de gewenste zender af met de knop TUNING 8 3 Het FM ST controlelampje 2 brandt alleen wanneer u UKW stereo hebt gekozen en de zender in stereokwaliteit wordt ontvangen Wannee...

Page 10: ...gens begint zelfstandig de weergave van CD Wanneer u de toets in stopmodus indrukt knippert eveneens de weergave op het display Start daarna de weergave met de PLAY PAUSE toets 14 Geprogrammeerde weergave Biedt de mogelijkheid om een willekeurige titelvolgorde te programmeren 1 Druk op de STOP toets 17 2 Druk op de PROGRAM toets 18 Op het display 13 knippert P01 geheugenplaats en de weergave PROG ...

Page 11: ... van reparatie of naar ons oordeel door vervanging Eventuele garantiegevallen verlengen noch de geldigheidsduur van de garantie noch begint daardoor een nieuwe garantieperiode Het koopbewijs geldt als garantiebewijs Zonder dit bewijs kan geen kosteloze reparatie of vervanging plaatsvinden Geef in garantiegevallen het complete apparaat in de originele verpakking samen met de kassabon af bij uw hand...

Page 12: ...ien données dans les docu ments de l appareil Les appareils dotés de ce symbole fonctionnent avec un laser de la classe 1 pour la lecture des disques CD Les boutons de sécurité intégrés sont chargés d éviter qu à l ouverture du compartiment à CD l utilisateur entre en contact avec la lumière laser qui est dangereuse et invisible à l oeil humain Il est absolument interdit de court circuiter ou mani...

Page 13: ...le sélecteur de fonctions 6 sur la position OFF avant de débrancher le support d enregistrement USB Pour écouter la radio 1 Placez le sélecteur de fonctions 6 sur la position AM ou FM UKW FM ondes moyennes AM Mono 2 Réglez le captage de l émetteur désirée grâce au bouton d accord TUNING 8 3 La lampe témoin FM ST 2 s allume seulement lorsque vous avez sélectionné UKW Stéréo et que vous recevez la s...

Page 14: ...t un court instant La lecture du disque commence ensuite automa tiquement Si la touche est maintenue enfoncée en mode Stop l affichage clignote également Commencez ensuite la lecture à l aide de la touche PLAY PAUSE 14 Programmation de la lecture Permet de programmer les titres dans l ordre choisi 1 Enfoncez la touche STOP 17 2 Enfoncez la touche PROGRAM 18 Sur l écran 13 clignote P01 plage de mémo...

Page 15: ...stimation au moyen d un remplacement Les prestations dans le cadre de la garantie n entraînent aucune prorogation de la durée de garantie et ne donnent pas droit à une nouvelle garantie Le justificatif de garantie est le reçu Sans ce justificatif aucun remplacement gratuit ni aucune réparation gratuite ne peuvent être effectués En cas de recours à la garantie ramenez votre appareil complet dans son ...

Page 16: ...iones de manejo y de mantenimiento importantes en la documentación que va adjunta Aparatos que llevan puesto este símbolo operan con un Lector Clase 1 para explorar el CD Los interruptores de seguridad incorporados sirven para impedir que el usuario esté expuesto a luz láser invisible peligrosa para la vista del usuario cuando está abierto el compartimiento del CD Bajo ningún concepto se ha de hac...

Page 17: ... CD Importante Antes de retirar el soporte de memoria USB cambie el selector de funciones 6 a la posición OFF Escuchar la radio 1 Posicione el selector de funciones 6 a la posición AM o FM Onda ultracorta FM Onda media AM monofónica 2 Utilizar el control de sintonización de emisoras TUNING 8 para sintonizar la emisora deseada 3 La lámpara de control FM ST 2 solamente se ilumina si ha elegido FM es...

Page 18: ...ción p e ALBUM 001 parpadeará brevemente A continuación se iniciará de forma automática la reproducción del disco compacto Si se presiona la tecla en el modo Stop parpadea también la indicación en el display A continuación inicie la reproducción con la tecla PLAY PAUSE 14 Reproducción programada Permite la programación de una sucesión de títulos al azar 1 Presione la tecla STOP 17 2 Presione la te...

Page 19: ...esorios que se hayan originado por defectos del material o de la fabricación Depen diendo de nuestra estimación se realizará una reparación o un cambio Los servicios de garantía no prolangan la garantía ni se incia por ello un período nuevo de garantía Como comprobante para la garantía es válido la factura de compra Sin este comprobante no se podrá realizar un cambio o una reparación gratuíta En c...

Page 20: ...o as quais podem motivar perigos de alta tensão O simbolo com pontos de exclamação deverá chamar a atenção ao utilizador para importantes instruções de serviço e de assistência que se encontram nas folhas anexas Aparelhos com este simbolo trabalham com um Laser de 1 classe o qual examina o CD O interruptor de segurança que se encontra montado serve para evitar que o utilizador ao abrir a gaveta de...

Page 21: ... 9 O aparelho trabalhoa agora com o modo USB No display 13 surgirá alguns segundos depois o número total de canções tracks 4 Pressione a tecla PLAY PAUSE 14 para reproduzir os dados musicais 5 Para o manuseamento siga as instruções da rubrica Tocar CDs MP3 6 Se a ligação USB não for mais necessária prima a tecla CD USB MODE 9 até que a indicação USB no ecrã se apague O aparelho trabalha agora no m...

Page 22: ...3 x o CD todo repete se constante mente no Display aparece Pressionar 4 x no visor 13 surgirá a indicação RANDOM MP3 e o número do título que será tocado em primeiro lugar Os títulos serão todos reproduzidos numa sequência casual Pressionar 5 x a função será desactivada e o CD tocará de modo normal FOLDER UP 10 Accione esta tecla durante a reprodução para passar para um directório acima Surgirá br...

Page 23: ...a empresa tem uma garantia de 24 meses a partir da data da compra talão Durante o período de garantia procederemos à remoção grátis por reparação ou segundo a nossa decisão por substituição das deficiências do aparelho ou dos acessórios que provenham de erros de material ou de fabricação A prestação de serviços relacionados com a garantia não prolongarão a mesma nem iniciarão um novo prazo de garan...

Page 24: ...er l uso e la manutenzione nei fogli di accompagna mento dell apparecchio Gli apparecchi dotati di questo simbolo lavorano con un Laser classe 1 per riprodurre i CD Gli interrut tori di sicurezza integrati hanno lo scopo di impedire che l utente venga esposto alla luce non visibile del laser pericolosa per l occhio umano aprendo lo scomparto per i CD Questi interruttori di sicurezza non devono mai...

Page 25: ...ante Prima di allontanare il supporto memoria USB impostare il selezionatore 6 sulla posizione OFF Ascoltare la radio 1 Regolare l interruttore 6 in corrispondenza della posizione AM oppure FM UKW FM Onda Media AM Mono 2 Sintonizzare il canale desiderato con il tasto TUNING 8 3 L indicatore luminoso FM ST 2 si accende solo se avete selezionato UKW Stereo e ricevete l emittente in stereofonia Se la...

Page 26: ...e un file di sopra L indicatore p e ALBUM 001 lampeggia brevemente Conseguentemente inizia così la riproduzione automatica del CD Se il tasto è premuto nel modulo Stop lampeggia l indicato re nel display Per continuare iniziare la riproduzione con il tasto PLAY PAUSE 14 Ripetizione programmata Permette la programmazione di una sequenza di brani deside rata 1 Premere il tasto STOP 17 2 Premere il ta...

Page 27: ... riparandoli o a nostra discrezio ne sostituendoli Le prestazioni in garanzia danno luogo a una proroga della garanzia né danno diritto ad una nuova garanzia Per la garanzia è sufficiente lo scontrino di acquisto Senza questo scontrino non sussiste il diritto né ad una sostituzione né ad una riparazione gratuita Nel caso si ricorra alla garanzia restituire al rivenditore l apparecchio completo in o...

Page 28: ... CD spilleren er åpen Disse sikkerhetsbryterne bør aldri kortsluttes eller manipuleres med det kan medføre fare for at du blir utsatt for laserstrålene Bar La aldri emballasjedeler ligge innenfor barns rekkevidde plastposer kartong styropor osv OBS Ikke la små barn leke med plast De kan kveles For å beskytte barn mot farer forbundet med elektriske apparater må du alltid sørge for at ledningen ikke...

Page 29: ... i mono Spille av CD er MP3 Slik spiller du av en CD 1 Sett funksjonsbryteren 6 i posisjonen CD USB 2 Åpne CD skuffen 11 ved å felle opp CD skufflokket OPEN CLOSE 12 3 Legg inn en CD med etiketten forover og lukk CD spilleren 4 Dersom anvisningen USB lyser på displayet så trykk på CD USB MODE tasten 9 slik at anvisningen compact disc blendes inn Nå går apparatet i CD modus 5 Etter noen sekunder vis...

Page 30: ... For å spille av programmet en gang til trykker du først 1 x på PROGRAM knappen 18 og deretter på PLAY PAUSE knappen 14 7 For å slette programmet trykker du 2 x på STOP knappen 17 Indikatoren PROG slukkes Apparatet stopper automatisk etter at alle programmerte spor er spilt av Den programmerte rekkefølgen blir liggende i minnet til du skifter over til en annen modus tar CD en ut av CD spilleren el...

Page 31: ...ette Som garantibevis gjelder kjøpsbeviset Uten dette beviset kan du ikke få byttet eller reparert apparatet gratis I forbindelse med garanti ber vi om at du gir hele apparatet i ori ginalemballasjen sammen med kassalappen til din forhandler Verken defekter på forbrukstilbehør og slitasjedeler eller reng jøring vedlikehold og utskifting av slitasjedeler går inn under garantien Slike ting er derfor...

Page 32: ...human eye when the CD compartment is opened Under no circumstances should these safety switches be bypassed or manipulated as this could result in a danger of exposure to the laser light Children In order to ensure your children s safety please keep all pa ckaging plastic bags boxes polystyrene etc out of their reach Caution Do not allow small children to play with the foil as there is a danger of...

Page 33: ...l flicker 4 For VHF FM mode pull out the telescopic antenna 22 and turn it to improve reception 5 An aerial is integrated into the device for the reception of AM stations The machine can be aligned to the station by turning it In this frequency band programs are transmitted in mono only Playing CDs MP3 This is how you play a CD 1 Turn the function selector switch 6 to the CD USB positi on 2 Open th...

Page 34: ... DN SKIP buttons 15 16 to select the desired track and then press the PROGRAM button 18 again The display changes to memory slot P02 3 Select the next track with the UP DN SKIP key and press the PROGRAM key again Repeat the procedure until all the desired tracks are selected 4 Press the PLAY PAUSE key 14 The playback starts The selected track numbers are shown in the display in the correct order a...

Page 35: ... right to a new guarantee Proof of the guarantee is provided by the proof of purchase Without proof of purchase no free replacement or repair will be carried out If you wish to make a claim under the guarantee please return the entire machine in the original packaging to your dealer together with the receipt Defects to consumables or parts subject to wearing as well as cleaning maintenance or the ...

Page 36: ...acją urządzenia Urządzenia z tym symbolem używają do odczy tywania dźwięku z płyty kompaktowej Lasera klasy A Wbudowany wyłącznik bezpieczeństwa ma zapobiec temu żeby użytkownik w czasie ot wierania kieszeni odtwarzacza płyt kompaktowych został poddany niebezpiecznemu dla ludzkich oczu oddziaływaniu niewidocznego światła lasera Wyłącznika tego nie należy w żadnym wypadku zmostkować lub też przy ni...

Page 37: ...USB ustaw przełącznik funkcji 6 w pozycji OFF Odbiór radiowy 1 Przełącznik wyboru funkcji 6 ustawić w pozycji AM lub FM UKF FM Fale średnie AM mono 2 Proszę wystroić żądaną stację przy pomocy gałkido wystra jania stacji TUNING 8 3 Lampka kontrolna FM ST 2 zaświeci się jedynie wówczas gdy wybrali Państwo UKF stereo i odbiór odbywa się w jakości stereo Jeżeli odbiór jest zbyt słaby lub słychać zakłó...

Page 38: ...ę wskaźnik RANDOM MP3 i numer utworu który będzie odtwarzany w pierwszej kolejności Wszystkie utwory będą następnie odtwarzane w przy padkowej kolejności Naciśnięcie 5 x funkcja zostaje dezaktywowana a CD będzie odtwarzane w zwykłym trybie FOLDER UP 10 Proszę wcisnąć ten przycisk podczas odtwarzania by przejść o jeden katalog wyżej Meldunek np ALBUM 001 krótko miga Następnie samoczynnie rozpoczyna...

Page 39: ... uznamy za stosowne wymieniając całe urządzenie na nowe Sprzęt do naprawy powinien być dostarczony w komplecie wraz z dowodem zakupu oraz z ważną kartą gwarancyjną do sprzedawcy w miarę możliwości w oryginalnym opakowaniu lub innym odpowiednim dla zabezpieczenia przed uszkodze niem W razie braku kompletnego opakowania fabrycznego ryzyko uszkodzenia sprzętu podczas transportu do i z miejsca zakupu ...

Page 40: ...nego i tam proszę oddawać sprzęt elektryczny którego już nie będą Państwo używać Tym sposobem pomagają Państwo unikać potencjalnych następstw niewłaściwego usuwania odpadów mających wpływ na środowisko i zdrowie ludzi Tą drogą przyczyniają się Państwo do ponownego użycia do recyklingu i do innych form wykorzystania starego sprzętu elektrycznego i elektronicznego Informacje gdzie można zdać sprzęt ...

Page 41: ... laserovým zařízením třídy 1 ke snímání dat z kompaktního dis ku Vestavěné bezpečnostní spínače mají zamezit tomu aby byl uživatel vystaven nebezpečnému pro lidské oko neviditelnému laserovému světlu jestliže se otevře CD mechanika Bezpečnostní spínače nesmějí být v žádném případě přemosťovány ani s nimi nesmí být nijak manipulováno protože jinak existuje nebezpečí že budete vystaveni laserovému z...

Page 42: ...lohy AM či FM VKV FM střední vlny AM mono 2 Pomocí regulátoru ladění TUNING 8 nalaďte požadovanou rozhlasovou stanici 3 Kontrolní svítilna FM ST 2 svítí jen tehdy jestliže jste si zvolili VKV Stereo a rozhlasové vysílání je přijímáno ve stereofonní kvalitě Jestliže je přijímaný signál příliš slabý a rozhlasové vysílání je zašuměno tato svítilna nepravidelně bliká 4 V provozu VKV FM vytáhněte teles...

Page 43: ... bude blikat i hlášení na displeji Poté spusťte přehrávání pomocí tlačítka PLAY PAUSE 14 Naprogramované pořadí reprodukce Umožňuje naprogramování libovolného pořadí reprodukce jednotlivých skladeb 1 Stiskněte tlačítko STOP 17 2 Stiskněte tlačítko PROGRAM 18 Na displeji 13 bliká P01 místo v paměti a indikace PROG Pomocí tlačítek UP DN SKIP 15 16 si zvolte požadovaný titul a znovu stiskněte tlačítko...

Page 44: ...nebo podle našeho uvážení formou výměny Záruční plnění nemají za následek ani prodloužení záruční doby ani tím nevzniká nárok na novou záruku Jako záruční doklad slouží doklad o koupi Bez tohoto dokladu nelze uskutečnit bezplatnou výměnu nebo bezplatnou opravu V případě uplatnění záruky předejte prosím kompletní přístroj v originálním obalu spolu s pokladním dokladem Vašemu obchodníkovi Jak na vad...

Page 45: ...tartási útmu tatásokra hívja fel a használó figyelmét Az ezzel a szimbólummal jelzett készülékek 1 osztályú lézerrel működve tapogatják le a CD t A beépített biztonsági kapcsolók megakadályozzák hogy a használó emberi szemmel nem látható veszélyes lézersugárzás hatásának legyen kitéve amikor a CD rekesz fel van nyitva Ezeket a biztonsági kapcsolókat semmi esetre sem szabad megpatkolni vagy más módo...

Page 46: ...t kapcsolja a funkciókiválasztó kapcsolót 6 OFF helyzetbe Rádióhallgatás 1 Állítsa a 6 funkcióválasztó kapcsolót AM vagy FM állásba URH FM középhullám AM mono 2 Állítsa be a TUNING állomáskereső gombbal 8 a kívánt adót 3 Az FM ST ellenőrző lámpa 2 csak akkor ég ha URH sztereó adást választott és sztereó minőségben fogja az adót Ha a vétel túl gyenge és a beállított adó zúg akkor az ellenőrző lámpa...

Page 47: ...ezdődik a CD lejátszása Ha Stop üzemmódban nyomja meg a gombot ugyancsak villog a dis play n a kijelzés Ezután indítsa el a lejátszást az PLAY PAUSE gombbal 14 Programozott lejátszás Tetszés szerint számsorrend programozását teszi lehetővé 1 Nyomja meg a STOP gombot 17 2 Nyomja meg a PROGRAM gombot 18 A display n 13 P01 memóriahely és a PROG jelzés villog Válassza ki a UP DN SKIP gombokkal 15 16 a...

Page 48: ...lkül sem díjmentes csere sem díjtalan javítás nem végezhető Garanciális esetben eredeti csomagolásában adja át az alap készüléket a pénztári bizonylattal együtt annak a kereskedőnek akitől a készüléket vásárolta Sem az elhasználódó tartozékokban ill kopó alkatrészekben bekövetkező hibák sem a tisztítás karbantartás vagy a kopó alkatrészek cseréje nem esik a garancia hatálya alá követke zésképp tér...

Page 49: ... внутри электроприбора имеются детали находящиеся под опасным высоким напряжением Символ восклицательный знак обращает ваше внимание на важные примечания в сопроводительных документах по пользованию и техосмотру электроприбора Электроприборы с этим символом оснащены лазером класса 1 который используется для считывания компакт диска Во время открывания отсека компакт диска встроенные предохранитель...

Page 50: ...в гнездо USB внешнее запоминающее устройство 3 Выберите при помощи кнопки CD USB MODE 9 режим USB Теперь центр работает в режиме USB Через несколько секунд на дисплее 13 появится число песен на диске 4 Нажмите кнопку PLAY PAUSE 14 чтобы включить чтение музыкальных данных 5 Как управлять изделием описано в главе Воспроизведение дисков CD MP3 6 Если разъем USB больше не используется нажмите кнопку C...

Page 51: ... Все записи будут воспроизводиться одна за другой в случайном порядке 4x раза нажать все функции выключаются Воспроизведение продолжиться в нормальном режиме Только для CD дисков с записью в формате MP3 1x раз нажать текущая дорожка будет постоянно повторяться на дисплее появится REP 2x раза нажать выбранная папка CD диска с записью в формате MP3 будет постоянно воспроизводиться на дисплее появитс...

Page 52: ...ется утвержденных стандартов защита от копирования По этой причине в редких случаях могут возникнуть проблемы с чтением CD дисков и дисков с записью в формате MP3 Это происходит не по причине неисправностью данного изделия Чистка и уход Перед чисткой вынимайте вилку из розетки Пятна снаружи корпуса можно удалить слегка влажной тряпкой без применения моющих средств Технические данные Модель SR 4310...

Page 53: ...05 SR 4310 AEG NEU 53 12 10 2006 14 42 08 Uhr ...

Page 54: ...24 måneders garanti i henhold til garantierklæring 24 miesiące gwarancji na podstawie karty gwarancyjnej Záruka 24 mésíců podle prohlášení o záruce A garanciát lásd a használati utasításban Гарантийные обязательства смотри руководство пользователя Kaufdatum Händlerstempel Unterschrift Koopdatum Stempel van de leverancier Handtekening Date d achat cachet du revendeur signature Fecha de compra Sello...

Reviews: