background image

Chapter 1 - Installing and Accessing the REX2


12

Campus-REX2 RS Interface Card User Manual

L

OGGING

 I

N

Access the Campus-REX2 menus for configuration and management using 
any of these four logins, which can be concurrently connected:

a telnet session to the Campus-REX2 (see below)

a login to the local Campus unit through the Console port (see 

“Logging 

In a Local Campus Unit through the Console Port” on page 13

)

a logon from a remote Campus unit through its Main Menu (see 

“Logging On a Remote Campus Unit” on page 15

)

a login through the CMU in the Campus-Star chassis

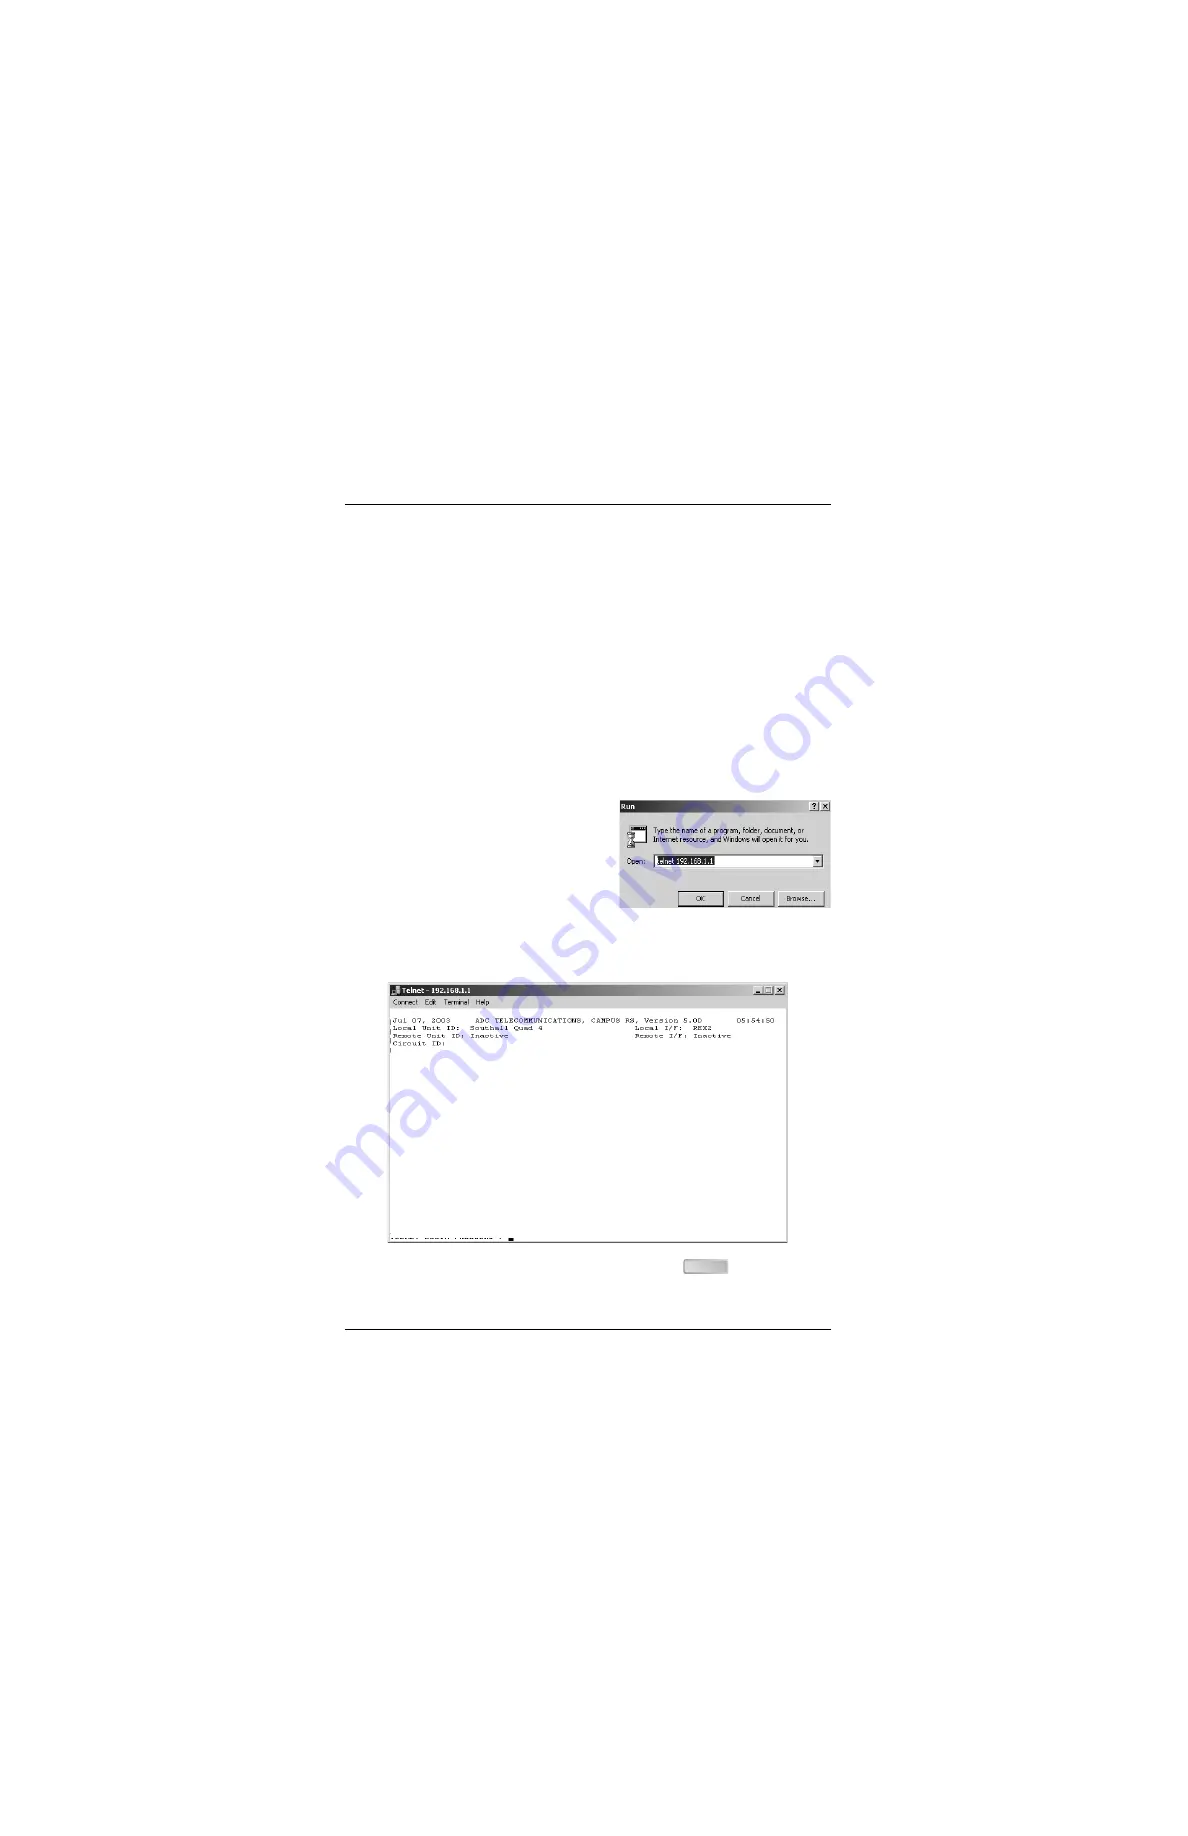
Logging In a Campus Unit Using Telnet

Use telnet protocol to access the 
Campus unit for configuration and 
management over the Internet. From the 
Windows Start menu, select Run. Enter 
the telnet command and the IP address 
for the Campus-REX2 (default IP 
address is 192.168.1.1). The timeout for 
disconnecting a telnet session is five minutes (time frame with no keyboard 
activity to the Campus unit). The following login screen is displayed:

Enter the configured password (default password is 

) to log on the 

Campus-REX2 Main Menu. 

TELNET LOGIN PASSWORD > 

ENTER

Summary of Contents for Campus-REX2 RS

Page 1: ...CAMPUS REX2 RS INTERFACE CARD VERSION 5 1 USER MANUAL...

Page 2: ...s believed to be accurate and reliable However no responsibility is assumed by ADC Telecommunications Inc for its use nor for any infringement of patents or other rights of third parties which may res...

Page 3: ...no guarantee that interference will not occur in a particular installation Testing on older Campus RS models was performed at 3 072 Mbps If this equipment does cause harmful interference to radio or...

Page 4: ...50 1220 01 150 1220 02 or 150 1220 51 configure the Campus REX2 using the LCD and buttons configure the Campus REX2 using the command line interface monitor the Campus REX2 performance perform testing...

Page 5: ...ampus Star User Manual Contains instructions for setting up and using a Campus Star The manual includes instructions for installing line units and interface cards into the Campus Star chassis Campus R...

Page 6: ...e extent of the damage to the transportation company and to your sales representative immediately Order replacement equipment if necessary 2 Compare the contents of the package against the packing lis...

Page 7: ...nit Console Port 9 Logging In 12 Logging In a Campus Unit Using Telnet 12 Logging In a Local Campus Unit through the Console Port 13 Logging On a Remote Campus Unit 15 Logging Off 16 Using the Menus 1...

Page 8: ...s 53 Saving the Router Configuration 55 Accessing the Routing Tables 56 Configuring the Campus REX2 for SNMP Management 60 Accessing the SNMP Configuration 60 Entering SNMP Parameters 61 Enabling Auth...

Page 9: ...________________________ 91 Upgrading Campus Unit Software 92 Recovering Software 95 Chapter 7 Using the LCD for Configuration and Management _____________________________ 97 Navigating the LCD Menus...

Page 10: ...HDSL Margin 116 Port Statistics 116 Bridge Port Statistics 117 Router Port Statistics 118 Chapter 8 Internetworking and Management Overview__119 Composition of a Campus RS System 120 Application 121...

Page 11: ...lity with Earlier Campus Products 136 Compatibility with Campus RS Products 137 Compatibility with Earlier Versions of Campus Products 138 Appendix A Technical Reference _____________________ 139 Spec...

Page 12: ...Table of Contents xii Campus REX2 RS Interface Card User Manual...

Page 13: ...FTP server for transferring software upgrades VLAN support that accommodates forwarding larger sized packets embedded Simple Network Management Protocol Version 1 SNMP V1 agent The following sections...

Page 14: ...unit or older only T1 E1 and 768 Mbps data rates are supported INSTALLING THE CAMPUS REX2 The following sections describe how to install the Campus REX2 RS Interface Card into either a Campus desktop...

Page 15: ...to the guide rails in the rear of the desktop unit 3 Gently press the card into place until it is seated firmly in the mating connector 4 Secure the card in place using the two captive screws 5 Comple...

Page 16: ...the line unit slot corresponding to the slot where you will install the Campus REX2 2 Slide the Campus REX2 into the guide rails of the selected slot at the rear of the Campus Star chassis The Campus...

Page 17: ...er The port autosenses both the 10 100Base T port rate and half or full duplex mode of the network device to which it connects and matches the configuration Use a straight through Category 5 cable to...

Page 18: ...repeater PC NIC or other Ethernet device The Campus REX2 10 100Base T interface operates in either half or full duplex mode which is determined by autosensing its network connection Both the LCD menu...

Page 19: ...to the Campus Star chassis if you have an AC power supply and to an external power source Then verify the powerup of and HDSL connection for that unit as specified in the appropriate user manual 2 If...

Page 20: ...lnet connection provides access to configuration menus that provide options not available through the LCD menus Depending on your immediate configuration requirements you may not need to set up a PC i...

Page 21: ...chassis or the CMU 810 installed in the Campus Star chassis 1 Connect the Console adapter into the standard 9 pin COM port on the PC and tighten the attached screws 2 Plug one end of the console cable...

Page 22: ...E UNIT HDSL TEST PORT RS 2 32 CONSOLE Campus HRS LIN E UNIT HDSL TEST PORT RS 2 32 CONSOLE Campus HRS LIN E UNIT HDSL TEST PORT RS 2 32 CONSOLE Campus HRS LIN E UNIT HDSL TEST PORT RS 2 32 CONSOLE Ca...

Page 23: ...ORT RS 2 32 CONSOLE P air Campus HRS LIN E UNIT HDSL TEST PORT RS 2 32 CONSOLE P air Campus HRS LIN E UNIT HDSL TEST PORT RS 2 32 CONSOLE P air Campus HRS LIN E UNIT HDSL TEST PORT RS 2 32 CONSOLE P a...

Page 24: ...ain Menu see Logging On a Remote Campus Unit on page 15 a login through the CMU in the Campus Star chassis Logging In a Campus Unit Using Telnet Use telnet protocol to access the Campus unit for confi...

Page 25: ...erminal do the following 1 Press the on the PC keyboard several times until the baud rate is established and the Login Password screen is displayed as shown below If the system does not respond when y...

Page 26: ...e port there is no timeout defined for the session You will stay connected until you either log out or the Campus unit detects a disconnected console cable DTR signal changes to inactive ENTER ENTER J...

Page 27: ...hanges to indicate the remote unit ID as the local unit and local unit ID as the remote This shows that the terminal program is physically connected to the local unit but is configuring as if it were...

Page 28: ...number of the item then press Return to the previous menu Type then press Return to the Main Menu Type then press when the menu is more than one level below the Main Menu Clear or update status inform...

Page 29: ...Configuration and Status screen is the root for REX2 configuration OPERATING WITH DEFAULT VALUES Campus REX2 can be operated using its default settings which include HDSL Operating Mode set to Standa...

Page 30: ...Chapter 1 Installing and Accessing the REX2 18 Campus REX2 RS Interface Card User Manual...

Page 31: ...l To view system performance and other status information see Monitoring and Testing the Campus System on page 5 73 For See Page Configuring HDSL Parameters 20 Configuring HDSL Alarms 26 Changes to th...

Page 32: ...efault HDSL Parameters screen 3 ENTER Jul 07 2003 ADC TELECOMMUNICATIONS CAMPUS RS Version 5 1 08 19 34 Local Unit ID Local I F REX2 Remote Unit ID Inactive Remote I F Inactive Circuit ID SYSTEM SETTI...

Page 33: ...ng mode you will use Campus RS offers these two HDSL operating modes Standard mode page 22 provides compatibility between a Campus RS product and an earlier Campus product legacy Campus that has a HDS...

Page 34: ...Auto Slave waits for the other Campus unit to initiate the HDSL link The other unit must be set to Master or Auto Auto default automatically switches between Master and Slave until an HDSL link is est...

Page 35: ...l duplex transmission 1 From the HDSL Parameters menu type then press The HDSL Operating Mode options changes from Standard to Extended as shown below 1 ENTER Jul 07 2003 ADC TELECOMMUNICATIONS CAMPUS...

Page 36: ...n attempting to establish an HDSL link 3 To change the HDSL Loop Mode from 1 Loop default to 2 Loop type then press 4 To select an HDSL Rate type then press The Select HDSL Rate screen that is display...

Page 37: ...2 kbps 5 320 kbps 17 1088 kbps 29 1856 kbps 6 384 kbps 18 1152 kbps 30 1920 kbps 7 448 kbps 19 1216 kbps 31 1984 kbps 8 512 kbps 20 1280 kbps 32 2048 kbps 9 576 kbps 21 1344 kbps 33 2112 kbps 10 640 k...

Page 38: ...ocal I F LOS lets you enable or disable the local Loss of Signal alarm Alarm on Remote I F LOS lets you enable or disable the remote Loss of Signal alarm Access the configuration screen then set the o...

Page 39: ...CRC anomalies or LOSW defects occur within the threshold interval 2 To configure the HDSL Margin Alarm Threshold a Type then press b At the prompt enter a value between 1 and 25 decibels dB then press...

Page 40: ...at the data port on the local Campus unit To disable this alarm repeat the procedure 4 To enable the Remote Data LOS Alarm type then press When enabled an alarm is generated when a loss of signal is d...

Page 41: ...eters for implementing your network use the procedures in this chapter You can also configure SNMP parameters which provide a way to manage the Campus REX2 system over a network Some of the bridging p...

Page 42: ...setting options found on the screen shown above for the Campus REX2 including Configuring Bridge Protocol Encapsulation and Timing on page 31 Configuring Bridge Features on page 32 Configuring Spanni...

Page 43: ...the HDSL link The proper setting of the Timing Source option depends upon the interface card of the remote Campus unit If the Campus REX2 is connected to a Campus unit with another Campus REX2 leave t...

Page 44: ...ble on page 42 for more information 2 To set the bridge filter age type then press Enter the filter age time in seconds from 10 to 100000 300 is the default at the prompt Enter New Bridge Filter Age i...

Page 45: ...Bridge Priority type then press At the prompt enter a value for the bridge priority between 0 and 65535 default value is 32768 Enter New Bridge Priority 24000 The bridge priority is set relative to ot...

Page 46: ...e Campus REX2 should send Spanning Tree Protocol packets BPDUs The valid range is 1 to 10 seconds the default value is 2 seconds Enter New Hello Time 4 c To set the forward delay type then press At th...

Page 47: ...ame bridge When the ports simultaneously request access to the network this priority level determines the order in which the ports get access The LAN is the other port on this bridge 8 To set the Line...

Page 48: ...bridge Root Port Root Bridge Priority and Root Path Cost indicates the calculated values for each of these functions for the Campus REX2 after the resolution of Spanning Tree resolves network topology...

Page 49: ...bout each Spanning Tree port on this bridge see ANSI IEEE Standard 802 1D for definitions Port state for the LAN and Line ports indicates one of the following disabled blocking listening learning forw...

Page 50: ...configuration IP address subnet mask and default gateway from a DHCP server on the LAN and displays this configuration in those respective fields on the screen When the IP Configuration is set to sta...

Page 51: ...mpus REX2 to determine if a host such as an SNMP management station or trap receiver is on the same local subnet If it is the Campus REX2 can send messages directly to the host if not messages must be...

Page 52: ...y to Continue Do not remove power to the Campus unit or disconnect the Line and LAN side network connections when upgrading software or saving configuration R ENTER Jul 07 2003 ADC TELECOMMUNICATIONS...

Page 53: ...e then press to access the REX2 Configuration and Status screen Ensure Bridge is selected 2 From the REX2 Configuration and Status screen type then press The Bridge Configuration screen is displayed 3...

Page 54: ...rminal or ProComm to refresh or update the table entries to clear all entries from the table Viewing the ARP Table The ARP table can be accessed through either the Bridge or the Router configuration s...

Page 55: ...rmation to a file using a terminal emulation software such as HyperTerminal or ProComm to refresh or update the table entries to clear all entries from the table 4 ENTER 6 ENTER ARP TABLE MAC ADDRESS...

Page 56: ...is screen for the Campus REX2 including Configuring Routing Protocol Encapsulation and Timing on page 45 Configuring Routing Features on page 46 Configuring the IP Addresses on page 47 Configuring RIP...

Page 57: ...quipment from another manufacturer 3 To change the timing source type then press Select a timing source setting Internal default setting which takes its timing from an internal oscillator HDSL which t...

Page 58: ...ming Source option to Internal Configuring Routing Features This section provides procedures for configuring routing features such as LAN and Line IP addresses and subnet masks RIP configuration for d...

Page 59: ...next hop cannot be identified See Campus REX2 IP Addresses on page 129 for more information 1 To configure the IP address and subnet masks type then press The IP Address Configuration screen is displ...

Page 60: ...atagrams if it does not have a valid entry for the destination in its routing table The default value for this parameter is 0 0 0 0 Required format is nnn nnn nnn nnn Enter Default Gateway 192 150 10...

Page 61: ...or example c To enable RIP2 authentication type then press RIPv2 uses a plain text password for authentication that you will set when you change the RIP2 authentication password d To change the RIP2 a...

Page 62: ...l be sent by the LAN port type then press Repeat until the preferred RIP version is selected None indicates that a RIP version is not selected RIP1 indicates that only RIPv1 packets will be sent by th...

Page 63: ...ion parameters go to Saving the Router Configuration on page 55 to save your changes Configuring and Deleting Static IP Routes Static IP routes define a fixed and manually configured path for data sen...

Page 64: ...28 128 65 Enter Hop Count 3 The following message is displayed Route added Hit Any Key to Continue 3 To delete a static route type then press Enter the IP address at the prompt for the destination hos...

Page 65: ...Campus REX2 LAN port to a DHCP server which can be on the LAN or WAN side of the network You can enter IP addresses for a primary required and secondary optional DHCP server The Campus REX2 will attem...

Page 66: ...ress for the secondary DHCP server to which the Campus REX2 relays requests type then press At the prompt enter the IP address Required format is nnn nnn nnn nnn Enter Secondary DHCP Server 192 150 0...

Page 67: ...iguration saved Hit Any Key to Continue Do not remove power to the Campus unit or disconnect the Line and LAN side network connections when upgrading software or saving configuration R ENTER Jul 07 20...

Page 68: ...he following to access the Router Configuration screen 1 From the Main Menu page 1 14 type then press to access the REX2 Configuration and Status screen Ensure Router is selected 2 From the REX2 Confi...

Page 69: ...mask of 0 0 0 0 and then entering the IP address for the default gateway see page 3 48 The Static Route Table can be accessed from both the Router Configuration and the Static Route Configuration scre...

Page 70: ...from the table to add static route table entries also see Configuring and Deleting Static IP Routes on page 51 and the following prompt is displayed Required format is nnn nnn nnn nnn Enter Destinati...

Page 71: ...ity to capture this information to a file using a terminal emulation software such as HyperTerminal or ProComm to refresh or update the table entries to clear all entries from the table 4 ENTER 9 ENTE...

Page 72: ...g Set the Authentication Trap Status to Enabled or Disabled Enter an IP Address for each Trap Receiver Enter a community string for each Trap Receiver Accessing the SNMP Configuration 1 From the Main...

Page 73: ...arameters enter the following information on the SNMP Configuration screen 1 To enter a Unit Name type then press At the prompt enter up to 32 characters use any ASCII character that identifies for SN...

Page 74: ...provides read only capability Public is commonly used Maximum length is 32 characters Enter SNMP Read Only Community String Public 5 To enter the Read Write Community String type then press At the pro...

Page 75: ...s issued by Campus REX2 type or then press At the prompt enter the IP address Required format is nnn nnn nnn nnn Enter Trap Receiver x IP Address 172 150 100 12 b To enter the community string for a d...

Page 76: ...Chapter 3 Configuring the REX2 64 Campus REX2 RS Interface Card User Manual...

Page 77: ...d You can reset configurable operating parameters to their default values in the chapter Also you can view information about the product HDSL alarm parameters are configured in the section for Configu...

Page 78: ...ID Local I F REX2 Remote Unit ID Inactive Remote I F Inactive Circuit ID SYSTEM SETTINGS MENU 1 SYSTEM PARAMETERS 2 HDSL PARAMETERS R eturn ENTER CHOICE 1 ENTER Jul 07 2003 ADC TELECOMMUNICATIONS CAMP...

Page 79: ...T MM DD YYYY 04 30 2003 The system displays this new date on System Parameters screen as Apr 30 2003 System and date take effect immediately after the values are entered and a save command is not requ...

Page 80: ...n page 12 The new Unit and Circuit IDs take effect immediately after the values are entered and a save command is not required 4 ENTER Jul 07 2003 ADC TELECOMMUNICATIONS CAMPUS RS Version 5 1 08 19 34...

Page 81: ...up to ten letters or numbers but the first character must be a letter Passwords are case sensitive From the System Parameters menu type then press At the prompt enter a password that contains up to 1...

Page 82: ...ote Unit ID Inactive Remote I F Inactive Circuit ID Southeast line 421 MAIN MENU 1 SYSTEM STATUS 2 REX2 CONFIGURATION AND STATUS 3 SYSTEM CONFIGURATION 4 MAINTENANCE 5 REMOTE LOGON L ogout ENTER CHOIC...

Page 83: ...ult configuration type then press At the prompt enter y to continue restoring all values to the factory default or n to stop the process Are You Sure Y N y Restoring REX2 factory defaults Please wait...

Page 84: ...tion screen displays the following information the version number of the Campus REX2 software this also is displayed in the heading of all the terminal screens the PROM checksum a hexidecimal number u...

Page 85: ...gement on page 7 97 for instructions on using the LCD panel For See Page Monitoring HDSL Performance 75 Monitoring Current System Status 75 Viewing 24 Hour Performance History 76 Viewing Seven Day Per...

Page 86: ...S RS Version 5 1 08 19 34 Local Unit ID Southall Quad 4 Local I F REX2 Remote Unit ID Central Remote I F REX2 Circuit ID Southeast line 421 MAIN MENU 1 SYSTEM STATUS 2 REX2 CONFIGURATION AND STATUS 3...

Page 87: ...oise ratio required for a Bit Error Rate BER of 10 7 Pulse Attenuation Attn indicates the decrease in amplitude of the transmitted signal as measured at the HDSL receiver in decibels 24 Hour ES indica...

Page 88: ...ir implementation Local indicates the Campus unit into which you are logged for management Remote indicates the Campus unit at the other end of the HDSL connection from the local unit ES UAS indicates...

Page 89: ...t when power is removed from the Campus unit N ENTER P ENTER U ENTER 3 ENTER Jul 07 2003 ADC TELECOMMUNICATIONS CAMPUS RS Version 5 1 08 19 34 Local Unit ID Southall Quad 4 Local I F REX2 Remote Unit...

Page 90: ...ur Campus system HDSL B represents the second pair or loop of a two pair implementation Local indicates the Campus unit into which you are logged for management Remote indicates the Campus unit at the...

Page 91: ...ir and HDSL loop B second pair when applicable Loss of Signal LOS for the HDSL port To view remote alarm history type then press To update the information type then press To clear the information type...

Page 92: ...it ID MAIN MENU 1 SYSTEM STATUS 2 REX2 CONFIGURATION AND STATUS 3 SYSTEM CONFIGURATION 4 MAINTENANCE 5 REMOTE LOGON L ogout ENTER CHOICE Jul 07 2003 ADC TELECOMMUNICATIONS CAMPUS RS Version 5 1 08 19...

Page 93: ...the table was full 5 ENTER Jul 07 2003 ADC TELECOMMUNICATIONS CAMPUS RS Version 5 1 08 19 34 Local Unit ID Local I F REX2 Remote Unit ID Inactive Remote I F Inactive Circuit ID Southeast line 421 BRI...

Page 94: ...d frames that have been discarded filtered Rx Errors The number of frames received in error from both the input and output buffers such as CRC errors alignment errors and dribbling bit errors Tx Error...

Page 95: ...ting table through manual configuration 5 ENTER Jul 07 2003 ADC TELECOMMUNICATIONS CAMPUS RS Version 5 1 08 19 34 Local Unit ID Southall Quad 4 Local I F REX2 Remote Unit ID Central Remote I F REX2 Ci...

Page 96: ...ed Tx Errors The number of frames transmitted in error from both the input and output buffers such as CRC errors alignment errors and dribbling hit errors Rx Errors The number of frames received in er...

Page 97: ...ELECOMMUNICATIONS CAMPUS RS Version 5 1 08 19 34 Local Unit ID Southall Quad 4 Local I F REX2 Remote Unit ID Central Remote I F REX2 Circuit ID Southeast line 421 MAIN MENU 1 SYSTEM STATUS 2 REX2 CONF...

Page 98: ...iagnostics screen type then press The Diagnostics screen is displayed 1 ENTER Jul 07 2003 ADC TELECOMMUNICATIONS CAMPUS RS Version 5 1 08 19 34 Local Unit ID Southall Quad 4 Local I F REX2 Remote Unit...

Page 99: ...pbacks between a Campus REX2 and another Campus unit that contains a synchronous interface card such as V 35 or DSX 1 The Remote to Remote loopback tests the remote data port The Local to Remote loopb...

Page 100: ...0 or 120 minutes or none which disables the timeout you want for this test The default is 20 minutes The loopback timeout determines the amount of time before a loopback clears automatically If you se...

Page 101: ...nges have been made but not saved and you want to revert to the previously saved configuration The REX2 is not functioning properly as indicated by excessive LAN errors or Not available displayed for...

Page 102: ...default values or n to stop the process WARNING Unsaved configuration change s will be lost Are You Sure Y N y REX2 reset in progress Please wait REX2 has been reset Hit Any Key to Continue Jul 07 20...

Page 103: ...FTWARE This chapter describes how to perform general management of the Campus unit software including both upgrading software and recovery of software in the event of a file system failure For See Pag...

Page 104: ...ion When you upgrade software the configured parameters for HDSL system and REX2 are not affect by the upgrade Prior to updating software ensure the following has been completed The Campus REX2 is con...

Page 105: ...u have correctly entered the LAN IP address 5 FTP then prompts for a user name and password to connect FTP to the Campus REX2 For example User 192 168 1 1 none admin Password admin or previously confi...

Page 106: ...g to the FTP prompt When the command completes FTP as well as Campus REX2 console and LCD display messages indicating that the upgrade is in progress As indicated by the FTP message the save and resta...

Page 107: ...the following information IP address and subnet mask Gateway IP address if required TFTP server IP address recovery image filename A TFTP server must be active and available and contain the recovery i...

Page 108: ...Chapter 6 Managing Software 96 Campus REX2 RS Interface Card User Manual...

Page 109: ...he HDSL Operating Mode set to Standard Mode with the Standard Mode HDSL Rate set to T1 as a bridge with the encapsulation format set to cHDLC and Spanning Tree protocol disabled with the Timing Source...

Page 110: ...the menus and select items Instructions for setting individual configuration options are included with each option The basic procedure is 1 Press Escape until CAMPUS RS I F REX2 is displayed 2 Press N...

Page 111: ...erwise follow the steps in this section to adjust the HDSL transmission rate You can use the default HDSL setting for your Campus RS unit when also using the default settings on the remote unit to whi...

Page 112: ...of two Campus RS products The rate is selectable as follows for 1 pair in 64 kbps increments starting at 128 kbps up to 2 304 Mbps for 2 pair in 128 kbps increments starting at 256 kbps up to 4 608 Mb...

Page 113: ...Mode option determines the hierarchy of the two Campus units when attempting to establish an HDSL link d Press Enter 3 To select the HDSL rate a Press Next until HDSL RATE is displayed b Press Enter c...

Page 114: ...ave until an HDSL link is established The Transceiver Mode option determines the hierarchy of the two Campus units when attempting to establish an HDSL link d Press Enter 3 To configure LOOP MODE do t...

Page 115: ...rotocol is selected either by its default configuration or through a change made to the interface through the LCD or through the console port telnet or SNMP For both bridge and router Network Protocol...

Page 116: ...then configure the specific parameters for either bridge mode or router mode Use the following procedures to set these parameters Set the Timing Source The Timing Source option determines the source...

Page 117: ...ng source depends on the setting of the Primary Timing Source option of the remote unit Set the Timing Source to HDSL if the remote unit is set to Internal or Data Port Set the Timing Source to Intern...

Page 118: ...ou want to enable Spanning Tree Protocol STP when bridge protocol is selected Spanning Tree Protocol is disabled as a default configuration See About Spanning Tree Protocol on page 124 for more inform...

Page 119: ...ect Port IP Settings then press Enter The LAN IP address is displayed If you have not changed the IP address through the terminal screens then the default IP address of 192 168 1 1 is displayed 3 Pres...

Page 120: ...the default configuration You can select DHCP Relay through the terminal screen The configured value is displayed 3 Press Escape to return to the Router Configuration menu Saving the REX2 Configurati...

Page 121: ...the system The following sections describe how to view specific alarm information for the HDSL local and remote ports and how to configure thresholds HDSL Alarms This section describes how to view and...

Page 122: ...where between 1 dB and 25 dB in 1 dB increments You can also disable this alarm To set the alarm thresholds 1 From the CURRENT ALARMS display press Next HDSL LINK ALARMS is displayed 2 Press Enter The...

Page 123: ...ress Escape until CAMPUS RS I F REX2 is displayed 2 Press Next HDSL LINK CONFIG STATUS is displayed 3 Press Enter then press Next until PERFORMANCE STATUS is displayed 4 Press Enter then press Next to...

Page 124: ...OC LOSS OF SIG ALM is displayed Remote Alarms Loss of Signal LOS alarms can occur on the remote unit This section describes how to view and configure this alarm Viewing Current Alarms If the CURRENT A...

Page 125: ...f the internal data path inside the local unit This loopback does not test the local data port drivers and receivers Remote to Remote loopbacks test the remote data port and a small portion of the rem...

Page 126: ...Press Next to scroll through the loopback options until NONE is displayed 3 Press Enter to clear the loopback LOOPBACK MODE is displayed Setting the Loopback Timeout The loopback timeout determines th...

Page 127: ...rcuit ID CIRCUIT ID You cannot change any of this information through the LCD Use an ASCII terminal to set the local and remote unit IDs and the circuit ID See Identifying the Unit and Circuit on page...

Page 128: ...ress Next to view the MAC ADDRESS HDSL Margin You can view the current HDSL loop margin values measured in dB for the local and remote HDSL loop The listed values represent the margin relative to a si...

Page 129: ...is displayed 2 Press Next until REX2 CONFIG STATUS is displayed 3 Press Enter CONFIGURE REX2 SETTINGS is displayed 4 Press Enter NETWORK PROTOCOL Bridge is displayed if not you must change the setting...

Page 130: ...Statistics 5 Press Next until Bridge STATISTICS is displayed 6 Press Enter FRAMES is displayed 7 Press Enter to display the first screen of statistics 8 Press Next to display the second screen of sta...

Page 131: ...bridge to forward Ethernet data based on MAC addresses or as a router to route Ethernet data based on IP addresses You can also configure parameters for management and encapsulation protocols For See...

Page 132: ...the customer side network connection You can install a Campus RS Management Unit CMU into the chassis for SNMP management of components in the chassis and for management of elements attached to the ch...

Page 133: ...onnect them through a public T1 E1 Wide Area Network WAN See Point to Point LAN Extension and LAN Connections Over a WAN on page 123 for more information Campus REX2 software provides complete main br...

Page 134: ...s REX2 provides a lower cost alternative to other LAN extension solutions The Campus REX2 provides a built in 10 100Base T LAN interface that eliminates the need for other internetworking devices whil...

Page 135: ...over public networks you can connect the public T1 network DSX 1 signal to the LAN through desktop units with CSU DSX 1 interface cards and the Campus REX2 in a desktop unit This application as shown...

Page 136: ...ystems RAM Flash etc an Ethernet controller and Ethernet drivers and other glue logic It provides complete main bridging tasks of learning forwarding filtering and hashing buffer management Additional...

Page 137: ...3 Bridge 2 Bridge 1 Bridge 4 Bridge 5 ENET 1 ENET 3 E N E T 2 Example Physical Network LAN LAN Bridge 3 Bridge 2 Bridge 1 Bridge 4 Bridge 5 ENET 1 ENET 3 E N E T 2 Loop free Topology Using SpanningTr...

Page 138: ...enable this function as a security feature to prevent eavesdropping and to provide broadcast filtering as well as to specify multiple destination gateways When static IP routing is enabled you can ac...

Page 139: ...The figure on page 128 shows a more complex example of multiple gateways that use static IP routing to route packets sourced from specific users to different destination gateways In this example packe...

Page 140: ...xternal routers can automatically update their routing tables This implementation prevents other parties from eavesdropping to discover routes to remote sites connected through the HDSL line The forma...

Page 141: ...ress Bridge Routing Mode Packet Encapsulation 192 168 200 5 IP Static Routing Table 192 168 200 1 255 255 255 0 Default Router IP ADDR LAN IP ADDR LAN SUBNET MASK LINE IP ADDR LINE SUBNET MASK Router...

Page 142: ...dresses are completely isolated and hidden from the rest of the network You can assign any subnet to the Line IP addresses When routing data travels one hop at a time The figure below shows destinatio...

Page 143: ...5 255 0 IP 192 168 240 10 Mask 255 255 255 0 IP 192 168 242 5 Mask 255 255 255 0 Default Gateway 192 168 242 1 DNS 192 168 240 20 IP 172 16 100 1 Mask 255 255 255 0 Default Gateway upstream router add...

Page 144: ...figuration information read status parameters A Management Information Base MIB defines these configuration and status parameters see MIB and Trap Support on page 133 The Internet Engineering Task For...

Page 145: ...pus unit FTP File Transfer Protocol is a TCP IP standard that is used for moving files between devices Use FTP when you are downloading upgrade software to the Campus unit from a server or other netwo...

Page 146: ...onfigured as trap receivers when events or alarms occur The following are traps that the Campus REX2 can issue coldStart warmStart linkDown linkUp authenticationFailure DHCP Dynamic Host Configuration...

Page 147: ...Point Protocol PPP The default setting is cHDLC and should be used in applications with another Campus REX2 Use PPP only if the remote unit is a synchronous interface card such as V 35 When PPP is se...

Page 148: ...8 as shown in the following illustration All earlier versions of Campus products are manufactured to operate at a single HDSL transmission rate while the Campus RS transmission rate is user selectable...

Page 149: ...EX2 Set the HDSL Operating Mode to Extended Mode Set the Extended Mode Loop Configuration to 1 Loop or 2 Loops depending on the physical layout of your HDSL network Set the Extended Mode HDSL Rate to...

Page 150: ...has the HDSL Transceiver XCVR Mode set to AUTO the HDSL link may not operate properly When operating the Campus RS product with an earlier version of the Campus products to avoid any problems with li...

Page 151: ...hes 14 1 cm Weight 4 0 ounces 113 4 gm Equipment Interface Ethernet Port 10 100Base T half or full duplex autosensing Connector RJ45C Encapsulation Format cHDLC or PPP Bridging IEEE 802 1d Transparent...

Page 152: ...s Environmental Operating Temperature 0 to 50 C Relative Humidity 0 to 85 Electromagnetic Emissions Per FCC Part 15 Class A CE Safety Compliance UL CSA CE Parameter Default Bridge Router Settings Brid...

Page 153: ...Data 4 4 5 5 6 2 RD Receive Data 7 7 8 8 ISO IEC IEEE Document Number Description ISO IEC 8802 3 1993 E ANSI IEEE Std 802 3 1993 Edition Information technology Local and metropolitan area networks Pa...

Page 154: ...vention for defining traps for use with SNMP RFC 1332 The PPP Internet Protocol Control Protocol IPCP RFC 1350 The TFTP Protocol Revision 2 RFC 1493 Definitions of Managed Objects for Bridges RFC 1497...

Page 155: ...nd DCE Data Circuit Terminating Equipment DHCP Dynamic Host Configuration Protocol DSR Data Set Ready DSX 1 DS1 Cross connect Frame DTE Data Terminal Equipment DTR Data Terminal Ready ES Errored Secon...

Page 156: ...Receive Data RIP Routing Information Protocol RLSD Receive Line Signal Detect RS Rate Selectable RTS Request to Send SCR Serial Clock Receive SCT Serial Clock Transmit SD Send Data SNMP Simple Network...

Page 157: ...n Systems Integration 800 366 3891 extension 73000 USA and Canada 952 917 3000 Complete Solutions from concept to installation Network Design and Integration Testing System Turn Up and Testing Network...

Page 158: ...ndex jsp Online Technical Publications www adc com library1 Product Return Department 800 366 3891 ext 73748 or 952 917 3748 Fax 952 917 3237 Email repair return adc com ADC Return Material Authorizat...

Page 159: ...nal 87 configuring alarms 26 connecting 11 logging on 12 port statistics 80 82 restoring default settings 70 SNMP configuration 60 assistance 145 authentication error trap generation 62 Auto Master Sl...

Page 160: ...E Encapsulation router 44 encapsulation protocols 135 Enter button 98 error trap generation 62 errored second See ES alarm ES alarm 109 threshold on an ASCII terminal 26 threshold on the LCD 110 Esca...

Page 161: ...Line Unit compatibility 2 Link alarm 109 LINK LED 7 local alarms history 79 LCD 111 local to remote loopback 87 113 local unit ID 115 log on local unit 13 remote REX2 unit 15 setting communications s...

Page 162: ...5 protocols 132 135 provisioning See ASCII terminal See LCD R received frames ASCII terminal 80 82 remote alarms ASCII terminal 79 LCD 112 remote interface card 115 remote to remote loopback 87 113 re...

Page 163: ...ce 145 technical specifications 139 terminal communications settings 11 connecting 8 See ASCII terminal testing Ethernet line 7 loopbacks LCD 113 115 time 67 timeout console interface 88 LCD 114 timin...

Page 164: ...Index 152 Campus REX2 RS Interface Card User Manual...

Page 165: ......

Page 166: ...dquarters ADC Telecommunications Inc PO Box 1101 Minneapolis MN 55440 1101 USA Technical Assistance Tel 800 366 3891 x73223 Tel 952 917 3223 Fax 952 917 3244 Email wsd support adc com e6 4 PART NUMBER...

Reviews: