61
•
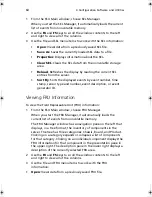
Keyboard
-Use the tab and arrow keys to highlight buttons and
press the spacebar or
Enter
to execute. You can also execute a
menu or button by using the
Alt
key in combination with the
underlined letter in the name of the menu or button.
You can have more than one task open at the same time, although
some tasks might require complete control to avoid possible conflicts.
The tasks achieve complete control by keeping the task as the center of
operation until you close the task window.
The SSU has a build-in help system, which you access by clicking a Help
button or choosing the Help menu.
Customizing the SSU Interface
The SSU lets you customize your interface using the Preferences section
of the main window. The AF sets these preferences and saves them in
the AF.INI file so that they take effect the next time you start the SSU.
There are four user customizable settings:
•
Color-lets you change the default colors associated with different
items on the screen using predefined color combinations. The
color changes take effect immediately.
•
Mode-lets you set the desired expertise level: novice, intermediate,
or expert. The expertise level determines which tasks are visible in
the Available Tasks section and which actions each task performs.
For a new mode setting to take effect, you must exit the SSU and
restart it.
•
Language-lets you change the text in the SSU to the appropriate
language. For a new language setting to take effect, you must exit
the SSU and restart it.
•
Other-lets you show or hide the status bar at the bottom of the
SSU main window. The change takes effect immediately.
Note
: If you run the SSU from read-only media (CD-ROM, for
example), these preferences are lost when you exit the SSU.
Exiting the SSU
Exiting the SSU closes all SSU windows.
BS811.f/cppl!!Qbhf!72!!Uvftebz-!Opwfncfs!37-!3113!!21;19!BN
Summary of Contents for Altos R700 Series
Page 1: ...Altos R700 Series User s guide ...
Page 10: ...x ...
Page 11: ...1 Description ...
Page 37: ...2 Installation Procedures ...
Page 43: ...33 8 Press one end of the clip down 2 9 Press the other end of the clip down 3 ...
Page 48: ...2 Installation Procedures 38 ...
Page 49: ...3 Upgrading ...
Page 54: ...3 Upgrading 44 ...
Page 55: ...4 Configuration Software and Utilities ...
Page 56: ...4 Configuration Software and Utilities 46 ...
Page 63: ...53 4 Press Enter 5 The boot process continues When finished a system prompt displays ...
Page 90: ...4 Configuration Software and Utilities 80 ...
Page 91: ...5 Solving Problems ...
Page 94: ...5 Solving Problems 84 hardware and operating system list on the Acer Customer Support website ...
Page 105: ...6 Technical Reference ...
Page 106: ...6 Technical Reference 96 ...
Page 124: ...6 Technical Reference 114 ...
Page 125: ...Appendix A Equipment Log and Power Consumption Worksheets ...
Page 127: ...117 Hard Disk Drive 5 Item Manufacturer Name and Model Name Serial Number Date Installed ...
Page 132: ...Appendix A Equipment Log and Power Consumption Worksheets 122 ...

