


System Configuration
3-29
3.2.3
Installing a Pentium Pro CPU
The basic system includes two Intel Pentium Pro CPUs installed in
CPU sockets 1 and 2 (CPU1 and CPU2). Two other second zero-
insertion force (ZIF) CPU sockets come with the system board for a
multiprocessor configuration. Your CPU package may include either
a sliding heat sink or a hook-type heat sink. The following sections
describe the installation procedures.
Installation with the Sliding Heat Sink
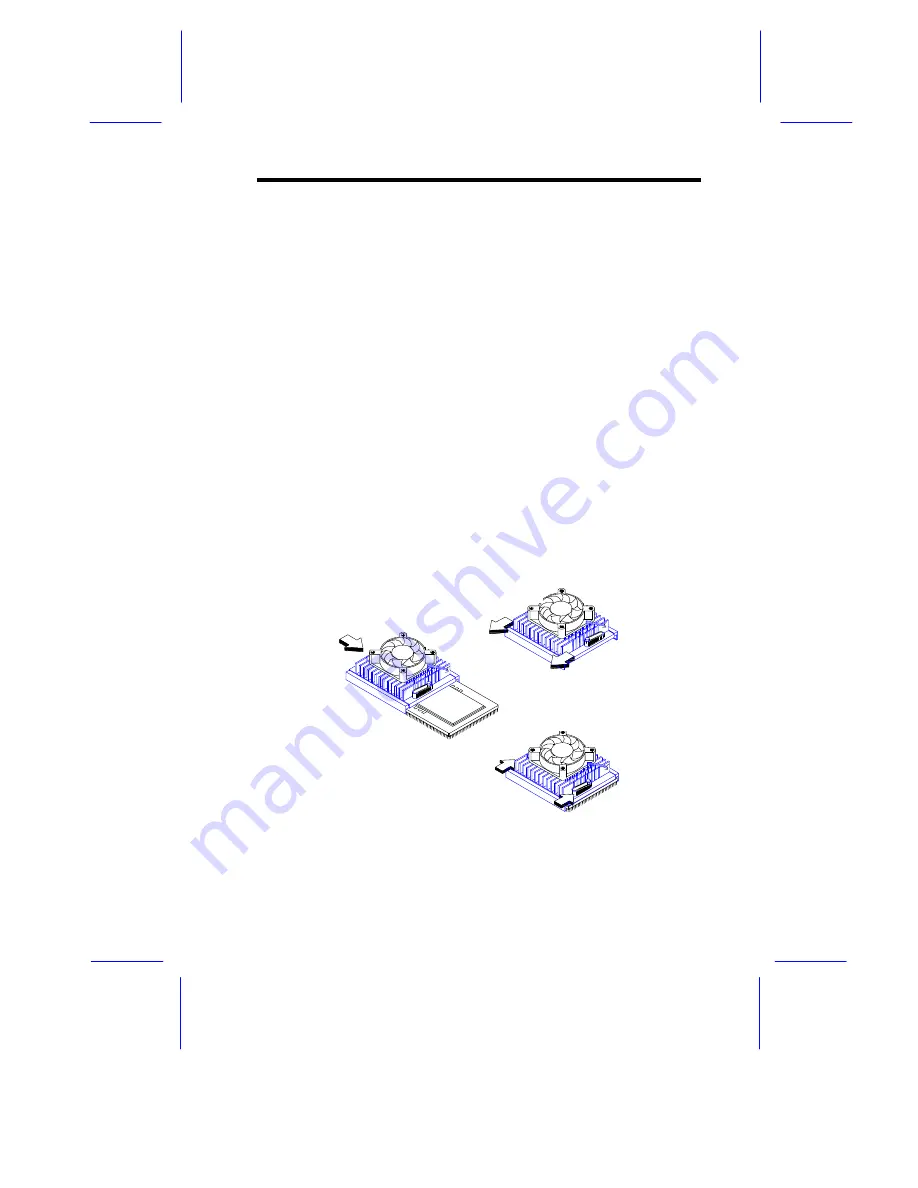
Follow these steps to install a CPU with a sliding heat sink:
1.
Release the heat sink locks.
2.
Attach the heat sink by sliding its rails along the longer sides of
the rectangular Pentium Pro CPU. Make sure that the heat sink
completely covers the CPU.
3.
Hold the CPU and the heat sink firmly together then slide the
locks on the sides of the heat sink to secure the CPU.
Figure 3-25
Attaching the Sliding Heat Sink to the CPU
STEP 1
STEP 2
STEP 3
Summary of Contents for Altos 19000PRO4
Page 1: ...AcerAltos 19000Pro4 AcerAltos 19000Pro4 System Guide ...
Page 32: ...1 14 AcerAltos 19000Pro4 System Guide ...
Page 39: ...2 6 AcerAltos 19000Pro4 System Guide 2 2 2 Mouse Figure 2 4 Connecting a Mouse ...
Page 40: ...Setting Up the System 2 7 2 2 3 VGA Monitor Figure 2 5 Connecting a VGA Monitor ...
Page 64: ...3 20 AcerAltos 19000Pro4 System Guide Figure 3 21 Removing the Thermal Air Guide ...


