4.
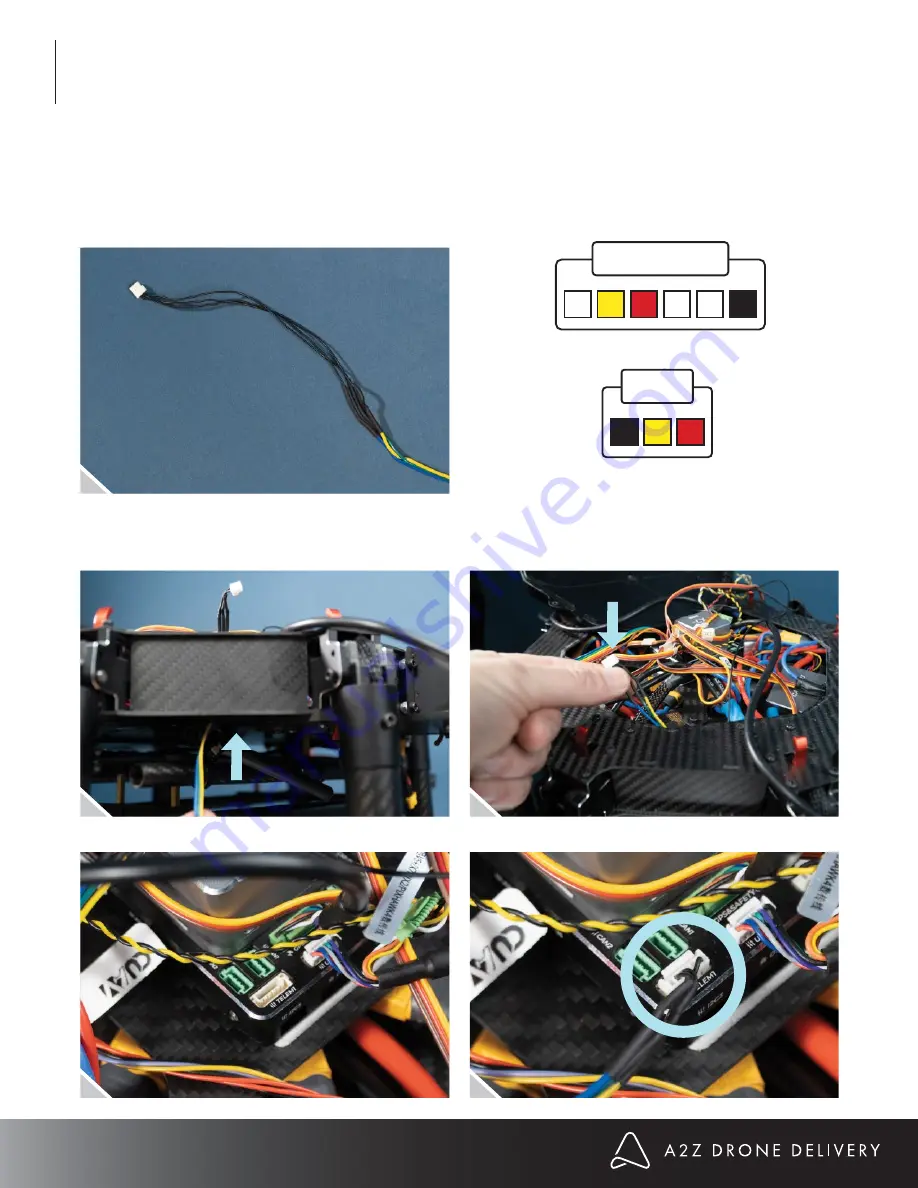
Take the 6P to 3P telemetry cable and push the 6 pin end with the flight controller connector up through the
main frame. If it is easier on your specific frame to go from the top down, make sure you insert the RDS2
connector- side (3 pin) of the cable into the frame so that it can be pulled out from the bottom.
11
2.
Remove any mounting kits and gimbals/sensors from the drone.
The RDS2 is designed to work with any standard 12mm floating rail system. Depending on your drone,
you may have to modify or customize a mount that better suites your frame.
3.
Take the 6p to 3p telemetry cable from the accessories box and remove it from the bag. This will be soldered to
the telemetry cable that is used with your specific flight controller. Please follow the diagram below when
soldering.
UNPACKING AND HARDWARE INSTALLATION
5.
Plug the 6 pin connector into the flight controller’s TELEM1 or TELEM2 port.
6 pin connector (to flight controller board)
3 pin connector (to RDS2)
Summary of Contents for RDS2
Page 1: ...RDS2 USER MANUAL ...


