background image

© 360 Vision Technology Ltd.

Page 58

Predator Radar Installation Manual V2.1.18.1

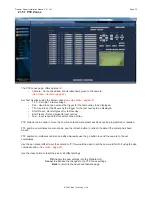
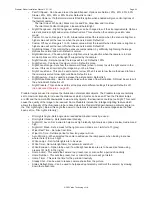
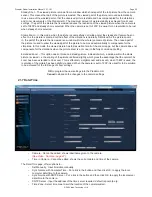
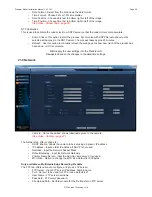
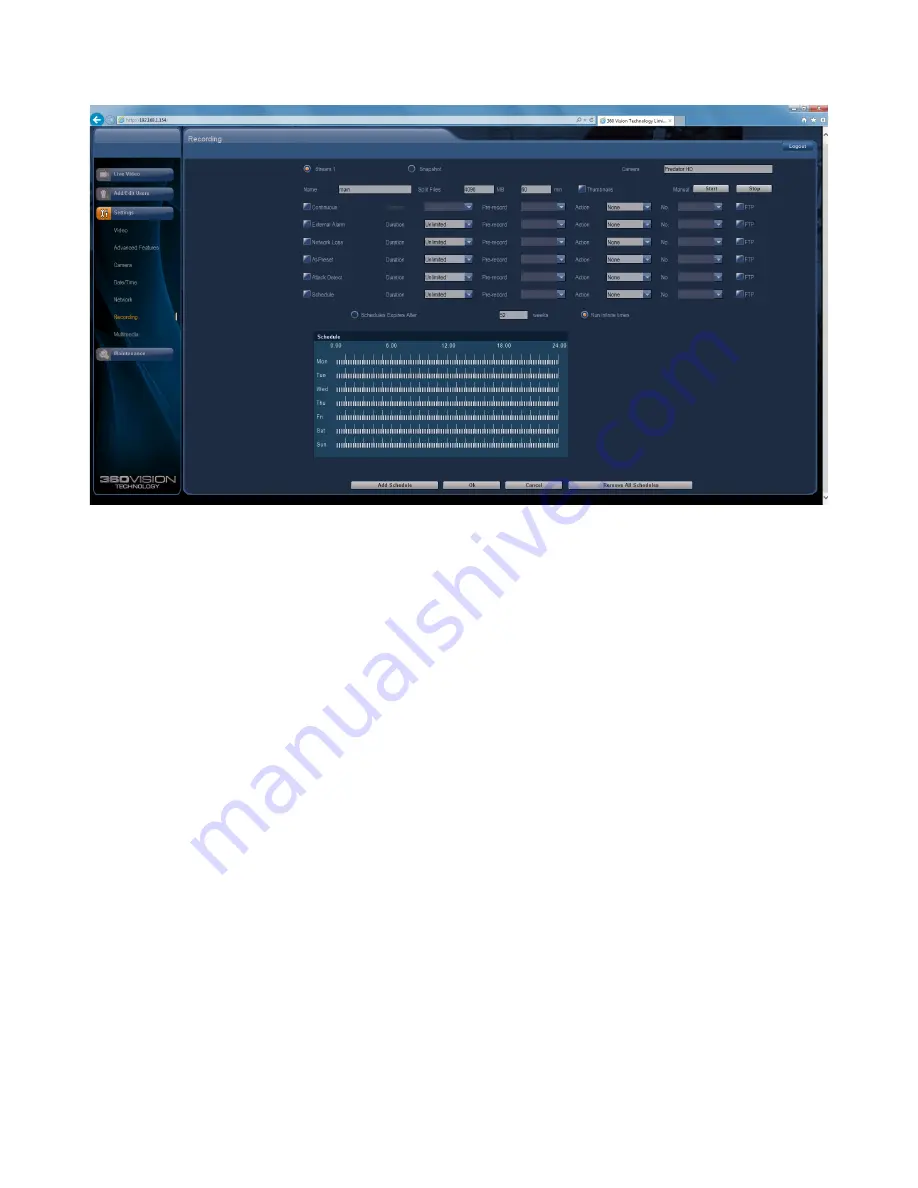
21.9 Recording

Only available on Multimedia Edge Recording Predator

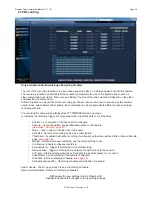
The role of the recording function is to store video streams as files on a storage device built into the camera. 

The recording function can auto-detect the necessary parameters from each configured stream, such as 

video compression, resolution, frame rate and bitrate. The size of the video created will depend on the video 

compression and bitrate used.

Different options can be used to start a recording per stream, these are manual, continuous, external alarm, 

network loss, attack detect and schedule. Each recording can be configured with different options including 

recording duration.

The recorded file name will be displayed as YYYYMMDDhhmmss-x-name.avi 

(x indicates the recording trigger d is manual demand, a is attack detect, s is schedule).

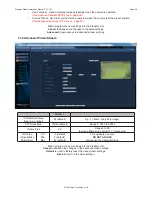
• 

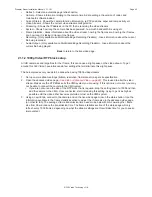
Stream 1, 2 or snapshot - Choose option to configure.

• 

Camera - Cannot be edited, shows label/name given to the camera.

(See Video - Camera - page 47).

• 

Name - Type in name of the file name to be used. 

• 

Split files - Set size of recording by file size or time period.

• 

Thumbnail - If enabled before the recording, thumbnails can then be used as a filter in the multimedia 

page 

(see page 59).

• 

Manual - Demand a manual recording, use the start and stop to set.

•  Continuous - Enable continuous recording.

• 

External Alarm - Trigger recording from an external string.

• 

Network Loss - Trigger recording from a network connection loss to the camera.

• 

At Preset - Start recording when the camera gets to a specific preset, tour or mimic.

• 

Attack Detect - Start recording if the camera is attacked

• 

Schedule - Setup a recording schedule 

(see page 59).

• 

Schedule expires after - Recording schedule will stop after this period.

Add schedule - Click to open screen to add a recording schedule.
Remove all schedules - Delete all recording schedules.

OK

 to apply the new settings into the Predator-HD.

Cancel

 to abandon the changes to the recording settings.

Summary of Contents for Predator-DV

Page 1: ... 360 Vision Technology Ltd Page 1 Predator Radar Installation Manual V2 1 18 1 Predator Radar Installation Configuration Manual ...

Page 2: ...ork Settings 16 10 2 Activating Additional Zones 17 10 2 1 To Activate or Deactivate a Zone 17 11 Using Multiple Detection Zones 19 11 1 Creating a Non Contiguous Detection Zone 19 11 2 Creating Detection Zones with Different Priorities 19 11 3 Creating Detection Zones with Different Rules 20 11 4 Creating Detection Zones with Different Sensitivity 21 11 5 Creating Detection Zones with Different C...

Page 3: ...Reset 37 18 Security Certificates 37 19 Appendix 1 40 20 Locating the Predator HD on your Network 42 21 Connecting to the Predator HD 42 21 1 Live Video 43 21 1 1 Status 44 21 1 2 1080p Video RTP block setup 45 21 2 Add Edit Users 46 21 3 Video 47 21 4 Advanced Video Stream 48 21 5 Advanced Features 49 21 5 1 PTZ Zones 52 21 6 Camera 53 21 7 Date Time 55 21 8 Network 56 21 9 Recording 58 21 10 Mul...

Page 4: ...the camera pick up device 5 Installation should be carried out by suitably qualified personnel in accordance with local codes of practice and regulations 6 360 Vision Technology Limited accept no liability for any damage caused by incorrect or improper installation 7 To prevent risk of injury caused by the Predator Radar or mounting options becoming detached fit a suitable safety chain or lanyard ...

Page 5: ...415 DATE AWS RELEASED APPROVED ENGINEER N A N A MATERIAL FINISH M20 CABLE GLAND NOT SUPPLIED M20 BLANKING PLUG SUPPLIED MUST NOT BE REPRODUCED OR SHOWN TO DO NOT SCALE ALL DIMENSIONS IN MM REMOVE ALL SHARP EDGES SHEET D C B A D C B A 4 3 2 1 4 3 2 1 A3 DESCRIPTION SCALE PERMISSION OF THE AUTHOR ANY THIRD PARTY WITHOUT THE DIRECT WRITTEN C COPYRIGHT PROTECTED AND THIS DRAWING AND ALL COPIES ARE PAR...

Page 6: ...n Technology Ltd Page 6 Predator Radar Installation Manual V2 1 18 1 MAINS FUSE PRED PSU SM MAINS FUSE 2AF OUTPUT FUSE PRED PSU SM FUSE 1 6 3AT PRED PSU SM MAINS input 100 240Vac CON5 CON6 NOT USED 3 Connections ...

Page 7: ...ite with Orange Band Tx Pin 2 Orange Tx Pin 3 White with Green Band Rx Pin 4 Blue Pin 5 White with Blue Band Pin 6 Green Rx Pin 7 White with Brown Band Pin 8 Brown Gain access to connectors in the HMA Ensure that the fixed part of the HMA is securely bolted to the top of the pole The hinged part of the HMA Hinged Mount Adapter is fastened to the fixed part using three M8x25 long hex head bolts Use...

Page 8: ...to CON5 DO NOT APPLY AC VOLTAGE TO THE PREDATOR RADAR Ethernet Connections Connect Ethernet cable to Predator Radar connection board using a RJ45 connector CON4 Please make sure there is adequate spare cable for when the camera is resting on the lanyard failure to do this could damage the connector circuit board ...

Page 9: ...lation Manual V2 1 18 1 Predator Radar Radar Installation Configuration Section Radar Information Document number RND S0133 1 2 Date 26 November 2015 Patent No GB 2 518 344 US Patent Application No US14 901 862 International Application No PCT GB2014 052018 ...

Page 10: ...configured to ensure the camera spends more time following targets considered higher threat However like a normal Predator HD the system fully supports a standard ONVIF connection so users can manually control the camera through any ONVIF compliant software such as a VMS A connected ONVIF application will always have priority over the radar when both systems are attempting to control the camera 6 ...

Page 11: ...inue the setup It is much easier creating and editing areas with a mouse compared to using a trackpad Note You can change the user password at any time We would strongly recommend that the default password is changed once the system is operational The password can be changed on the System Configuration page once you have logged in 9 Quick Setup Guide To get the system up and running quickly there ...

Page 12: ...lick camera move feature is disabled whilst you are editing To identify a feature Find a feature in the radar image that might be a tree or other obvious marker Right click on it a red marker will appear and the camera will move to this location Check the camera image and ensure you have selected the object you anticipated To view the camera output you can use a RTSP H264 compatible viewer such as...

Page 13: ...n Zone By default the Predator Radar ships with a single active zone To keep the setup simple this zone covers most of the radar s detection range This means the system is ready to start tracking as soon as it s powered up Any targets appearing in Zone 1 will be tracked and the camera will be tasked to follow them using the default timeshare behaviour 9 2 1 Changing the Default Detection Zone Sele...

Page 14: ... zoom in and pan the image around to help you draw your zone more accurately Use the mouse wheel to zoom in and out and use the cursor keys to pan Once complete select Apply followed by Commit Changes 9 3 Set the Camera Height The default camera height is set to 4m which is the optimal operating height for the radar However if the unit has been installed at a different height then this needs to be...

Page 15: ... radar use the following IP addresses Camera 192 168 1 187 24 Radar 192 168 1 188 24 Note To access both the camera and the radar from another computer the PC must be configured to have an IP address within the same range but not the same The subnet is 24 which is the same as 255 255 255 0 For example a good IP address for a PC being used to connect to the Predator Radar would be 192 168 1 100 10 ...

Page 16: ...ra address is 192 168 1 187 and the radar is 192 168 1 188 To change the IP address Login to the radar Navigate to the System Configuration page Set the IP Address subnet mask and gateway After setting IP details select Apply followed by Commit Changes Then reboot the radar to complete the new network settings change Confirm reboot when prompted The system will now reboot using the new IP address ...

Page 17: ... understand the full benefit of using multiple zones 10 2 1 To Activate or Deactivate a Zone Select the desired zone from the menu If already active the selected zone is outlined in pink If not active you will see a message to that affect Select Edit Details Clear the Active checkbox to deactivate select to activate Select Apply and then Commit Changes and Close If activating you can now adjust th...

Page 18: ... 360 Vision Technology Ltd Page 18 Predator Radar Installation Manual V2 1 18 1 When using multiple areas you can select the Detection tab to view all the currently active areas at the same time ...

Page 19: ... sides of the road but not the road itself so the setup may look like this 11 2 Creating Detection Zones with Different Priorities Although the camera can only follow one target at a time the radar can track up to 40 targets concurrently across a large area To better utilise the camera you can prioritise different parts of the site using the detection zones By allocating a higher priority to a zon...

Page 20: ...re the Predator Radar to look for different behaviours in different areas Using the example of the road running through our secure site we could setup the following Zone 1 Zone 1 is configured to the trigger the camera only if a target is moving slower than 5Kph This means the Predator Radar will ignore fast moving traffic as it passes through the site This allows the camera to only focus on targe...

Page 21: ... a fully automated camera Therefore it is recommended that High sensitivity is used only when required is only used in small zones where the extra detection capability is required and is tested thoroughly over a period of time to ascertain where the false alarm rate is acceptable The reverse is true of using low sensitivity This setting will it make it harder for the radar to detect targets This c...

Page 22: ...art of the person or vehicle Examples of poor camera tracking without any height adjustments To help overcome these issues each detection area supports the following camera adjustment options Height Offset Allows the user to set a height offset in metres of the detection area relative to the height of the camera For example if the detection you wish to cover is 2m above the camera you would enter ...

Page 23: ...ured to cope with 99 of sites where the Predator Radar will be used This is the recommended setting for all zones Low this setting is the least sensitive This setting can be used in areas where the tracking is very good but the radar has too much information so it s tracking everything including undesirable targets such as moving vegetation and small animals Again it must be used with caution beca...

Page 24: ... also works in conjunction with the direction rule By default this rule is set to Any which means that no speed checks are performed See Section 13 for more information 12 1 8 Direction Rule The direction rule enables you to configure a direction check to be performed on all targets in this zone If the direction check is enabled then the camera will only be tasked if the direction conditions are t...

Page 25: ... date and time fall within the configured schedule parameters The schedule will always control the overall status of the zone even if rules are configured Where more than one schedule is configured the zone will be active if any of the schedules are active Typical examples of schedules include the following The zone is only active between 18 00 07 00 for every day of the year night time The zone i...

Page 26: ...uired by Radar Is Target in this zone Is Target breaking Speed Rule Is Target breaking Direction Rule Is Break Count exceeded Are any Schedules active Tell Camera to Follow Target Do Nothing Yes No Yes Yes Yes Yes Yes No No No No No Step 1 Step 2 Step 3 Step 4 Step 5 No Speed Rule Direction Rule Break Allowance ...

Page 27: ... Smaller Than Enter the required value in the Start Speed and End Speed fields The speed values are entered in metres per second m s Click Apply followed by Commit Changes In the example above the camera will only be tasked if a target is detected moving at speeds below 4m s To remove this rule check simply return the speed check to Any Note If you select a comparator that only requires a single v...

Page 28: ...gle bearing even when moving very straight therefore we would always recommend using either Is Between or Is Outside 13 3 1 How to Identify the Direction Required It can be awkward to work out in which direction you want the rule to be active Remember that the direction rule covers the course of the target not the angle from the radar to the track The easiest method to identify which angles direct...

Page 29: ... also serve as a means to reduce false alarms The break allowance can act as a confidence level ensuring that the camera is only tasked when the rule has been broken by a consistent target which we have seen over several seconds 14 Configuring Schedules A schedule controls the active status of a zone If schedules are used on a zone then than that zone can only task the camera to follow a target du...

Page 30: ... how you want this schedule to repeat The options are a Once the schedule will be active once based on the start date and time specified b Daily the schedule will be active everyday between the specified times from the give start date c Weekly the schedule will apply on specific days of the week between the times and dates specified When this option is selected you are given a list of weekdays to ...

Page 31: ...odes the camera will follow the target for approximately 10 seconds before it switches to the next target It will then follow this new target for 10 seconds and then move to the next and so on This is usually referred to as Time Sharing What the modes control is the logic for selecting the next target 15 1 Oldest Control Mode In this mode the camera will follow the first target which meets the cri...

Page 32: ...s there are suitable targets to follow Note After 10 seconds if the current target is still the closest target then the camera will not switch targets it will always remain with the closest However the camera will not switch during a 10 second time slot even if the followed target is no longer the closest This is to stop the camera jumping around when you have multiple targets which may alternate ...

Page 33: ...r these trees you will stop any targets being generated and hence stop the unwanted alarms Another possible use is privacy By using an exclusion zone you will prevent tracking of targets which in turn will ensure the camera is never triggered to follow targets in this area This will be useful if you have certain areas where you do not want the camera to look or record An example of using exclusion...

Page 34: ...ease refer to Section 9 2 for more information There are 10 areas you can activate and adjust as required The process is as follows Select the required exclusion zone Select Enable The exclusion zone will now be activated and displayed on the radar image Select Edit Zone to change the shape of the area Drag the nodes around and add additional nodes as required to create the desired shape ...

Page 35: ...nt shadows to avoid obscuring the detail of the radar image but visible enough to aid you with locating the exclusion areas Once complete select Apply followed by Commit Changes The exclusion zone will now be active and no tracks will be created in this area Repeats steps 1 7 to create additional exclusions zones as required Existing Detection Zone ...

Page 36: ...ds 12 is the default value Note If you make this count too small then the camera will jump rapidly from target to target making it very difficult to monitor what is happening If you make it too large then the camera will stay on one target for a long time and you run the risk that other targets will never be viewed by the camera 17 1 4 Zoom Factor This is the global zoom factor It s a value from 0...

Page 37: ...n Screen Display OSD for the target being followed 17 1 7 Link Reset This button will force a communication link reset between the radar and the camera This must be used when the camera IP address is updated but it can also be used when troubleshooting if required 18 Security Certificates The Predator Radar configuration interface is accessed over a secure HTTP link using SSL In order for this to ...

Page 38: ...ings a Internet Explorer click Continue to this website b Chrome click Advanced then click Proceed to IP Address You will now see the status page At the bottom click on the link Download Root Certificate Save the certificate to disk Right click on the certificate and select Install Certificate You may need to select Open to continue if prompted but you should now be in the Certificate Import Wizar...

Page 39: ...s installed you will no longer get the warnings when opening the Predator Radar configuration interface The browser should also not show warning in address bar and should indicate the link is secure Internet Explorer Google Chrome Note Google Chrome will still show a red line through the HTTPS in the address bar This is nothing to worry about but indicates that the root certificate cannot be verif...

Page 40: ...ollowing targets Oldest Behaviour A method used by the camera to select the next target to follow Oldest means that the camera will choose the target which has not been viewed for the longest time Radar This refers to the millimetre wave radar within the Predator Radar system Rule A rule is a check performed on each target in a zone If the criteria of the rule i e speed or direction is met then th...

Page 41: ... 360 Vision Technology Ltd Page 41 Predator Radar Installation Manual V2 1 18 1 Predator Radar Predator Installation Configuration Section ...

Page 42: ... the IP address of the Predator HD Note the ports used by the Predator HD are Protocol Port ONVIF HTTP 80 TCP RTP Stream 1 6970 TCP UDP RTCP Stream 1 6971 TCP UDP RTP Stream 2 6972 TCP UDP RTCP Stream 2 6973 TCP UDP RTSP 554 TCP 360 SDK 3600 TCP 360 Event 9001 TCP 21 Connecting to the Predator HD Type in the IP address of the Predator HD into the address bar of Windows Internet Explorer and instal...

Page 43: ... the camera status See Status page 44 Zoom In Out This will operate the optical and digital zoom if digital zoom is enabled See Camera Digital Zoom page 53 Focus Auto This will operate the manual focus near far or automatically focus as required See Camera AF AI when PTZ page 53 Iris Auto This will operate the manual iris open close or automatic as required See Camera AF AI when PTZ page 53 Pan Ti...

Page 44: ...360 Vision Technology Ltd Page 44 Predator Radar Installation Manual V2 1 18 1 21 1 1 Status Status page shows information relating to the camera status Status page top section Status page bottom section ...

Page 45: ... To get around this 360 Vision have introduced a few settings that will eliminate this slight pause The below process only needs to be done when using 1080p video streams 1 Set up camera stream settings bitrate resolution framerate etc as per site specification 2 Open the advanced video page See Video Advanced Video page 48 This is used to alter the video stream Make sure the RTP Block suits the V...

Page 46: ... allows the admin user to create both operator and viewer level login details The admin user login password can also be changed here The web page admin password is also the Onvif admin password Care must be taken when changing the admin password Note There is no way of recovering the Predator HD admin password if forgotten ...

Page 47: ...o stream See Date Time page 55 Time Selecting this option will show the time as text on the video stream See Date Time page 55 Text Selecting this option will show the selected text on the video stream Positions available are top left or right of the image Detailed Info This will show the information about the stream on the video Custom A Used to enable the option to display text when the camera i...

Page 48: ...ed to gain access to advanced stream settings 21 4 Advanced Video Stream Stream 1 IP Ratio GOP value type in a number 25 default E g 1 i frame every 25th image RTP Block Size 15000 default Range 0 1440 to 65500 I Frame Size 99 Range 0 to 99 average frame size x value 10 i frame size QP Value Quantization Parameter Init Min Max 1 default 8 default 44 default For engineers use only DO NOT ADJUST Alw...

Page 49: ... the preset to activate the washer Re Map Choose which function preset you want to re map to the new preset number above Tour Set the preset to start or stop a preset tour Mimic Set the preset to start or stop a mimic tour User Used on systems supporting 360 SDK Function Function option will change to suit the above type Illumination Choice of illumination for preset with night presets function en...

Page 50: ...t Each of the four tours of presets can contain between 2 and 90 points When programming a tour of presets it is necessary to first store all the required presets into the Predator HD and to define the required dwell times and speeds of travel that you will require the Predator HD to use when the tour is started A maximum of four individual tours of presets can be stored in each Predator HD Each t...

Page 51: ... Can be used to change the Onvif version reported by the camera to the VMS options are Default Onvif 2 40 V2 02 V2 20 V2 40 Ok setting and then re boot camera from web page to apply Presets Default Used on certain VMS servers Uses mix of text and P zero pad number as preset tokens Number only Used on certain VMS servers Uses numbers as preset tokens P zero pad number Used on certain VMS servers Us...

Page 52: ...or text overlay Text Input required text for sector zone overlay PTZ buttons can be used to move the camera so that simple preset positions can be programmed or recalled PTZ position coordinates are also shown use the refresh button to refresh the data if the camera has been moved PTZ position co ordinates can also be added manually use the go button to send the camera to the set coordinates Use t...

Page 53: ...e original position if the camera is physically forced moved Default is on Proportional Zoom Automatically reduces increases pan tilt speed depending on zoom ratio Default is on Freeze Preset This option freezes the image when moving between presets This can help reduce the bandwidth Default is off Day Aperture Can be used to increase the picture detail Default is 10 Sensor Frame Rate Can be used ...

Page 54: ...oise with scenes of low illumination NR must be set to suit the environment Default is off Night Presets This can be used to set the presets to different settings if required Default is off See Advanced Features page 49 Predator lamps are used to improve the illumination of distant dark objects The Predator lamps are normally set to maximum intensity to increase the distance at which objects can b...

Page 55: ...d picture has full resolution for all of the zoom range but the camera does not compensate for the vibrations when the picture zoom is at or near to the fully zoomed out setting Extended Zoom This option doesn t produce a steady picture instead of which a window within the whole picture is viewed i e the scaling of the picture is altered slightly which gives the advantage that the normal 30x zoom ...

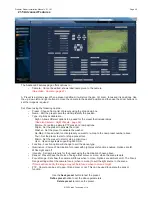
Page 56: ...r if it is complete OK to apply the new settings into the Predator HD Cancel to abandon the changes to the date time settings 21 8 Network Camera Cannot be edited shows label name given to the camera See Video Camera page 47 The Network tab offers options to DHCP Enable Allows the camera to be set using a dynamic IP address IP Address Input a static IP address if DHCP is not used Netmask Input the...

Page 57: ... network bandwidth used E g five users would require five video streams that typically will require five times the bandwidth Multicast If the receivers of the video streams are suitable for using multicast and the video streams will all have the same format then it may be possible to use multicast In this mode the CODEC in the Predator HD chooses a new UDP address Typically an address which is out...

Page 58: ...edule Stream 1 2 or snapshot Choose option to configure Camera Cannot be edited shows label name given to the camera See Video Camera page 47 Name Type in name of the file name to be used Split files Set size of recording by file size or time period Thumbnail If enabled before the recording thumbnails can then be used as a filter in the multimedia page see page 59 Manual Demand a manual recording ...

Page 59: ...rder Choose what order the files are displayed in choices are newest or oldest first Filter Choose what recording trigger is to be used for the filter Refresh Used to apply any filter changes FTP Click to send all files in the table to the FTP server see page 56 Audio Stop Stop remote playing of the current audio file Audio Volume Used to adjust the volume of the current audio file being played re...

Page 60: ...an use this option to format the storage device Please stay on the web page while it is doing this Once formatted the unmount button will show as mount Use this to mount the device so that it can be used by the camera Unmount Select this option to unmount the storage once confirmed The web page will report back that the process is successful Event logs System Log Currently not available Access Log...

Page 61: ...rmed DO NOT interfere with this process as it may stop the camera from working Contact 360 Vision Technical Support for the link to the codec update files Only available on Multimedia Edge Recording Predator Audio File Browse to the audio file and then click upload The file will then be available for playback through the camera audio system Only WAV files are supported Update Screen Parameter Scre...

Page 62: ...ed Seek 66 Off Seek 65 On White Lights mono colour not changed no timer Seek 66 Off Night Sensor when it is dark Seek 67 Mono Seek 68 Colour Night Focus Range when it is dark Seek 69 Ambient Seek 70 IR Wiper Seek 81 Double Wipe Seek 86 Stop Seek 82 Permanent Intermittent Wipe Seek 83 Permanent Fast Wipe Seek 84 Timed Intermittent Wipe Seek 85 Timed Fast Wipe De Fog Seek 87 On Seek 88 Off Washer Se...

Page 63: ...ansit packaging which is used for despatch from the factory they should not be stacked to a height of more than two Predators When Predators are being stored before installation they should be kept in the transit packaging and located in a dry indoor environment preferably between 1 C and 35 C which is dry and dust free Humidity should such that water vapour is non condensing Predators can be allo...

Page 64: ...080p 1920 x 1080 Resolution VGA 640 x 480 D1 720 x 576 720p 1280 x 720 QVGA 432 x 240 1080p 1920 x 1080 D1 720 x 576 MPEG4 rtsp ipaddress mpeg4main MJPEG rtsp ipaddress mjpeg 720p 1280 x 720 D1 720 x 576 720p 1280 x 720 1080p 1920 x 1080 Resolution VGA 640 x 480 D1 720 x 576 720p 1280 x 720 QVGA 432 x 240 1080p 1920 x 1080 D1 720 x 576 Dual MPEG4 rtsp ipaddress mpeg4main rtsp ipaddress mpeg4sub 72...

Page 65: ...1280 x 720 VGA 640 x 480 D1 720 x 576 720p 1280 x 720 720p 1280 x 720 D1 720 x 576 MPEG4 rtsp ipaddress mpeg4main MJPEG rtsp ipaddress mjpeg 720p 1280 x 720 D1 720 x 576 720p 1280 x 720 720p 1280 x 720 Resolution VGA 640 x 480 D1 720 x 576 720p 1280 x 720 D1 720 x 576 Dual MPEG4 rtsp ipaddress mpeg4main rtsp ipaddress mpeg4sub 720p 1280 x 720 D1 720 x 576 D1 720 x 576 720p 1280 x 720 Resolution QV...

Page 66: ...edator Radar Installation Manual V2 1 18 1 30 White Balance and Fast Shutter options White Balance Options Auto Outdoor Indoor Auto Tracing Indoor A B C Sodium Sodium Auto A B Fast Shutter Options 1 1000 1 1250 1 1750 1 2500 1 6000 1 10000 ...

Reviews: