Getting Started
6
Getting Started
7
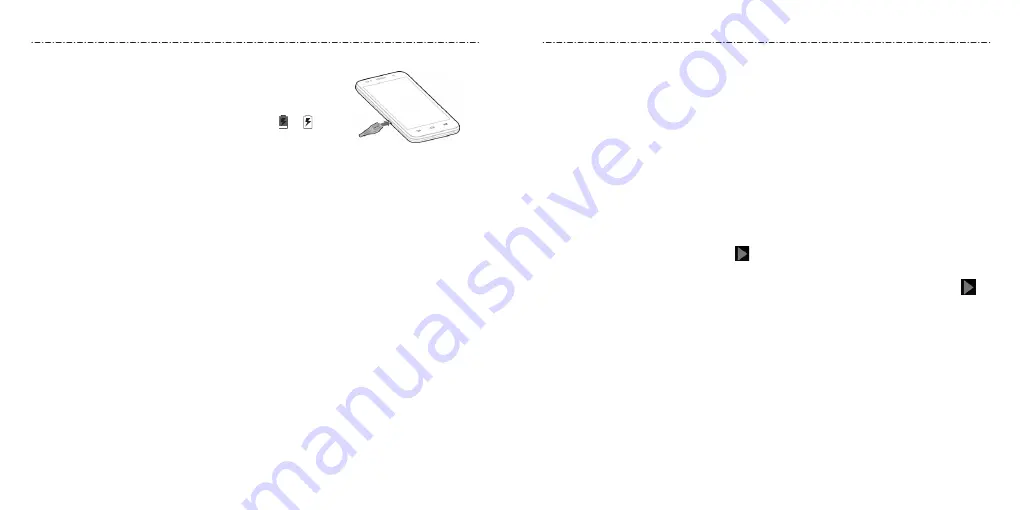
1. Connect the adapter to the charging port. Ensure that the
adapter is inserted with the correct orientation. Do not
force the connector into the charging port.
2. Connect the charger to a standard AC wall outlet. If the
phone is on, you’ll see a charging icon, such as or ,
appear in the Status Bar.
3. Disconnect the charger when the battery is fully charged.
NOTE: If the battery is extremely low, you may be unable to power on the phone even
when it is being charged. In this case, try again after charging the phone for at least
10 minutes. Contact customer service if you still cannot power on the phone after
prolonged charging.
Extending the Battery Life
Active applications, screen brightness levels,
Bluetooth
and Wi-Fi usage, and GPS
functionality can drain your battery. You can follow the helpful tips below to conserve
your battery power:
• Reduce the screen backlight time.
• Lower the screen brightness.
• Turn auto-sync, Wi-Fi, and
Bluetooth
off when not in use.
• Disable the GPS function when not in use. Most applications using this function
will periodically query the GPS satellites for your current location; each query drains
your battery.
Powering Your Phone On/Off
• Press and hold the Power/Lock Key to turn on your phone.
• To turn it off, press and hold the Power/Lock Key to open the options menu. Tap
Power off and then tap OK.
Setting Up Your Phone for the First Time
When you first power on your phone after you purchase it or reset it to factory settings
(see
Settings – Personal – Backup and Reset
), you may need to set it up before using it.
1. Tap the language field, select the language you want, and tap Start.
2. Select data use connections and tap Next.
3. Connect to a Wi-Fi network and tap Next. Otherwise, tap Skip.
4. Set the date, time, and time zone, or use date and time data provided by the network.
Then tap Next.
5. If you have a Google™ account, tap Existing to sign in. Tap New to create a Google
account or tap Not now to set up an account later. The following steps may vary
depending on which option you choose.
6. Tap OK to agree to the terms of service.
7. Configure backup options and tap
.
8. Configure the Google location options and tap Next.
9. Enter your name, which the phone uses to personalize some apps, and then tap
.
10. You will be prompted to accept the Google terms of service. Tap Next to continue.
11. Tap Finish to complete the setup.
Locking/Unlocking the Screen and Keys
Your phone allows you to quickly lock the screen and keys (put the phone into Sleep
mode) when not in use, and also to turn the screen back on and unlock it when you
need it.
To lock the screen and keys:
To quickly turn the screen off and lock the keys, press the Power/Lock Key.
NOTE: To save battery power, the phone automatically turns off the screen after a certain
period of time when you leave it idle. You will still be able to receive messages and calls
while the phone screen is off.
Содержание Scend Z791G
Страница 1: ...Z8090175300MT USER MANUAL LEAPS AND BOUNDS BEYOND EXTRAORDINARY ZTEUSA COM Z791G ...
Страница 59: ...Notes 114 ...


