DVR
VGA Monitor (sold separately)
VGA cable (usually included with monitor)
Step 1:
Power off DVR and monitor.
Step 2:
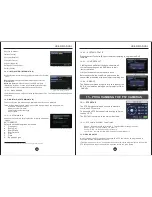
Locate VGA port on rear panel of DVR. See Figure 3-7.
Step 3:
Connect VGA cable from monitor to VGA port on rear panel of DVR.
Step 4:
Power on monitor.
Step 6:
Power on DVR. Wait until system is fully initialized.
No other configuration is necessary.
Important !
· The VGA output of the DVR does not function with DVI or HDMI monitors unless
an adapter is used (sold separately by retail electronics stores).
· We do not advise changing the DVR's VGA monitor resolution. This could
render the DVR display unviewable. If that situation occurs, please see Section
14.3.1
3.7 – CONNECTING THE DVR TO A LOCAL AREA NETWORK (LAN)
These instructions will connect the DVR to local area network; however, further
steps may need to be taken to view the DVR on a local computer.
What you will need:
· DVR
· Ethernet cable (not included)
· Network Router (not included)
Steps:
1. Power off DVR.
2. Connect one end of Ethernet cable to LAN port
on rear panel of DVR.
3. Connect other end of Ethernet cable to an open
LAN port on the network router.
4. Power on DVR.
Troubleshooting Tips
Issue
· LAN port lights are not lit either on DVR or network router.
Suggestions
· Try different Ethernet cable.
· Reboot DVR.
· Reboot router.
For more information regarding configuring your DVR for local access, see
Section 8. You may also visit http://zmodo.net or contact Technical Support.
Suggestions
1.
Follow steps one through three above.
2.
Try a different mouse.
3.
Test the malfunctioning mouse by connecting it to a computer.
The mouse USB port is on the rear panel of the DVR. It is the top port, labeled
with a mouse icon.
1. Power off or unplug the DVR.
2. Connect mouse.
3. Power on or plug in the DVR.
No other configuration is necessary.
Troubleshooting Tips
Issues
· There is no mouse pointer
· There is a pointer, but it does not move.
· The mouse stops working.
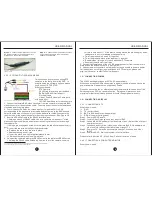
Figure 3-10: Connecting the DVR to the router
4 - STARTING UP YOUR DVR
4.1 – SYSTEM INITIALIZATION
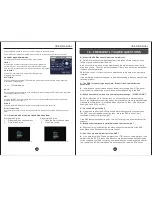
Connecting the power supply to the
DVR will begin the startup process.
After a few moments, a message
s i m i l a r t o t h e f o l l o w i n g w i l l b e
displayed:
4.2 – MAIN VIDEO FEED DISPLAY
After the DVR has completed the startup process, the main video feed will be
displayed. If no cameras, connected, the channels will show Video Loss status
messages. If cameras are connected and working properly, live video will appear
on the respective channels.
3.5 – Connecting a USB Backup Device
Two types of USB devices that can be connected to the DVR for backing up
recording files are either a portable flash drive (thumb drive) or an external hard
drive.
The DVR runs on a Linux platform, so the drive must be formatted for the DVR to
recognize it and a Windows PC to read the files. While Linux can theoretically
read NTFS, FAT32 is a preferable option.
If the flash drive or external HDD is formatted properly, simply plug the device into
the USB port on the DVR.
The front panel USB port for backup is identified with the universal USB symbol
( )
While you can either format the drive as FAT32 first from a Windows PC, you may
also format the drive using the USB format command in the HDD Management
console.
Important Note: Formatting the drive will erase all contents currently stored on it.
3.6 – Connecting a USB Mouse
Rear panel of 9104UV
Figure 4-12: System
initializing message
should appear a few
moments after
powering on the DVR.
9
10
USER MANUAL
USER MANUAL
Содержание H9104V
Страница 1: ...H9104V...


