61
Once you are happy that the SW1000XG is being correctly identified by OMS, you should save it as your current
studio setup using the ‘Save and make current’ option in OMS.
Now it is time to run the Yamaha XGEditor for Mac.
It is at this point, you will find out whether or not your SW1000XG is working, and being recognised by the PCI slot in
your Mac. If it isn’t then the XGEditor software will not run. It will say that the SW1000XG is not installed or detected,
and close down. If this happens then we recommend that you move the SW1000XG to another free PCI slot, and try
running the editor again (turn off your Mac first!).
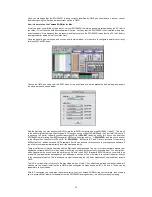
Once the editor is up and running and you can see its main window, it is then time to configure the editor to correctly
talk to the SW’s MIDI ports.
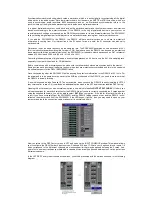
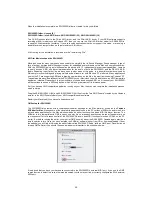
Choose the OMS port setup from the ‘MIDI’ menu of the editor, and you will be presented with a dialog box roughly
the same as the one shown below
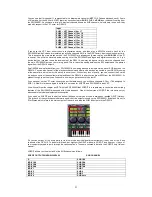
Now the first thing you may ask yourself is ‘Why are there 5 MIDI out ports, when the SW1000XG has 3?” This is due
to the editor originally being written for generic XG devices such as the MU10/MU90 and the 5 port MU128 (hence it
supports up to 5 ports). Logically you should assign MIDI In to
SW-EXT
(and click on key thru so you can hear your
SW1000XG whilst playing your MIDI keyboard). MIDI out A, should be set to ‘
1- SW1000XG
‘ and the check box set
to the ON position, likewise for MIDI out B ‘
2 – SW1000XG
‘ MIDI ports B, C and D are in fact used for monitoring
MIDI output only, and do not send XG Parameters. Port E can be used for connection to your sequence software if
you wish to record parameters directly into it (as most people will).
There are effectively 2 ways of working with the Macintosh editor package. The first is to circumnavigate around your
application software whilst it is in loop mode, monitoring your edits, but not actually recording them. You would then,
when happy with the sound, save the editor setup file as a type 0 SMF (Standard MIDI file) which you would then
import into your application package such as Cubase as a set-up bar. The other way is to connect the editor directly
to the sequencer of choice. This is achieved via what is known as the IAC (Inter Application Communication) buss in
OMS.
The IAC is not dissimilar in function to the way Hubis works on the PC. You effectively install a new driver (which will
be done via the ‘custom install’ option in OMS) which configures 4 busses known as IAC 1,2,3 and 4. These can be
renamed to suit your needs.
With IAC configured you could pipe the output directly from the Yamaha XGEditor into your software, thus allowing
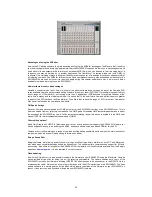
you to record edits of sliders (for example from the SW1000XG analogue mixer), etc whilst your track is playing.

